
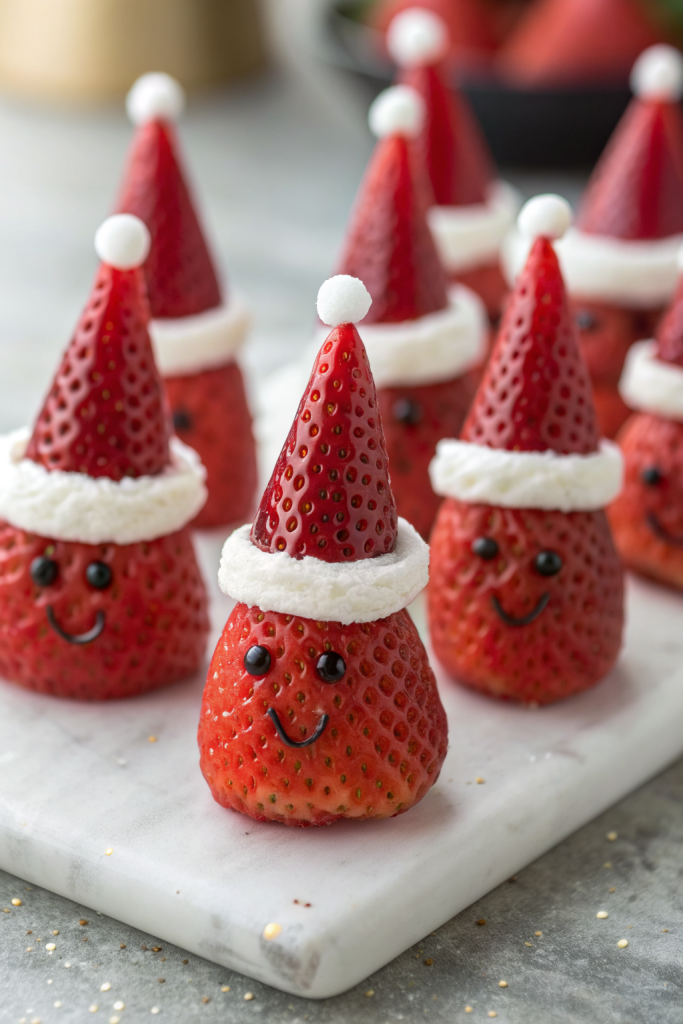
Mini Strawberry Santas Recipe tastes like a bite of fresh strawberry shortcake with creamy vanilla filling and just enough sweetness to feel festive, not heavy. It works perfectly for busy parents, beginner bakers, or anyone who wants a cute Christmas dessert in about 20 to 25 minutes. I first made these for a kids’ party, and they disappeared faster than the actual presents.
Why Choose This Mini Strawberry Santas Recipe
These Mini Strawberry Santas look impressive on a holiday dessert table, yet they stay incredibly simple and quick. You need only a handful of ingredients, no baking, and zero fancy piping skills.
Kids love the cute Santa faces, adults appreciate the light, fresh flavor, and everyone snaps photos before they eat them. You can prep them ahead, tweak the filling to your taste, and keep the whole recipe budget friendly.
“These Mini Strawberry Santas vanished from the dessert tray in minutes and had everyone asking for the recipe! ★★★★★”
Ingredients You’ll Need
Fresh ingredients
- 1 pound fresh strawberries, large and firm, with pointed tips
- 4 ounces cream cheese, softened (use full fat for best texture)
- 1/2 cup heavy whipping cream, very cold
- 1/4 cup powdered sugar, sifted
- 1 teaspoon vanilla extract (use pure vanilla for best flavor)
Pantry staples & decorations
- 1 to 2 tablespoons powdered sugar, for dusting on top
- Mini chocolate chips or chocolate sprinkles, for eyes
- Optional: black sesame seeds or tiny candy pearls, for eyes if you prefer no chocolate
- Optional: red or green sanding sugar, for a little sparkle on the plate
You can swap the cream cheese with mascarpone for a milder, richer filling. You can also use a store bought whipped topping instead of whipping cream if you need a shortcut, though the flavor tastes a bit sweeter and lighter. If you use whipped topping, reduce the powdered sugar so the filling does not taste overly sweet.
Equipment
- Sharp paring knife
- Cutting board
- Medium mixing bowl
- Hand mixer or stand mixer with whisk attachment
- Piping bag with round or star tip
- No piping bag at home: use a zip top bag and snip a small corner.
- Small tray or plate lined with parchment paper
Tips & Tricks
- Choose strawberries that stand up easily so your Santas stay upright.
- Pat strawberries very dry after washing so the filling sticks and does not slide.
- Let cream cheese soften at room temperature so it whips smooth without lumps.
- Chill the mixing bowl and beaters for 10 minutes so the cream whips faster.
- Do not over whip the cream or the filling turns grainy; stop when it holds medium to stiff peaks.
- Cut only a thin slice off the bottom of each berry so you keep as much space for filling as possible.
- Use a small amount of filling as “glue” under each strawberry base to keep it from tipping.
- Pipe a tiny dot of filling where you want the eyes so mini chocolate chips stick easily.
- Keep the finished Santas in the fridge until serving so the filling stays firm and safe.
- Make them just before serving time if your strawberries look very juicy, since extra juice can soften the filling.
How to Make Mini Strawberry Santas Recipe
Step 1: Prep and dry the strawberries
Rinse the strawberries gently under cool water and dry them very well with paper towels. Remove any leaves that look wilted or brown. Keep the green tops on for now so you can hold them while you slice.
Place the strawberries on a dry towel and let them air dry a few extra minutes. Moisture on the outside makes the filling slide, so take your time with this step.
Step 2: Slice the bases and hats
Use a sharp paring knife and cut a very thin slice off the bottom of each strawberry so it stands upright. Set the flat side down on the cutting board and check that it does not wobble. Trim a bit more if needed.
Next, slice off the pointed tip of each berry to form the “hat.” Keep each hat next to its base so you match the same pieces later.
Step 3: Make the creamy filling
Add softened cream cheese to a mixing bowl and beat it with a hand mixer until smooth and fluffy. Add powdered sugar and vanilla and beat again until the mixture looks creamy and thick. Pour in the cold heavy cream.
Beat on medium high speed until the mixture thickens and holds medium to stiff peaks. Scrape the bowl once or twice so everything mixes evenly.
Step 4: Fill the piping bag
Spoon the filling into a piping bag fitted with a small round or star tip. If you use a zip top bag, push the filling into one corner and twist the top closed. Snip a small opening at the tip.
Place the bag in the fridge for 5 to 10 minutes if the filling feels too soft. Chilled filling pipes more neatly and holds its shape better.
Step 5: Build the strawberry bodies
Set the strawberry bases on a parchment lined tray. Pipe a small dot of filling under each base and press it gently onto the tray so it sticks. This little trick keeps your Santas from sliding around.
Pipe a generous swirl of filling on top of each base to form the “face” and “belly.” Do not skimp on filling, since it gives most of the flavor and structure.
Step 6: Add the hats and pom poms
Place the strawberry hat on top of the filling, slightly off center if you want a playful tilt. Press gently so it stays in place but do not smash the filling. Pipe a tiny dot of filling on the very tip of each hat to make the pom pom.
If any filling squishes out the sides, call it “extra beard fluff” and keep going. Slightly messy Santas still look adorable.
Step 7: Add faces and buttons
Use mini chocolate chips or black sesame seeds for eyes. Press them gently into the filling on the front of each Santa. If they slide, pipe a tiny dot of filling where you want each eye, then stick the chocolate chip on.
Add two small dots of filling down the front as “buttons” if you like extra detail. You can also sprinkle a little sanding sugar around the base for a snowy plate effect.
Step 8: Chill and serve
Place the finished Mini Strawberry Santas in the fridge for at least 20 minutes so the filling firms up. Keep them chilled until you serve them. Right before serving, dust lightly with powdered sugar so they look like they just walked in from the North Pole.
Serve them on a white platter or cake stand so the red color pops. Expect them to disappear quickly, so maybe hide two in the back for yourself.
What to Serve with it?
These Mini Strawberry Santas pair nicely with hot chocolate, warm apple cider, or a big pot of peppermint tea. They also sit well next to sugar cookies, gingerbread men, or a simple vanilla cupcake if you want a full dessert spread. Add a bowl of fresh grapes, orange slices, or a fruit salad to keep the table colorful and light.
You can serve them as a fun dessert after a cozy dinner of roast chicken, mashed potatoes, and green beans. They also fit perfectly on a brunch table with pancakes, waffles, or French toast. Kids love them as a special after school treat during December.
Storage Options
- Store leftover Mini Strawberry Santas in a single layer in an airtight container in the fridge for up to 24 hours.
- Line the container with paper towels to catch extra moisture and keep the berries from getting soggy.
- Avoid freezing them, since strawberries and cream cheese filling change texture and turn watery after thawing.
- If you need to prep ahead, slice the strawberries and mix the filling, then store the filling in a piping bag in the fridge for up to 2 days and assemble just before serving.
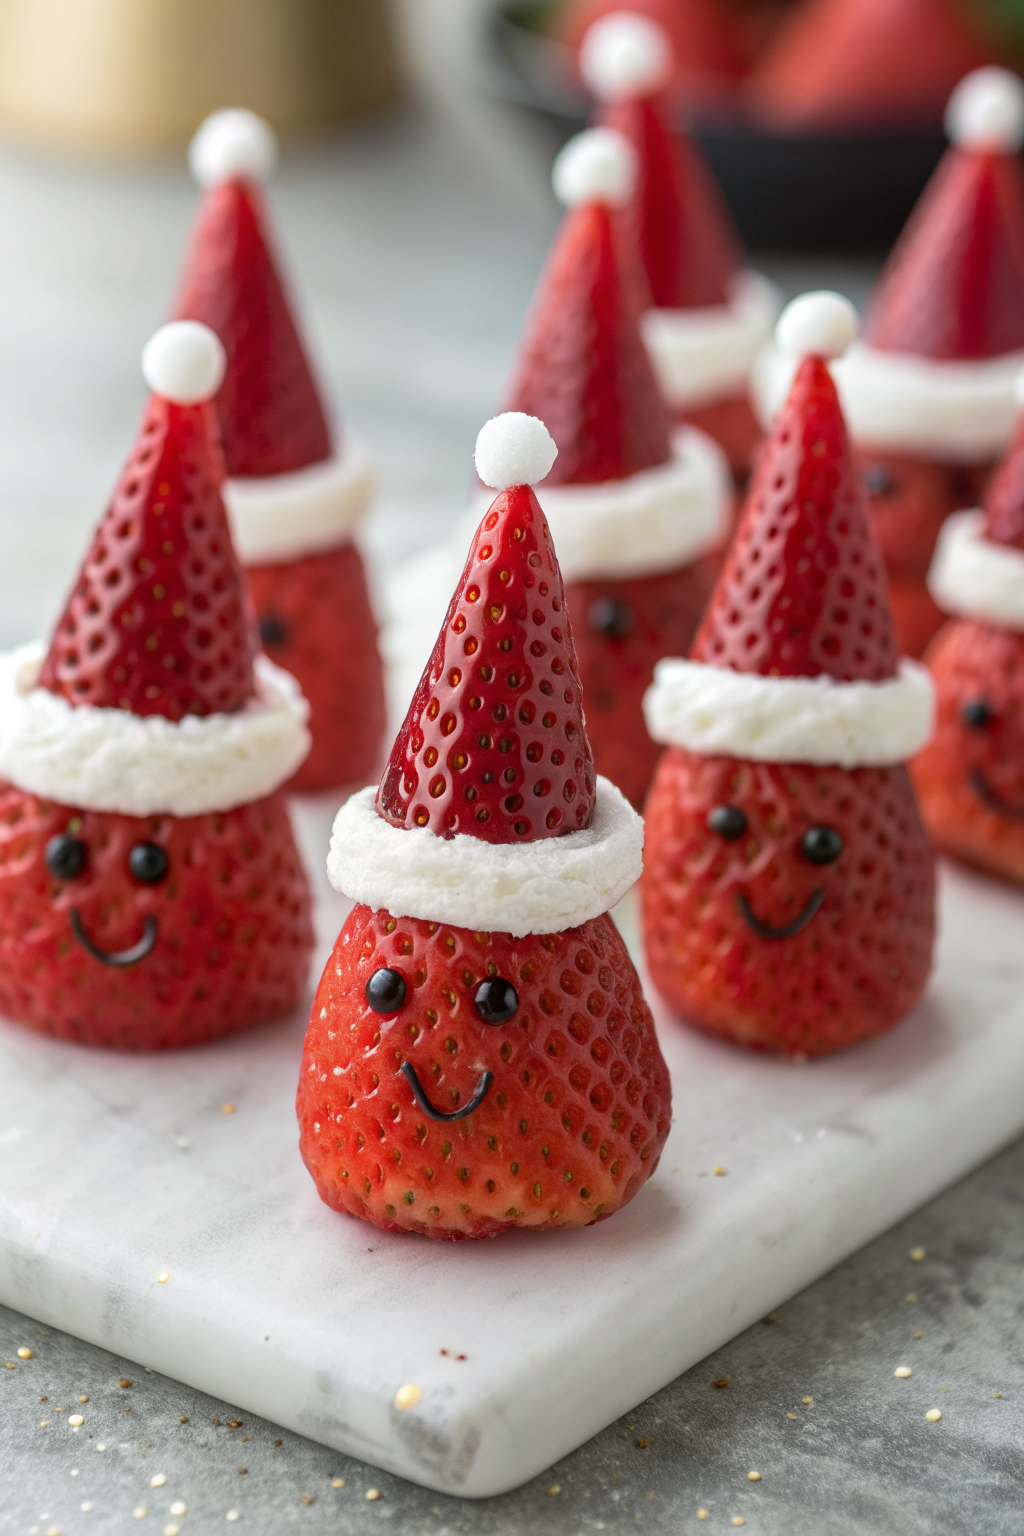
Mini Strawberry Santas Recipe
Ingredients
Method
- Rinse the strawberries gently under cool water and dry them very well with paper towels. Let them air dry a few extra minutes so no moisture remains on the surface.
- Using a sharp paring knife, slice a very thin piece off the bottom of each strawberry so it stands upright. Then cut off the pointed tip of each berry to create a small 'hat,' keeping each hat matched with its base.
- In a medium mixing bowl, beat the softened cream cheese until smooth and fluffy. Add the 1/4 cup powdered sugar and vanilla extract and beat until creamy and thick.
- Pour in the cold heavy whipping cream and beat on medium-high speed until the mixture thickens and holds medium to stiff peaks, scraping the bowl as needed.
- Spoon the filling into a piping bag fitted with a small round or star tip (or use a zip-top bag with a corner snipped off). Chill the filled bag in the fridge for 5 to 10 minutes if the mixture feels too soft.
- Arrange the strawberry bases on a parchment-lined tray. Pipe a tiny dot of filling underneath each base to help it stick to the tray, then pipe a generous swirl of filling on top of each base to form the 'face' and 'belly.'
- Place the strawberry hats on top of the filling, pressing gently so they stay in place. Pipe a small dot of filling on the tip of each hat to create a pom pom.
- Add eyes by gently pressing mini chocolate chips, chocolate sprinkles, or sesame seeds into the front of the filling. If needed, pipe tiny dots of filling where you want the eyes, then attach the decorations.
- Chill the assembled Mini Strawberry Santas in the refrigerator for at least 20 minutes so the filling firms up. Just before serving, dust lightly with powdered sugar and, if desired, sprinkle sanding sugar around the plate for a snowy effect.
Notes
Approximate per 1 Santa (about 1 strawberry with filling): 45 calories; fat 3 g; saturated fat 2 g; carbohydrates 4 g; fiber 0.5 g; sugars 3 g; protein 1 g; sodium 20 mg. Values will vary based on strawberry size, decorations used, and portion size.