
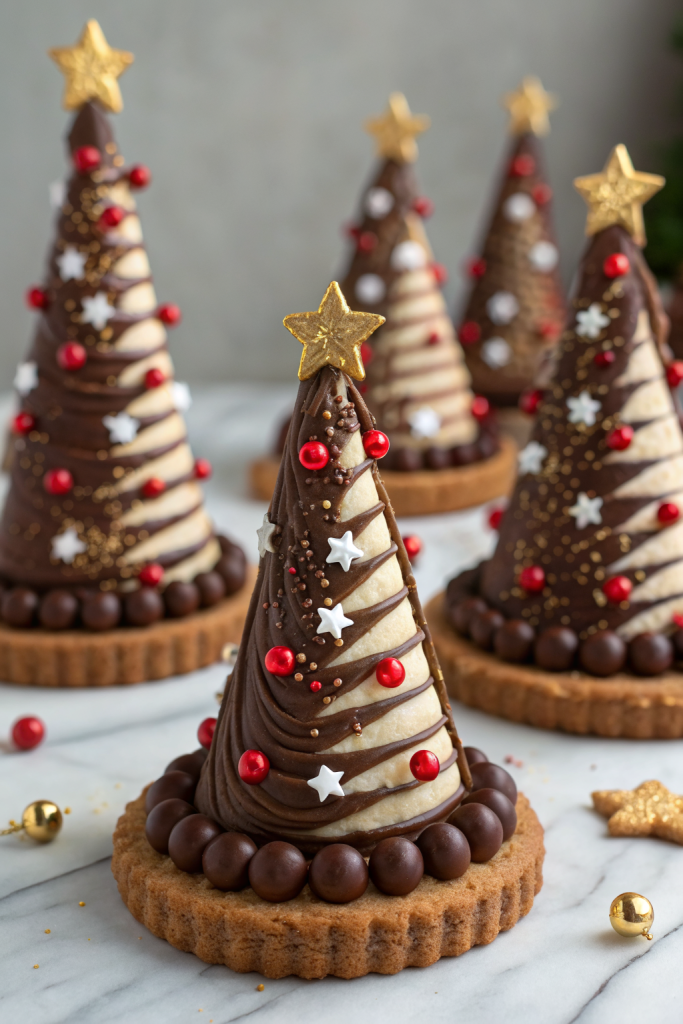
Christmas Chocolate Trees Recipe tastes like a cross between a rich brownie and a truffle, with a little crunch that feels like holiday magic in every bite. It works perfectly for busy home bakers who want a cute Christmas dessert in about 45 minutes total, including chill time. I tested these with my kids last weekend, and they disappeared so fast I had to hide a few in the back of the fridge for “quality control.”
Why Christmas Chocolate Trees Recipe Is Worth It
These Christmas Chocolate Trees look bakery-level fancy, but the method stays simple enough for a weeknight. You melt, mix, chill, cut, and decorate, and everyone thinks you hired a pastry chef.
Kids love decorating the trees with sprinkles and candy, and adults love the deep chocolate flavor. You can prep the base ahead, then decorate right before serving so the chocolate stays glossy and fresh.
My whole family said these Christmas Chocolate Trees tasted like holiday fudge from a fancy shop, and not a crumb survived the party ★★★★★
Ingredients You Need
Chocolate tree base
- 2 cups semi sweet chocolate chips
- Use a good brand like Ghirardelli or Guittard for best flavor.
- You can swap half for milk chocolate chips if you like a sweeter tree.
- 4 tablespoons unsalted butter, cut into pieces
- Salted butter works in a pinch; just reduce added salt.
- 1/2 cup heavy cream
- Full fat coconut milk works as a dairy free option.
- 1/3 cup powdered sugar, sifted
- 1 teaspoon pure vanilla extract
- 1/4 teaspoon fine sea salt
- 1 1/4 cups crushed crispy rice cereal or cornflakes
- Pantry shortcut: use store brand cereal; nobody notices once it sits in chocolate.
Tree trunks and decorations
- 12 to 16 small pretzel sticks
- Gluten free pretzel sticks work great if you need a gluten free version.
- 1 cup white chocolate chips or white candy melts
- Candy melts set a bit firmer and handle warm rooms better.
- Green gel food coloring
- Gel color keeps the chocolate thick and bright.
- Assorted sprinkles, mini M&M style candies, or sugar pearls
- Use what you already have in the pantry to save a trip.
- Optional: edible gold stars or glitter sugar for a festive sparkle
Equipment list
- 8 by 8 inch square baking pan
- Parchment paper
- Medium heatproof mixing bowl
- Small saucepan
- Rubber spatula
- Sharp chef’s knife or long serrated knife
- Small piping bag or zip top bag
- Small offset spatula or butter knife
Quick Tips & substitutions
- Line the pan with parchment and let it hang over the sides so you lift the chocolate slab out easily.
- Chop the chocolate chips a bit if they look large so they melt smoother and quicker.
- Use a microwave to melt chocolate in 20 second bursts if you do not want to set up a saucepan.
- Swap crispy rice cereal with crushed cornflakes or crushed waffle cones for a fun texture twist.
- Use coconut cream and dairy free chocolate chips to keep the Christmas Chocolate Trees recipe dairy free.
- Chill the base until firm but not rock hard so the knife slices cleanly without cracking.
- Warm the knife under hot water, dry it, then slice so the triangles look neat.
- If the white chocolate thickens too much, stir in 1 teaspoon neutral oil to loosen it.
- Use gluten free pretzels and gluten free cereal to keep the recipe safe for gluten free guests.
- Decorate over a rimmed baking sheet so the sprinkles stay contained and not all over your floor.
How to Make Christmas Chocolate Trees Recipe
Step 1: Prepare the pan
Line an 8 by 8 inch baking pan with parchment paper. Let the paper hang over two sides so you lift the chocolate out later. Lightly mist the pan with cooking spray so the parchment sticks in place.
Step 2: Melt the chocolate mixture
Heat the heavy cream and butter in a small saucepan over medium low heat until the butter melts and small bubbles form around the edges. Pour the hot mixture over the chocolate chips in a heatproof bowl. Let it sit 2 minutes, then stir until the chocolate turns smooth and glossy.
Step 3: Sweeten and flavor
Whisk in the powdered sugar, vanilla extract, and sea salt until the mixture looks thick and shiny. Taste a tiny bit and adjust salt if you want a stronger sweet and salty vibe. Stir again so everything blends evenly.
Step 4: Add the crunch
Fold in the crushed crispy rice cereal or cornflakes with a rubber spatula. Coat every piece with chocolate so no dry bits hide in the mix. The mixture should feel thick but still spreadable.
Step 5: Press into the pan
Scrape the chocolate mixture into the lined pan. Press it into an even layer with the spatula or your clean hands covered in a bit of parchment. Smooth the top so the future trees sit flat and stable.
Step 6: Chill the base
Place the pan in the fridge for about 30 minutes until the chocolate firms up. You want it solid enough to cut, but not so hard that it shatters. If you chill it longer, let it sit at room temperature 5 to 10 minutes before slicing.
Step 7: Cut into triangles
Lift the chocolate slab out of the pan using the parchment handles. Place it on a cutting board. Trim the edges if they look uneven, then cut the square into 3 or 4 long strips and slice each strip into triangles to form tree shapes.
Step 8: Add the pretzel trunks
Gently press a pretzel stick into the base of each triangle to form the tree trunk. If the chocolate feels too firm, use the tip of a knife to make a tiny starter hole. Lay the trees on a parchment lined tray so they stay neat while you decorate.
Step 9: Color the white chocolate
Melt the white chocolate chips or candy melts in a microwave safe bowl in 20 second bursts, stirring between each burst until smooth. Tint with green gel food coloring a little at a time until you get a nice tree green shade. Stir well so no streaks remain.
Step 10: Decorate the trees
Transfer the green chocolate to a piping bag or zip top bag and snip a small tip. Pipe zigzags across each triangle to mimic garlands and branches. While the chocolate still feels wet, sprinkle on candies, sugar pearls, and stars so they stick.
Step 11: Set and serve
Let the decorated Christmas Chocolate Trees sit at room temperature until the green chocolate sets. If your kitchen runs warm, slide the tray into the fridge for 10 minutes. Arrange the trees on a platter and serve them as a fun Christmas dessert centerpiece.
Recipe Variations
- Gluten free: Use gluten free crispy rice cereal or cornflakes and gluten free pretzel sticks.
- Vegan: Use dairy free chocolate chips, plant based butter, and full fat coconut milk instead of cream.
- Low carb: Use sugar free chocolate chips, powdered sweetener, and crushed sugar free high protein cereal.
- Peppermint twist: Add 1/2 teaspoon peppermint extract and sprinkle crushed candy canes on top.
- Nutty version: Stir in 1/2 cup chopped toasted almonds, pecans, or hazelnuts with the cereal.
- Extra fudgy: Reduce cereal to 3/4 cup for a softer, truffle like Christmas Chocolate Trees recipe.
Ways to Serve
- Arrange the trees on a large white platter with mini marshmallows scattered like snow.
- Pack a few trees in cookie tins for neighbor gifts or teacher treats.
- Serve with hot cocoa, warm apple cider, or cold milk for a cozy dessert spread.
- Add them to a Christmas cookie tray as the showpiece in the center.
- Use them as edible place cards and pipe initials on each tree with melted chocolate.
Storage Success
Store Christmas Chocolate Trees in a single layer in an airtight container, or separate layers with parchment so the decorations stay neat. Keep them in the fridge for up to 1 week for best texture and flavor. Let them sit at room temperature about 10 minutes before serving so the chocolate softens slightly. Freeze undecorated trees for up to 2 months, then thaw in the fridge and decorate closer to your holiday gathering.
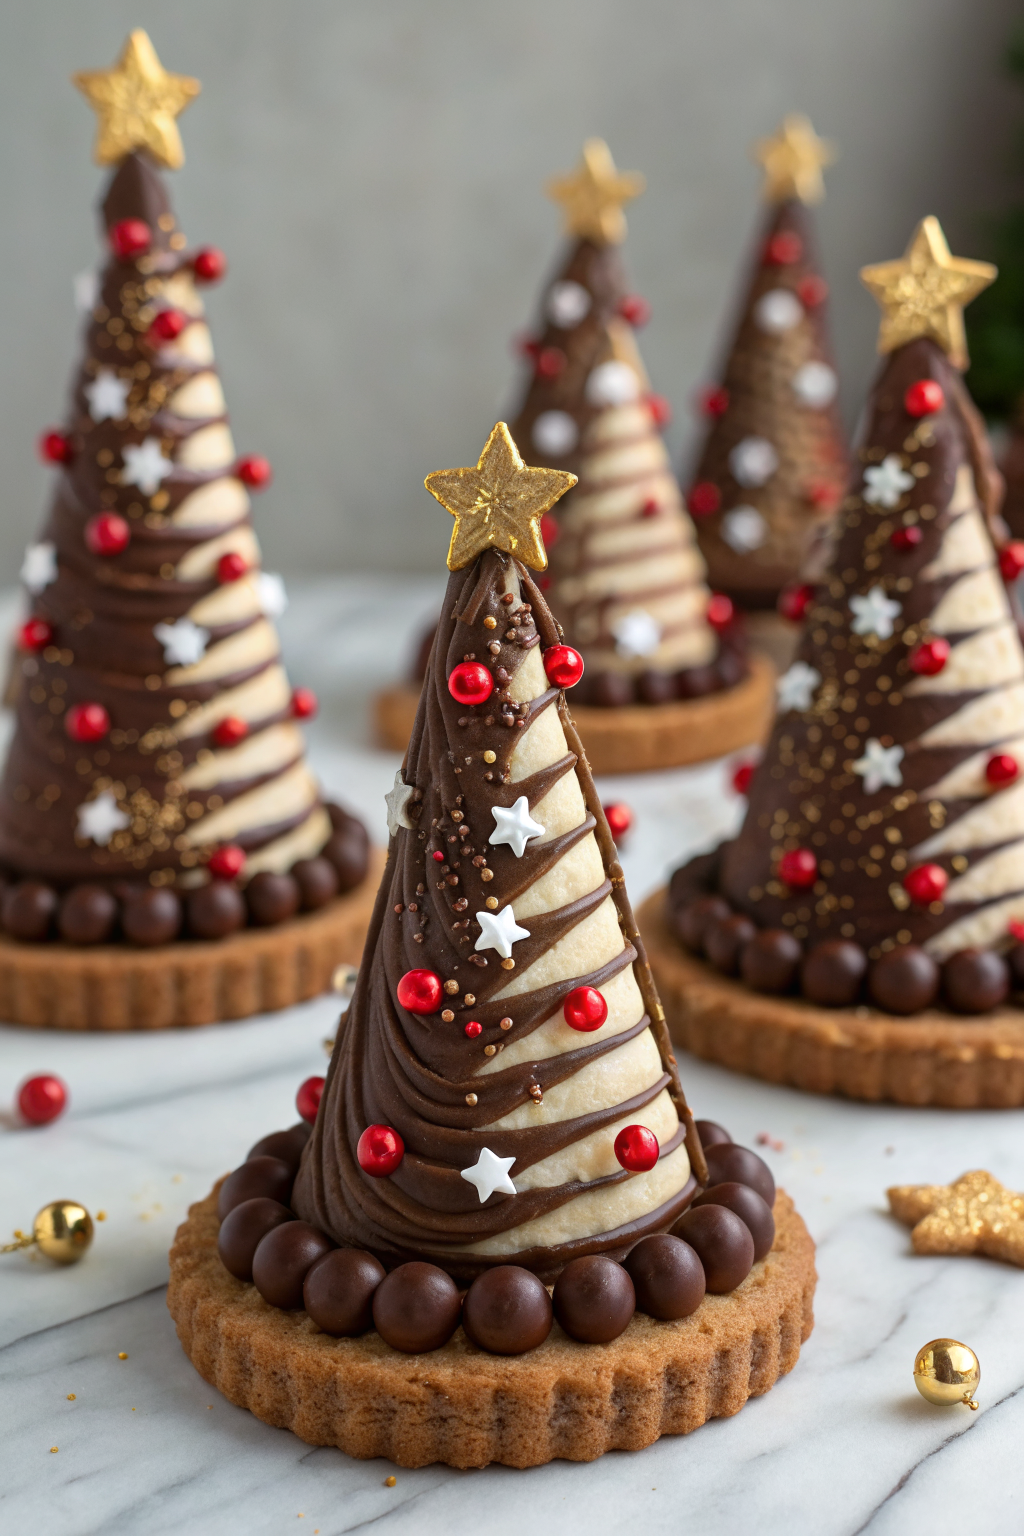
Christmas Chocolate Trees Recipe
Ingredients
Method
- Line an 8 by 8 inch baking pan with parchment paper, letting it hang over two sides to create handles. Lightly mist the pan with cooking spray so the parchment sticks in place.
- Heat the heavy cream and butter in a small saucepan over medium low heat until the butter melts and small bubbles form around the edges.
- Place the semi sweet chocolate chips in a medium heatproof bowl. Pour the hot cream and butter mixture over the chocolate. Let sit for 2 minutes, then stir until the chocolate is completely smooth and glossy.
- Whisk in the powdered sugar, vanilla extract, and fine sea salt until the mixture looks thick and shiny.
- Fold in the crushed crispy rice cereal or cornflakes until every piece is coated and the mixture is thick but still spreadable.
- Scrape the chocolate mixture into the prepared pan. Press it into an even layer and smooth the top so the trees will sit flat.
- Refrigerate for about 30 minutes, or until the chocolate base is firm enough to cut but not rock hard. If chilled longer, let it sit at room temperature 5 to 10 minutes before slicing.
- Use the parchment handles to lift the chocolate slab from the pan onto a cutting board. Trim the edges if needed, then cut the square into 3 or 4 long strips. Slice each strip into triangles to form tree shapes.
- Gently press a small pretzel stick into the base of each triangle to form the tree trunk. If the base is very firm, use the tip of a knife to make a starter hole. Arrange the trees on a parchment lined tray.
- Melt the white chocolate chips or candy melts in a microwave safe bowl in 20-second bursts, stirring between each, until smooth. Tint with green gel food coloring a little at a time until you have a tree-green color, stirring well to remove streaks.
- Transfer the green chocolate to a piping bag or zip top bag and snip a small tip. Pipe zigzags across each triangle to mimic garlands and branches, then immediately add sprinkles, mini candies, sugar pearls, and optional gold stars so they stick.
- Let the decorated trees sit at room temperature until the green chocolate sets, or chill the tray in the fridge for about 10 minutes if your kitchen is warm. Arrange on a platter and serve.
Notes
Approximate per 1 tree (about 1/12 of recipe): 260 calories; fat 16 g; saturated fat 9 g; carbohydrates 29 g; fiber 2 g; sugars 21 g; protein 3 g; sodium 90 mg. Values will vary based on exact brands, decorations, and portion size.