
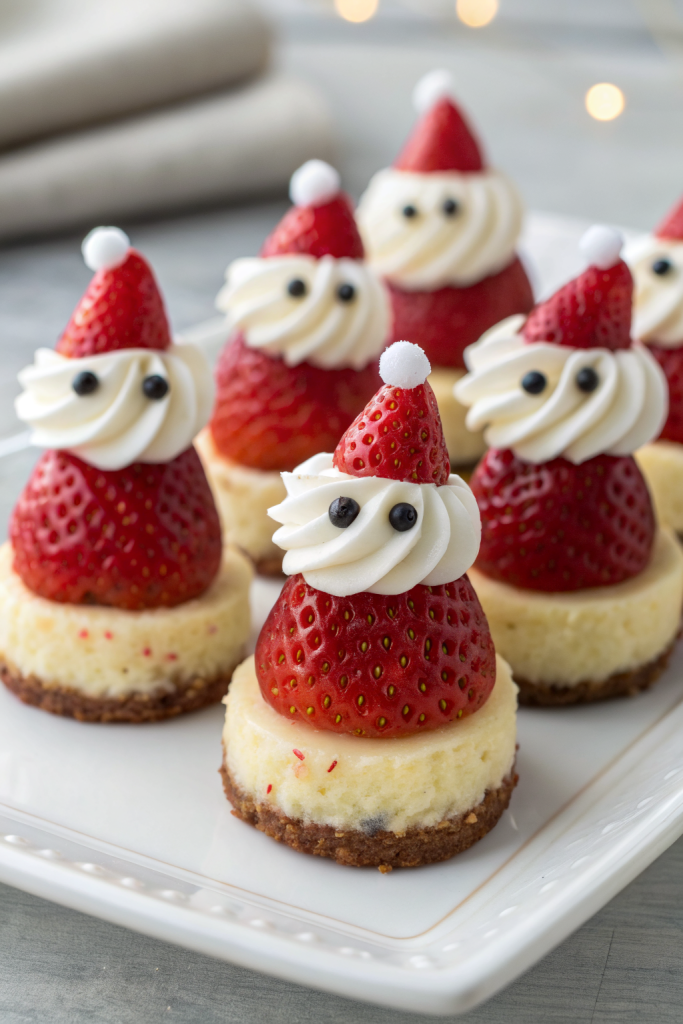
Cheesecake Strawberry Santas Recipe tastes like a bite of creamy cheesecake wrapped in juicy fresh berries with a sweet little hat of whipped topping, and kids and adults both inhale them. This dessert works perfectly for busy holiday hosts because you finish the whole batch in about 30 minutes from start to finish. I test these every December with my own family taste panel, and they disappear faster than I can refill the platter.
Why Cheesecake Strawberry Santas Recipe Is Worth It
These Cheesecake Strawberry Santas look adorable on a holiday dessert table, yet you only need simple ingredients and no baking. The creamy cheesecake filling pairs with fresh strawberries, so each bite tastes rich but still light and fruity.
You also prep them ahead, which saves your sanity on busy days. Guests think you hired a pastry chef, but you know you just used a piping bag and a steady hand.
These Cheesecake Strawberry Santas taste like mini bites of strawberry cheesecake in cute costumes, and they vanish from the dessert tray in minutes ★★★★★
Ingredients You Need
Strawberries and cheesecake filling
- 1 pound fresh strawberries, large and firm, with pointed tips
- Choose bright red berries with green tops and no mushy spots.
- 8 ounces cream cheese, softened
- Use full fat cream cheese for the best texture; Philadelphia or your favorite store brand both work.
- 1/3 cup powdered sugar, sifted
- You can bump this up to 1/2 cup if you like a sweeter filling.
- 1 teaspoon pure vanilla extract
- Use real vanilla, not imitation, for deeper flavor.
- 1 tablespoon heavy cream or milk
- This loosens the filling so it pipes smoothly.
- Pinch of fine sea salt
- This balances the sweetness and makes the cheesecake flavor pop.
Decoration
- Mini chocolate chips or black sesame seeds for eyes
- Red sanding sugar or sprinkles for extra sparkle, optional
- Extra whipped cream or whipped topping for quick hats, optional
Pantry shortcuts and swaps
- Swap powdered sugar with a powdered sugar substitute if you want a lower sugar version.
- Use whipped topping instead of homemade whipped cream if you want a shortcut and longer stability.
- Use flavored cream cheese, like strawberry or vanilla, for a twist without extra ingredients.
Equipment list
- Cutting board and small sharp knife
- Paper towels for drying strawberries
- Medium mixing bowl
- Hand mixer or stand mixer
- Small spatula or spoon
- Piping bag with round or star tip
- You can also use a zip top bag with a corner snipped off.
- Toothpicks or small skewer for placing eyes
- Serving platter or tray
Quick Tips & substitutions
- Dry strawberries very well so the cheesecake filling sticks and does not slide.
- Slice a tiny bit off the bottom of each berry so your Santas stand upright.
- Do not overbeat the cream cheese or the filling can turn runny.
- Chill the filling for 10 to 15 minutes so it pipes with clean, fluffy peaks.
- Use mascarpone instead of cream cheese for an extra rich filling.
- Swap vanilla with almond extract or orange extract for a different flavor profile.
- Use mini chocolate chips, chocolate sprinkles, or black sesame seeds for eyes, whatever you already have.
- Use a sugar free powdered sweetener and low carb berries if you want a lighter dessert.
- Keep the berries fairly large; tiny berries make assembly tricky and wobbly.
- Prep the filling a day ahead and store it in the fridge, then pipe it fresh before serving.
How to Make Cheesecake Strawberry Santas Recipe
Step 1: Prep the strawberries
Rinse the strawberries under cool water and pat them completely dry with paper towels. Keep the leafy tops on for now so you can grip them easily. Sort out any berries that feel mushy or flat and save those for smoothies.
Slice a thin piece off the bottom of each strawberry so it stands flat on the cutting board. Then slice across each berry about one third of the way from the tip to create a little hat. Set the hats aside in a separate spot so you do not mix them up.
Step 2: Mix the cheesecake filling
Place the softened cream cheese in a mixing bowl. Beat it with a hand mixer on medium speed until it turns smooth and fluffy, about 1 to 2 minutes. Add powdered sugar, vanilla, salt, and heavy cream or milk.
Beat again until the mixture turns creamy and holds soft peaks, about 1 minute. Taste a tiny bit and adjust sweetness or vanilla if you want. If the filling looks too loose, add a spoonful of powdered sugar and mix again.
Step 3: Chill and load the piping bag
Place the bowl of cheesecake filling in the fridge for 10 to 15 minutes so it firms up slightly. During that time, set up your piping bag with a round or star tip. Spoon the chilled filling into the bag and twist the top closed so the filling does not squeeze out the wrong end.
If you use a zip top bag, spoon the filling into one corner and squeeze out the air. Seal the bag and snip a small piece off the corner. Keep the bag in the fridge if you need to pause between batches.
Step 4: Pipe the cheesecake bellies
Set the strawberry bases on your serving tray with the cut side facing up. Pipe a generous swirl of cheesecake filling onto each base to form the Santa belly and face. Aim for a tall mound so the hat sits nicely on top.
If the filling starts to soften, pop the tray and the piping bag into the fridge for a few minutes. Work in small batches if your kitchen runs warm.
Step 5: Add the hats and details
Place the strawberry hat on top of each cheesecake swirl and press gently so it sticks. Pipe a tiny dot of filling on the very tip of each hat to form the pom pom. Then pipe a small line or dots around the base of the hat if you want a fluffy trim.
Use a toothpick to place mini chocolate chips or sesame seeds as eyes. If you want a beard effect, pipe a few extra squiggles of filling down the front. Sprinkle a bit of red sanding sugar on the tray for a festive look.
Step 6: Chill before serving
Place the finished Cheesecake Strawberry Santas in the fridge for at least 20 to 30 minutes. This short chill time helps the filling firm up and keeps the berries fresh. Serve them cold for the best cheesecake texture and clean bites.
If you plan to travel with them, chill them on the tray, then cover loosely with plastic wrap or a lid that does not press on the tops. Keep them cold until you reach your destination.
Recipe Variations
-
Gluten free
- The base recipe already stays gluten free, so just check your vanilla and sprinkles for hidden gluten.
-
Vegan
- Use vegan cream cheese and a plant based whipping cream or coconut cream.
- Sweeten with powdered coconut sugar or a vegan powdered sweetener.
-
Low carb / keto
- Use a powdered erythritol or monk fruit blend instead of powdered sugar.
- Choose the largest, firmest berries and keep the filling slightly less sweet.
-
Flavor twists
- Add finely grated lemon or orange zest to the cheesecake filling.
- Mix in a spoonful of strawberry jam for a pink, fruity filling.
- Stir in mini chocolate chips to the filling for a chocolate cheesecake vibe.
-
Decor fun
- Use colored sprinkles for buttons down the front.
- Add tiny shredded coconut flakes for a fluffy beard effect.
Ways to Serve
- Arrange Cheesecake Strawberry Santas on a white platter with fresh mint leaves for a holiday color pop.
- Add them to a dessert board with cookies, brownies, and fruit for a kid friendly spread.
- Pack a few in lunchboxes as a fun surprise treat.
- Serve them after a cozy family dinner with hot cocoa or warm herbal tea.
- Use them as edible toppers on cupcakes or a simple sheet cake.
Storage Success
Store Cheesecake Strawberry Santas in a single layer in an airtight container in the fridge. Line the bottom with a paper towel to catch extra moisture and keep the berries from getting soggy. Eat them within 24 hours for the best texture, since strawberries release juice as they sit. If you need to prep ahead, keep the cheesecake filling in a piping bag in the fridge for up to 2 days and assemble the Santas a few hours before serving.
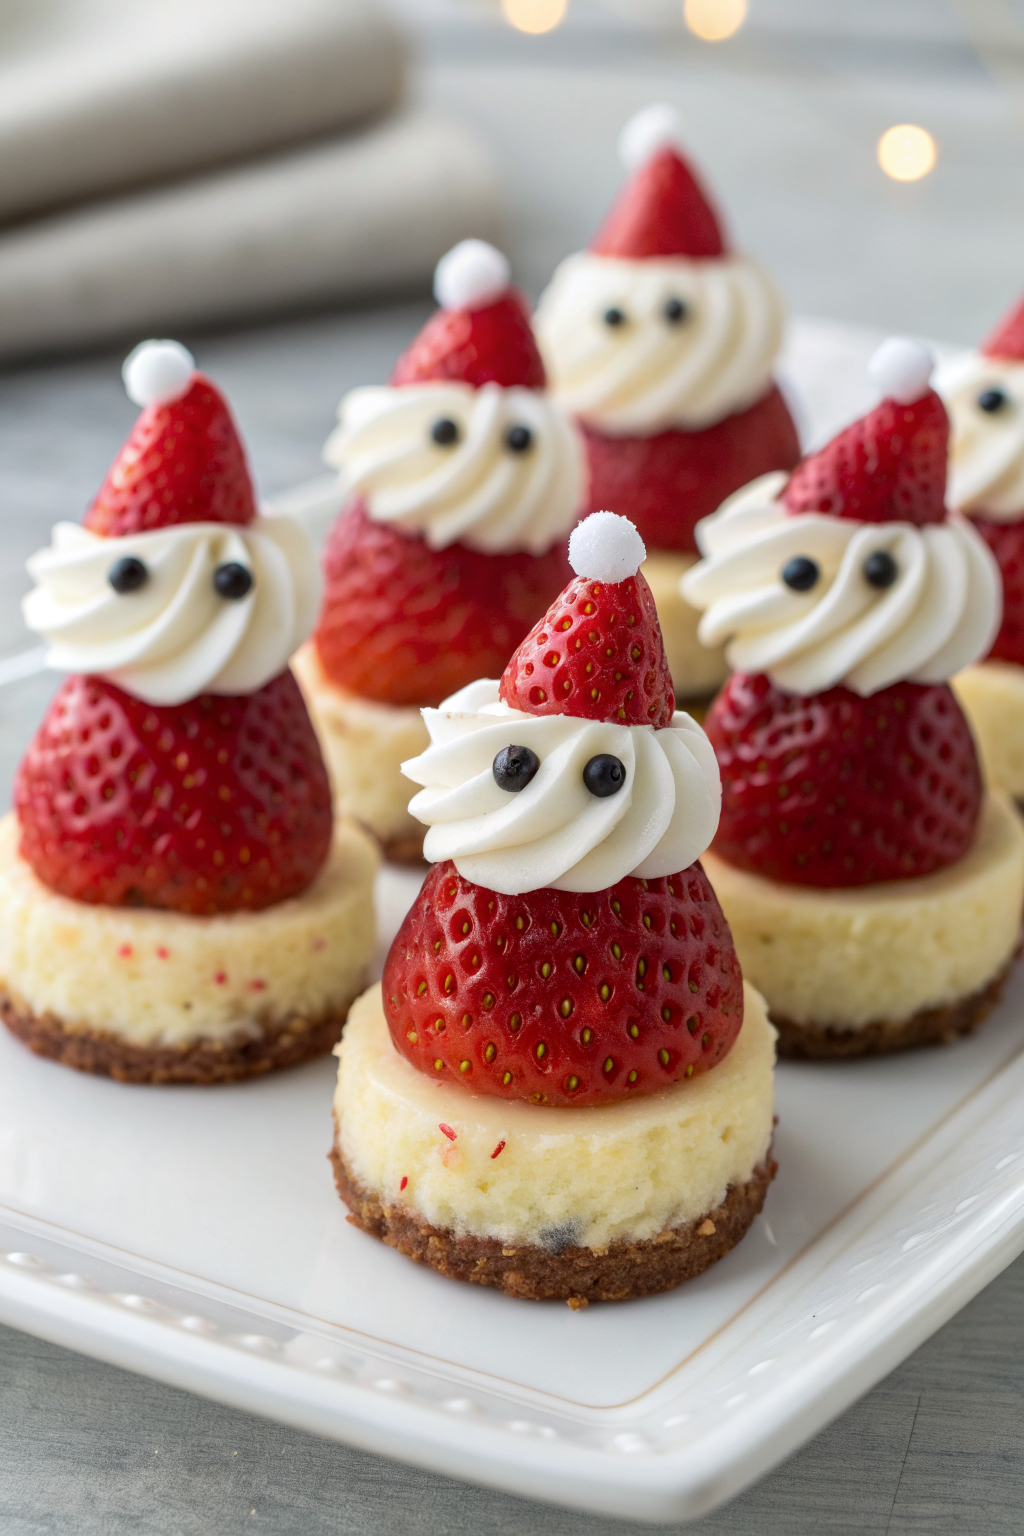
Cheesecake Strawberry Santas Recipe
Ingredients
Method
- Rinse the strawberries under cool water and pat them completely dry with paper towels. Keep the leafy tops on so you can grip them easily, and set aside any mushy berries for another use.
- Slice a thin piece off the bottom of each strawberry so it stands flat. Then cut across each berry about one third of the way from the tip to create a small hat. Set the hats aside separately from the bases.
- Place the softened cream cheese in a medium mixing bowl. Beat with a hand mixer on medium speed until smooth and fluffy, about 1 to 2 minutes.
- Add the powdered sugar, vanilla, heavy cream or milk, and a pinch of fine sea salt. Beat again until the mixture is creamy and holds soft peaks, about 1 minute. If it seems too loose, mix in a little more powdered sugar.
- Chill the cheesecake filling in the refrigerator for 10 to 15 minutes so it firms up slightly and pipes cleanly.
- Transfer the chilled filling to a piping bag fitted with a round or star tip, or spoon it into a zip-top bag and snip off one corner.
- Arrange the strawberry bases on a serving tray, cut side up. Pipe a generous swirl of cheesecake filling onto each base to form the Santa belly and face, making a tall mound so the hat will sit securely on top.
- Place the strawberry hats on top of the cheesecake swirls and press gently so they stick. Pipe a tiny dot of filling on the tip of each hat for a pom pom, and, if you like, a small line or dots around the base of each hat for trim.
- Use a toothpick to place mini chocolate chips or black sesame seeds as eyes. Add any extra details you like, such as a little beard of piped filling or a sprinkle of red sanding sugar on the tray.
- Refrigerate the Cheesecake Strawberry Santas for 20 to 30 minutes before serving so the filling can firm up. Keep chilled until ready to serve and enjoy within about 24 hours for the best texture.
Notes
Approximate per 1 Santa (about 1/24 of recipe): 60 calories; fat 4 g; saturated fat 2.5 g; carbohydrates 5 g; fiber 0.5 g; sugars 4 g; protein 1 g; sodium 35 mg. Values will vary based on strawberry size, exact amounts of filling used, and decoration choices.