
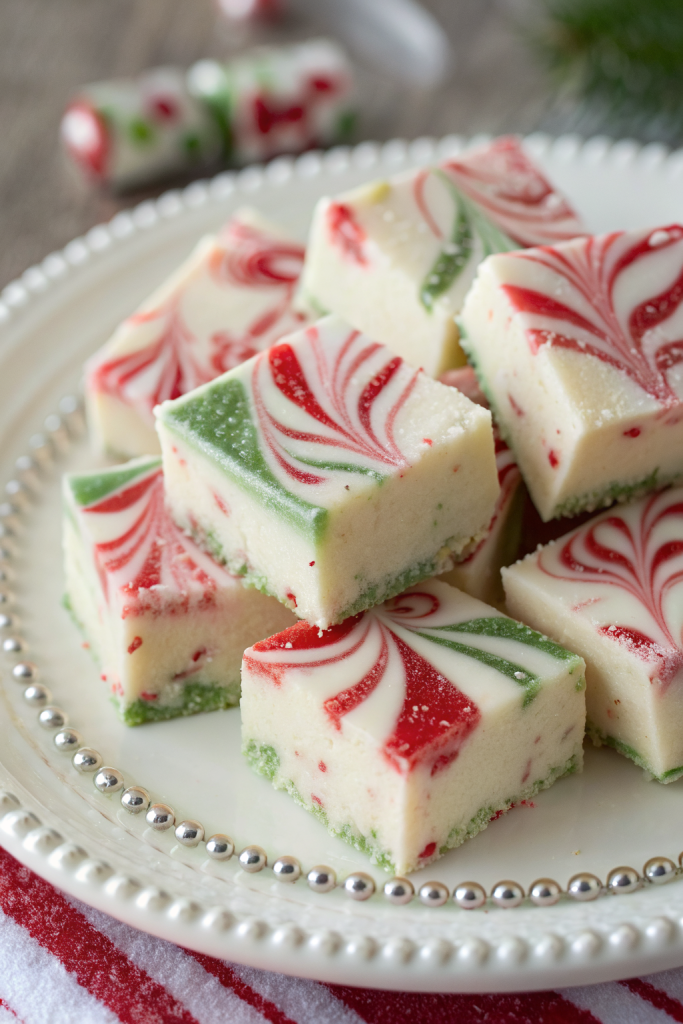
Soft Christmas Peppermints Recipe tastes like a creamy, melt-in-your-mouth candy cane cloud with a cool peppermint finish and a gentle sweetness that never feels harsh. It works perfectly for busy bakers who want a festive, no-bake treat in about 45 minutes total, including shaping time. I still remember sneaking these off my grandma’s cookie tray as a kid and pretending I had “no idea” where they went.
Why Choose This Soft Christmas Peppermints Recipe
This Soft Christmas Peppermints Recipe gives you that classic candy cane flavor without the rock-hard teeth risk. The texture feels tender and creamy, almost like a peppermint marshmallow met a butter mint and decided to be extra fancy.
You mix everything in one bowl, roll, cut, and let them dry. No thermometer, no boiling sugar, no drama, just simple ingredients and a lot of holiday cheer.
“These soft Christmas peppermints disappear faster than any cookie on my dessert table, and everyone asks for the recipe. ★★★★★”
Ingredients You’ll Need
These soft Christmas peppermints use simple pantry staples that you probably already keep around during the holidays.
Main ingredients
- 4 cups powdered sugar, sifted
- Use a good quality powdered sugar like Domino or C&H for the smoothest texture.
- Avoid “organic powdered sugar” that sometimes clumps more and tastes a bit gritty.
- 4 tablespoons unsalted butter, softened to room temperature
- Salted butter works in a pinch; just skip any extra salt.
- 4 ounces cream cheese, softened to room temperature
- Full-fat cream cheese gives the best creamy texture.
- Use block cream cheese, not the whipped tub style.
- 1 teaspoon pure peppermint extract
- Use peppermint extract, not mint extract, which tastes more like spearmint gum.
- 1 teaspoon vanilla extract
- This rounds out the flavor so the peppermint does not taste too sharp.
- 1/8 teaspoon fine sea salt
- This tiny bit of salt balances the sweetness.
- 2 to 3 tablespoons heavy cream or whole milk
- Start with 2 tablespoons and add more only if the dough feels too dry.
Coloring & decoration
- Red gel food coloring
- Green gel food coloring
- Gel colors work best because they keep the dough firm.
- Liquid food coloring can make the dough sticky, so use it very sparingly if that is all you have.
- Optional: extra powdered sugar for dusting your hands and work surface
Equipment
- Stand mixer with paddle attachment or a hand mixer
- Large mixing bowl
- Rubber spatula
- Measuring cups and spoons
- Small cookie scoop or teaspoon
- Baking sheets or large trays
- Parchment paper or silicone baking mats
- Fork for crosshatch marks or a small knife for cutting
- Airtight containers for storage
Tips & Tricks
- Soften the butter and cream cheese fully so they blend smooth and lump free.
- Sift the powdered sugar to avoid little sugar clumps in the finished peppermints.
- Add peppermint extract slowly and taste as you go; some brands taste stronger than others.
- Start with less food coloring, then deepen the color as needed so the dough does not turn sticky.
- Dust your hands with powdered sugar if the dough sticks while you roll or shape the candies.
- Chill the dough for 15 to 20 minutes if it feels too soft to roll into ropes or balls.
- Use a small cookie scoop for even sizes so the peppermints dry at the same rate.
- Let the shaped peppermints dry at room temperature on parchment so they set on the outside but stay soft inside.
- Rotate the trays halfway through drying if your kitchen feels humid or warm.
- Store different colors in separate layers with parchment between them so the colors do not smudge together.
How to Make Soft Christmas Peppermints Recipe
Step 1: Mix the creamy base
Add the softened butter and cream cheese to a large mixing bowl. Beat with a mixer on medium speed until the mixture turns smooth and creamy, about 1 to 2 minutes. Scrape down the sides of the bowl so everything blends evenly.
Pour in the peppermint extract, vanilla extract, and salt. Beat again for about 30 seconds so the flavors mix into the creamy base. Taste a tiny bit and adjust the peppermint if you want a stronger mint flavor.
Step 2: Add powdered sugar
Turn the mixer to low and add the powdered sugar about 1 cup at a time. Mix after each addition until the sugar disappears into the mixture. Scrape the bowl often so no dry pockets hide at the bottom.
When you add the last cup of powdered sugar, the mixture will look thick and crumbly. Add 2 tablespoons of heavy cream or milk and mix on medium speed. The mixture should come together into a soft, pliable dough that feels like stiff frosting or playdough.
If the dough still feels dry and crumbly, add the remaining tablespoon of cream a little at a time. If it feels too sticky, sprinkle in a bit more powdered sugar. Aim for a dough that holds its shape when you pinch it but still feels soft.
Step 3: Divide and color the dough
Turn the dough out onto a clean surface or a sheet of parchment. Shape it into a rough log and cut it into three equal pieces. Place each piece into its own small bowl.
Leave one piece plain white. Add a small drop of red gel color to the second piece and a small drop of green gel color to the third. Knead each piece by hand until the color looks even, adding more gel color as needed for a deeper holiday shade.
If the dough sticks to your hands while you knead, dust your fingers with powdered sugar. Keep the colors separate so they stay bright and do not marble unless you want that look on purpose.
Step 4: Shape the soft Christmas peppermints
Line baking sheets or trays with parchment paper. Pinch off small portions of dough and roll them into 1/2 to 3/4 inch balls between your palms. Place the balls on the prepared trays, leaving a little space between each candy.
Use the tines of a fork to press a gentle crosshatch pattern on top of each ball. This flattens them slightly and gives that classic old-fashioned peppermint look. If the fork sticks, dip it lightly in powdered sugar before each press.
You can also roll ropes of dough about 1/2 inch thick and cut them into small pillow shapes with a knife. This style looks a bit like soft pillow mints and works nicely if you want a different texture on the tray.
Step 5: Dry and set
Leave the trays of shaped peppermints at room temperature, uncovered. Let them dry for at least 4 to 6 hours, or up to overnight, depending on how soft you want the centers. They will firm up on the outside while the inside stays tender.
If your kitchen feels very humid, place the trays in the coolest, driest room in the house. You can gently flip each peppermint after a few hours so the bottoms dry evenly. When they feel set on the outside but still soft when you press lightly, they are ready to serve.
What to Serve with it?
These soft Christmas peppermints sit perfectly on a holiday dessert tray with sugar cookies, gingerbread men, and chocolate fudge. Pair them with hot cocoa, peppermint mocha, or a big pot of spiced apple cider for a cozy movie night. Kids love them after dinner as a light dessert, especially when you serve them with simple vanilla ice cream.
You can also tuck a few into treat bags with chocolate bark and caramel popcorn for neighbor gifts. They travel well and always add a bright pop of color to any cookie exchange.
Storage Options
- Store the soft Christmas peppermints in an airtight container at room temperature for 7 to 10 days.
- Place parchment between layers so the candies do not stick or transfer color.
- For longer storage, freeze them in a freezer-safe container for up to 2 months.
- Thaw frozen peppermints in the closed container at room temperature so condensation does not land directly on the candies.
- Skip reheating; these taste best at room temperature and keep their soft, creamy texture that way.
Soft Christmas Peppermints Recipe
Ingredients
Method
- Add the softened butter and cream cheese to a large mixing bowl. Beat on medium speed until smooth and creamy, 1 to 2 minutes, scraping down the sides of the bowl as needed.
- Add the peppermint extract, vanilla extract, and sea salt. Beat for about 30 seconds until evenly combined, tasting and adjusting the peppermint to your liking.
- Turn the mixer to low and add the powdered sugar about 1 cup at a time, mixing after each addition until incorporated and scraping the bowl often so no dry spots remain.
- When the last cup of powdered sugar is added and the mixture looks thick and crumbly, add 2 tablespoons of heavy cream or milk. Mix on medium speed until it comes together into a soft, pliable dough similar to stiff frosting or playdough, adding up to 1 more tablespoon of cream if the dough feels too dry or a little more powdered sugar if it seems sticky.
- Turn the dough out onto a clean surface or parchment. Shape it into a rough log and cut into three equal pieces. Place each piece in its own small bowl.
- Leave one piece plain white. Tint the second piece with a small amount of red gel food coloring and the third with green gel food coloring. Knead each piece by hand until the color is evenly distributed, dusting your fingers with powdered sugar if the dough sticks and adding more gel color as needed for deeper shades.
- Line baking sheets or trays with parchment paper. Pinch off small portions of dough and roll into 1/2- to 3/4-inch balls between your palms. Arrange them on the prepared trays with a little space between each one.
- Use the tines of a fork to gently press a crosshatch pattern on top of each ball to flatten slightly and give an old-fashioned peppermint look. Dust the fork lightly with powdered sugar if it sticks. Alternatively, roll the dough into 1/2-inch ropes and cut into small pillow shapes with a knife.
- Leave the shaped peppermints on the trays at room temperature, uncovered, to dry for 4 to 6 hours or up to overnight. They should firm up on the outside while remaining tender inside. Flip them once during drying if desired for more even setting. Serve when the outsides feel set but the centers are still soft.
Notes
Approximate per 1 piece (about 1/60 of recipe): 40 calories; fat 1.7 g; saturated fat 1.1 g; carbohydrates 6.3 g; fiber 0 g; sugars 6.1 g; protein 0.2 g; sodium 7 mg. Values are estimates and will vary based on exact ingredients, food coloring amounts, and portion size.