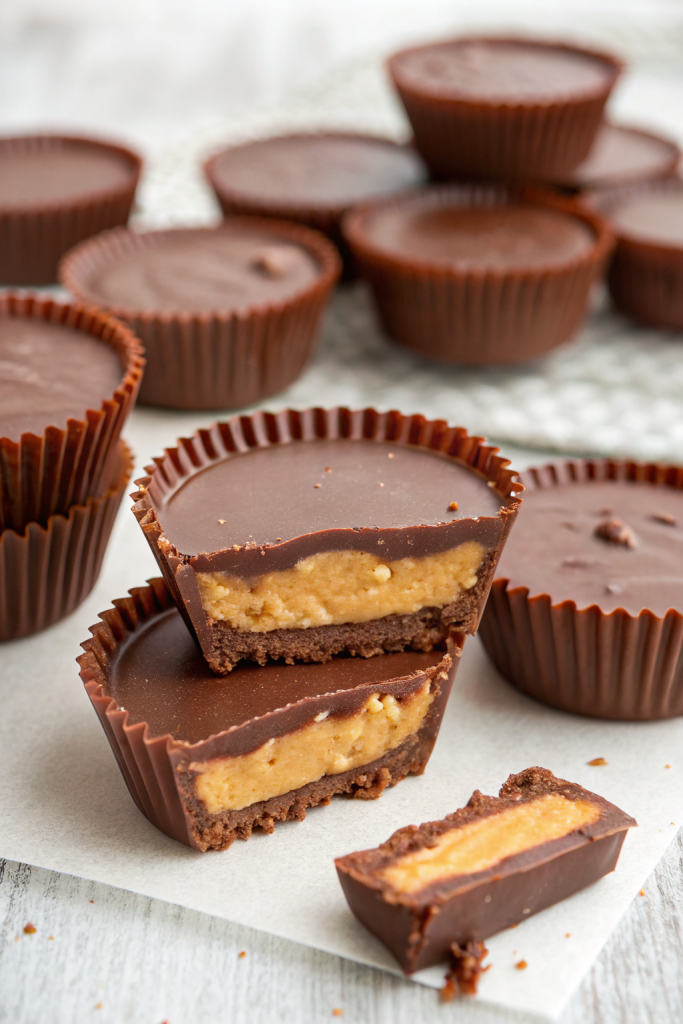
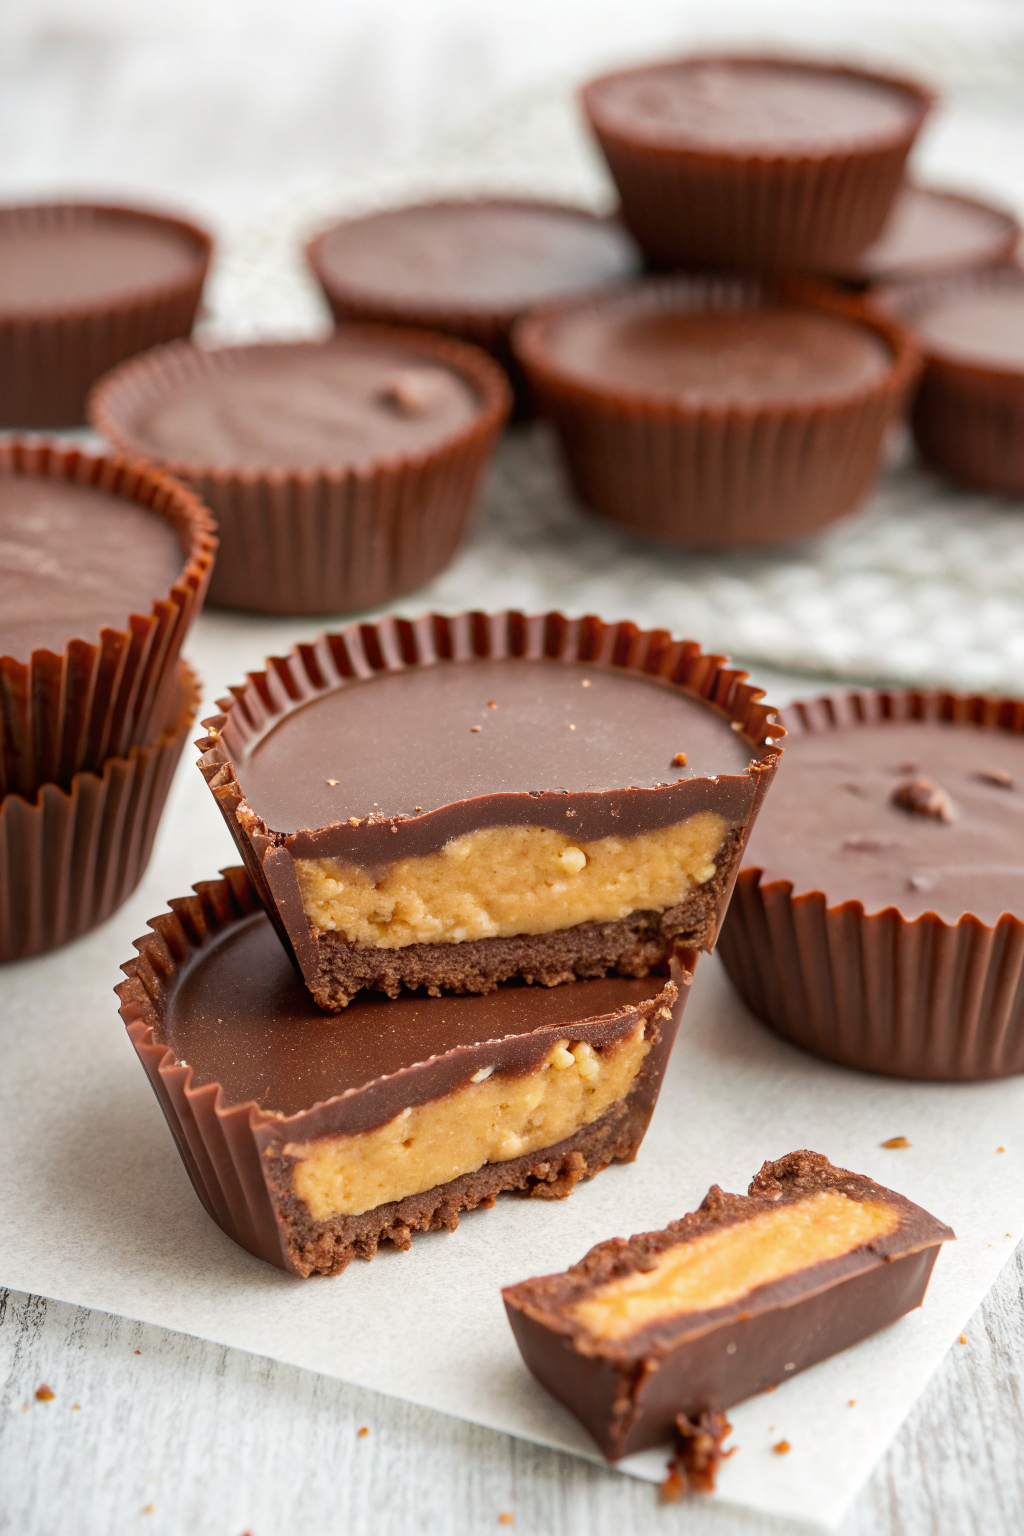
Reeses Peanut Butter Cups Recipe tastes like a salty-sweet chocolate hug with a creamy, nutty center and a soft snap of chocolate on top. It works perfectly for peanut butter lovers who want a quick dessert, since you only need about 30 minutes of active time plus chilling. I still remember sneaking store-bought cups into movie theaters as a teenager, so this homemade version feels like a full-circle glow-up.
Why Make This Reeses Peanut Butter Cups Recipe at Home
Homemade Reeses Peanut Butter Cups taste richer, creamier, and more chocolatey than the store version. You control the sweetness, the thickness of the chocolate shell, and the salt level, so every bite hits exactly how you like it.
You also skip preservatives and mystery ingredients and use pantry staples you already know. Kids love helping with the chocolate and peanut butter layers, and adults love that the recipe uses a microwave and one bowl most of the time.
These homemade Reeses Peanut Butter Cups taste better than the original and disappear in minutes at every party ★★★★★
Ingredients You Need
Here is everything you need to make this Reeses Peanut Butter Cups Recipe at home.
Chocolate layer
- 2 cups semi sweet chocolate chips
- Use a good brand like Ghirardelli or Guittard for best flavor.
- You can swap half with milk chocolate chips for a sweeter, more classic candy flavor.
- 2 tablespoons refined coconut oil or neutral vegetable oil
- Coconut oil helps the chocolate set with a softer bite.
- Use refined coconut oil if you do not want coconut flavor.
Peanut butter filling
- 1 cup creamy peanut butter
- Use shelf stable peanut butter like Jif or Skippy for the closest copycat texture.
- Natural peanut butter works, but stir it very well and expect a slightly softer center.
- 1/2 cup powdered sugar, sifted
- This sweetens and thickens the filling.
- 1/4 cup light brown sugar, packed
- Brown sugar adds that signature candy-shop depth and a tiny bit of chew.
- 1/4 teaspoon fine sea salt
- Taste your peanut butter first and adjust salt up or down.
- 1 teaspoon pure vanilla extract
- This rounds out the flavor and makes the filling taste like candy, not just peanut butter.
Optional flavor boosters
- 1 to 2 tablespoons crushed graham crackers
- This adds a subtle grainy texture similar to the original cups.
- Flaky sea salt for sprinkling on top
- Adds crunch and balances sweetness.
Equipment
- 12 cup standard muffin tin or 24 cup mini muffin tin
- Paper cupcake liners or parchment liners
- Microwave safe bowl or heatproof bowl plus small saucepan for a double boiler
- Rubber spatula
- Small cookie scoop or teaspoon
- Spoon or small offset spatula for spreading
- Measuring cups and spoons
Tips & Mistakes
- Use paper liners so the cups release cleanly and keep their shape.
- Chill the muffin tin before you add chocolate if your kitchen runs warm, so the chocolate sets faster and cleaner.
- Melt chocolate in short bursts of 20 to 30 seconds and stir often so it does not scorch.
- Dry every bowl and utensil completely so water drops do not seize the chocolate.
- Taste the peanut butter filling before you chill it and adjust salt and sugar to your preference.
- Do not overfill the peanut butter layer or the chocolate will not fully cover the top.
- Tap the muffin tin gently on the counter after each chocolate layer to pop air bubbles.
- Let the cups chill fully before peeling off the liners so the edges stay neat.
- Store the cups in a cool place so the chocolate does not bloom or turn streaky.
- Use mini muffin tins for parties and kids so each serving stays small and easy to grab.
How to Make Reeses Peanut Butter Cups Recipe
Step 1: Prep the pan
Line a standard muffin tin with 12 paper liners or a mini muffin tin with 24 liners.
Set the pan in the fridge while you prep the filling and chocolate.
This quick chill helps the first chocolate layer set faster.
Step 2: Mix the peanut butter filling
Add peanut butter, powdered sugar, brown sugar, salt, and vanilla to a medium bowl.
Stir with a spatula until the mixture turns thick, smooth, and slightly stiff.
If you want that classic candy-shop texture, stir in the crushed graham crackers at this point.
Taste the filling and adjust sweetness or salt to your liking.
If the filling feels too sticky to handle, chill it for 10 to 15 minutes so it firms up.
You want a dough-like texture that you can scoop and flatten without sticking everywhere.
Step 3: Melt the chocolate
Place the chocolate chips and coconut oil in a microwave safe bowl.
Microwave in 20 to 30 second bursts, stirring well after each round, until the chocolate turns smooth and glossy.
Stop heating as soon as only a few small pieces remain, then stir until they melt from the residual heat.
If you prefer a stovetop method, set the bowl over a small saucepan with barely simmering water.
Stir constantly until the chocolate melts and looks smooth.
Keep water out of the bowl so the chocolate stays silky.
Step 4: Make the bottom chocolate layer
Spoon about 1 to 1 1/2 teaspoons of melted chocolate into each liner for mini cups, or about 2 teaspoons for standard cups.
Tilt and swirl each liner or use the back of a spoon to push chocolate slightly up the sides.
You want a thin, even base that covers the bottom completely.
Tap the muffin tin gently on the counter to level the chocolate.
Place the pan in the fridge for 5 to 10 minutes until the chocolate starts to firm but does not turn rock hard.
You want it set enough to hold the filling without mixing into it.
Step 5: Add the peanut butter centers
Scoop small balls of the peanut butter mixture, about 1 teaspoon for mini cups or 1 tablespoon for standard cups.
Roll each portion quickly between your hands and flatten it into a disk slightly smaller than the liner.
Place one disk on top of the set chocolate in each cup.
Press the peanut butter disk down gently so it sits flat and leaves a small border of chocolate around the edges.
Do not press so hard that you crack the bottom layer.
If the filling sticks to your fingers, lightly dust your fingertips with powdered sugar.
Step 6: Top with chocolate
Spoon more melted chocolate over each peanut butter disk, about 1 to 1 1/2 teaspoons for mini cups or enough to cover for standard cups.
Use the back of a spoon to nudge the chocolate to the edges so it seals the peanut butter completely.
Tap the pan again on the counter to smooth the tops and release any air bubbles.
If you want a salted finish, sprinkle a few flakes of sea salt on each cup while the chocolate still looks wet.
Chill the pan in the fridge for 20 to 30 minutes until the chocolate sets fully.
You can also chill in the freezer for about 10 to 15 minutes if you feel impatient.
Step 7: Chill and serve
Once the cups feel firm to the touch, pull the pan from the fridge.
Peel off one liner slowly to check that the chocolate set cleanly.
If the sides still feel soft, chill for another 10 minutes.
Serve the cups slightly chilled or at cool room temperature so the centers stay creamy.
If you store them in the fridge, let them sit out for 5 to 10 minutes before serving so the chocolate softens just a bit.
Enjoy that perfect snap of chocolate with the smooth peanut butter center.
Variations I've Tried
Use crunchy peanut butter instead of creamy for a fun texture and extra peanut bits.
Swirl a teaspoon of honey into the peanut butter filling for a deeper, almost caramel-like sweetness.
Use dark chocolate chips for a more grown up version that tastes less sweet and more intense.
Add a thin layer of raspberry or strawberry jam on top of the peanut butter filling for a PB&J cup.
Press a few mini pretzel pieces into the peanut butter layer before you add the top chocolate for a salty crunch.
Swap peanut butter with almond butter or sunflower seed butter if you need a peanut free option.
How to Serve Reeses Peanut Butter Cups Recipe
Serve these homemade Reeses Peanut Butter Cups straight from the fridge for a firm snap or at room temperature for a softer, meltier bite. Pair them with cold milk, hot chocolate, coffee, or a simple cup of tea. Pack them in lunchboxes, stack them on dessert platters, or chop them into chunks and sprinkle over ice cream or yogurt. I also tuck a few into the freezer as a secret stash for late night cravings.
How to store
- Room temperature: Keep the cups in an airtight container in a cool, dry spot for up to 3 days if your kitchen stays under about 70°F.
- Fridge: Store in a sealed container for 1 to 2 weeks, with parchment between layers so they do not stick.
- Freezer: Freeze in a single layer on a baking sheet until solid, then transfer to a freezer bag or container and keep up to 2 months.
- Thawing: Let frozen cups sit in the fridge for about 30 minutes or on the counter for 10 to 15 minutes before eating.
- Best texture: Enjoy them slightly chilled so the chocolate holds its shape and the peanut butter center stays creamy.
Reese's Peanut Butter Cups Recipe
Ingredients
Method
- Line a 12-cup muffin pan with paper liners.
- In a microwave-safe bowl, combine chocolate chips and coconut oil. Microwave in 20–30 second bursts, stirring between each, until smooth and fully melted.
- Spoon about 1 to 1 1/2 teaspoons of melted chocolate into the bottom of each muffin liner and tilt or tap the pan so the chocolate coats the bottom evenly. Chill in the refrigerator for about 10 minutes until just set.
- Meanwhile, make the filling: In a medium bowl, mix peanut butter and softened butter until smooth. Add powdered sugar, salt, and vanilla extract and stir until thick and well combined.
- Divide the peanut butter mixture into 12 portions and roll each into a ball. Flatten gently into a disk that is slightly smaller than the muffin cup diameter.
- Place one peanut butter disk onto the set chocolate layer in each liner, pressing lightly so it sits flat without touching the sides of the liner.
- Spoon more melted chocolate over the top of each peanut butter disk, using enough to fully cover the filling and reach the sides of the liner. Tap the pan gently on the counter to smooth the tops and release air bubbles.
- Refrigerate for 30–40 minutes, or until completely set. Peel off the paper liners and serve. Store leftover peanut butter cups in an airtight container in the refrigerator for up to 1 week.
Notes
Approximate per 1 peanut butter cup (1 of 12): 220 calories; fat 15 g; saturated fat 6 g; carbohydrates 19 g; fiber 2 g; sugars 15 g; protein 4 g; sodium 95 mg. Values are estimates and will vary based on specific brands, measurements, and portion sizes.