
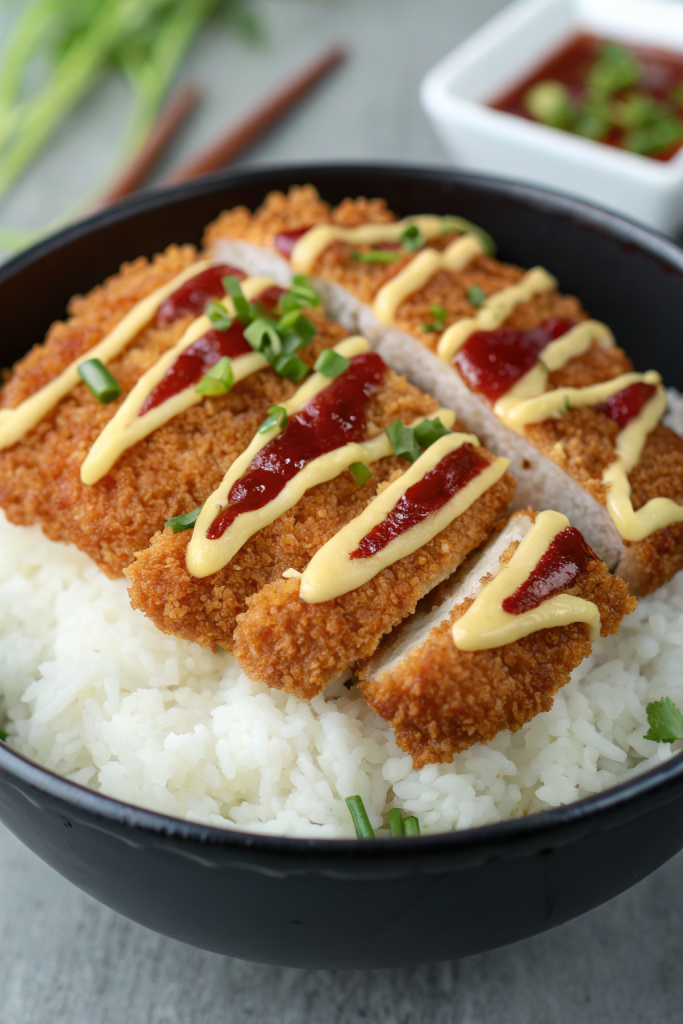
Crispy Japanese Katsu Bowls Recipe hits all the cravings: crunchy golden cutlets, glossy savory sauce, and fluffy rice in one cozy bowl. It works perfectly for busy weeknights since you finish it in about 40 minutes, but it still feels special enough for a weekend dinner. I tested versions of this so many times that my family started ranking katsu like a TV cooking show panel.
Why Make This Crispy Japanese Katsu Bowls Recipe at Home
Homemade katsu bowls taste hotter, crispier, and juicier than takeout, and you control the oil, salt, and sauce sweetness. You also stack the bowls exactly how you like them, with extra cabbage, extra sauce, or a sneaky layer of mayo under the cutlet.
You also save money when you fry at home, especially if you cook for more than two people. Leftovers pack beautifully for lunch, so you cook once and eat twice.
“This Crispy Japanese Katsu Bowls Recipe tastes better than our local spot and still crunches after the drive to the couch. ★★★★★”
Ingredients You Need
I list ingredients for a classic chicken katsu bowl, plus easy swaps for tofu or shrimp.
Protein
- 1 ½ pounds boneless, skinless chicken thighs
- Use thighs for juicier katsu and more forgiveness if you overcook slightly.
- Swap with chicken breast, pork-free turkey cutlets, extra firm tofu, or peeled shrimp.
- Kosher salt and black pepper to season
Breading station
- 1 cup all purpose flour
- Any basic store brand works.
- 2 large eggs
- Whisk with a splash of milk or water to thin.
- 1 ½ to 2 cups panko breadcrumbs
- Use Japanese style panko for the crunchiest texture.
- If you only have regular breadcrumbs, mix half breadcrumbs and half crushed cornflakes for more texture.
Katsu sauce
You can use bottled katsu sauce (often labeled “tonkatsu sauce”) as a shortcut. I still include a quick homemade version.
- 3 tablespoons ketchup
- 1 ½ tablespoons Worcestershire sauce
- 1 tablespoon soy sauce
- 1 tablespoon oyster sauce or vegetarian mushroom stir fry sauce
- 1 teaspoon sugar or honey
- ½ teaspoon rice vinegar
- Optional: ½ teaspoon Dijon mustard for a tiny kick
Rice and bowl base
- 2 cups uncooked short grain Japanese rice or sushi rice
- Use a rice cooker if you have one to keep things easy.
- 2 ½ cups water, or amount your rice package suggests
- 1 teaspoon neutral oil for the rice pot if you cook on the stove
- 2 to 3 cups finely shredded green cabbage
- Bagged coleslaw mix works as a shortcut.
- 1 to 2 carrots, cut into thin matchsticks or shaved with a peeler
- 2 to 3 green onions, thinly sliced
- 1 to 2 tablespoons toasted sesame seeds
Optional toppings and sauces
- Japanese mayonnaise or your favorite mayo
- Sriracha or chili crisp
- Pickled ginger or quick pickled cucumbers
- Avocado slices
- Soft boiled or jammy eggs
Oil and seasoning
- Neutral frying oil with high smoke point
- Use canola, vegetable, peanut, or grapeseed oil.
- Extra kosher salt and black pepper
- Optional: garlic powder and onion powder for seasoning the flour
Equipment list
- Cutting board and sharp chef’s knife
- Meat mallet or rolling pin to flatten chicken
- 3 shallow bowls or pie plates for breading
- Large heavy skillet or Dutch oven for frying
- Tongs or chopsticks for turning cutlets
- Wire rack set over a sheet pan, or a plate lined with paper towels
- Medium saucepan or rice cooker for rice
- Small bowl for mixing katsu sauce
- Instant read thermometer if you want precise frying
Tips & Mistakes
- Pound chicken to an even thickness so it cooks evenly and stays juicy.
- Pat chicken dry before seasoning so the flour sticks better and the crust stays crisp.
- Season every layer lightly, including flour and panko, so the katsu tastes flavorful all the way through.
- Keep one hand for wet ingredients and one hand for dry so you avoid breading your fingers.
- Press panko firmly onto the chicken so it adheres and does not fall off in the oil.
- Heat oil to about 340 to 350°F and keep it there so the crust turns golden without burning or turning greasy.
- Fry in batches and avoid crowding the pan so the oil temperature stays stable.
- Drain cutlets on a wire rack instead of stacking them so steam does not soften the crust.
- Slice katsu after a short rest so juices redistribute and the crust stays intact.
- Add sauce to the sliced katsu right before serving so the coating stays crisp.
How to Make Crispy Japanese Katsu Bowls Recipe
Step 1: Cook the rice
Rinse the rice in cold water until the water runs mostly clear. Drain well so the rice does not turn gummy. Cook in a rice cooker or in a saucepan with the water, then let it sit covered for 10 minutes after cooking so the grains relax.
Fluff the rice with a rice paddle or fork. Keep it covered on low or warm while you fry the katsu. If the rice dries out a bit, sprinkle a spoonful of water over it and cover again.
Step 2: Prep the vegetables and toppings
Shred the cabbage as thin as you can so it tastes light and crunchy. Cut carrots into matchsticks or peel them into ribbons. Slice green onions and prepare any other toppings like avocado, pickled ginger, or soft eggs.
Set everything in small bowls so you build the katsu bowls quickly once the cutlets finish frying. This step keeps the crust from sitting too long before serving. Think of it like a mini assembly line.
Step 3: Flatten and season the chicken
Place chicken thighs between two sheets of plastic wrap or parchment. Gently pound the thick parts with a meat mallet or rolling pin until each piece reaches about ½ inch thick. Trim any large bits of fat if you prefer.
Season both sides of the chicken with salt and pepper. If you like extra flavor, add a light sprinkle of garlic powder and onion powder. Set the chicken aside while you set up the breading station.
Step 4: Set up the breading station
Place flour in one shallow bowl. Beat eggs in a second bowl until smooth. Pour panko into a third bowl.
Season the flour and panko with a pinch of salt and pepper. This small step makes a big difference in flavor. Arrange the bowls in order: flour, egg, panko.
Step 5: Bread the chicken
Work with one piece of chicken at a time. Dredge in flour and shake off excess so you avoid a thick gummy layer. Dip in egg and let the extra drip off.
Press the chicken firmly into the panko on both sides. Scoop panko over the top and press again so it sticks. Place breaded pieces on a plate or tray and repeat with the rest.
Step 6: Mix the katsu sauce
In a small bowl, whisk ketchup, Worcestershire sauce, soy sauce, oyster or mushroom sauce, sugar or honey, and rice vinegar. Taste and adjust sweetness or tang to your liking. Add a tiny bit of mustard if you want more bite.
Set the sauce aside. It thickens slightly as it sits, which helps it cling to the sliced katsu. If you use bottled katsu sauce, pour it into a small bowl and stir so it looks glossy and smooth.
Step 7: Heat the oil
Pour about ½ inch to ¾ inch of oil into a large skillet or Dutch oven. Heat over medium to medium high until it reaches about 340 to 350°F. If you do not use a thermometer, drop in a breadcrumb and watch it sizzle gently and turn golden in about 30 seconds.
Adjust the heat so the oil stays hot but not smoking. Keep kids and pets away from the stove while you fry. Set your wire rack over a sheet pan nearby.
Step 8: Fry the katsu
Carefully lower a few breaded chicken pieces into the hot oil. Do not crowd the pan so the temperature stays steady. Fry each side for about 3 to 4 minutes, until the crust turns deep golden and the internal temperature reaches 165°F.
Use tongs or chopsticks to turn the cutlets gently. Move them around a little so they brown evenly. Transfer cooked pieces to the wire rack and sprinkle with a tiny pinch of salt while hot.
Repeat with remaining chicken, adjusting heat as needed. Skim out any burnt crumbs between batches so they do not darken the oil. Let the cutlets rest for 5 minutes before slicing.
Step 9: Slice the katsu
Place a cutlet on a cutting board and slice it crosswise into strips about ½ to ¾ inch wide. Use a sharp knife so you cut cleanly through the crust. Keep the slices in the original shape of the cutlet so they look neat on the bowl.
Repeat with all the cutlets. You can drizzle a bit of katsu sauce over the sliced pieces now or wait until they sit on the rice. Both ways taste great.
Step 10: Build the bowls
Spoon hot rice into each bowl. Add a handful of shredded cabbage and some carrots on one side. Fan sliced katsu over the top.
Drizzle katsu sauce over the meat and a little over the rice if you like. Add Japanese mayo in a zigzag, sprinkle green onions and sesame seeds, and tuck in any extras like avocado or pickled ginger. Serve right away while the katsu still crunches.
Variations I've Tried
Chicken breast katsu bowls taste a bit lighter, and you just pound the breasts slightly thinner and watch the cook time since they finish faster. Turkey cutlets work almost the same as chicken and give a leaner option that still tastes juicy with proper pounding and quick frying. Shrimp katsu bowls cook very quickly and taste great with extra lemon and a little chili sauce.
Tofu katsu bowls turn vegetarian friendly and still feel hearty. Press extra firm tofu, slice into slabs, season well, then bread and fry just like chicken. You can also bake or air fry breaded tofu or chicken if you prefer less oil, though the crust turns a bit lighter in color.
How to Serve Crispy Japanese Katsu Bowls Recipe
Serve these bowls hot with plenty of rice, a big pile of shredded cabbage, and extra katsu sauce on the side for dipping. Add a soft boiled egg, sliced cucumbers, or a simple miso soup to round out the meal. Kids usually love the crunchy cutlets, especially if you keep the sauce on the sweeter side.
Pair the bowls with iced green tea, hot barley tea, or sparkling water with citrus. Set everything on the table family style and let everyone build their own katsu bowl so they customize toppings and sauce levels.
How to store
- Store leftover katsu and rice in separate airtight containers in the fridge for up to 3 days.
- Keep shredded cabbage and fresh toppings in another container so they stay crisp for 2 to 3 days.
- Freeze cooked katsu cutlets in a single layer on a tray, then move them to a freezer bag for up to 2 months.
- Reheat katsu in a 375°F oven or air fryer until hot and crisp, about 8 to 12 minutes from the fridge or a bit longer from frozen, and warm rice in the microwave with a sprinkle of water and a loose cover.