
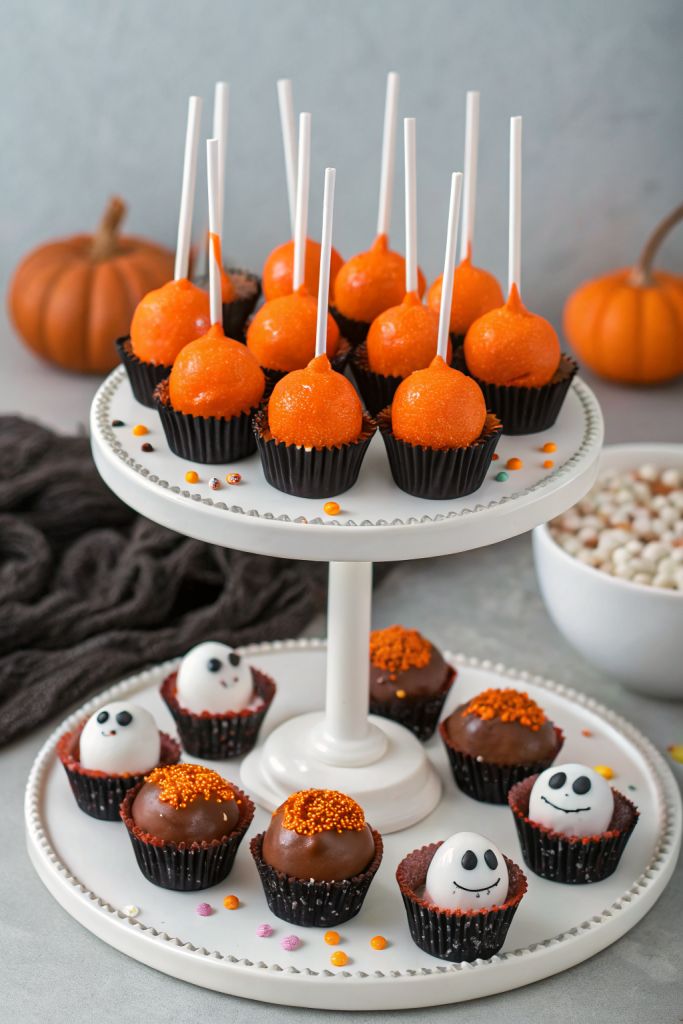
Halloween Cake Pops Recipe tastes like a bite of moist chocolate birthday cake wrapped in candy coating with a little crunch and a lot of frosting flavor. It works perfectly for busy parents, party hosts, or anyone who wants a spooky dessert in about 1 hour of active time. I first made these for a neighborhood block party, and my platter came back with nothing but crumbs and a plastic spider.
Why Make This Halloween Cake Pops Recipe at Home
Homemade Halloween cake pops cost less than store bought, and you control every detail from flavor to decorations. You also avoid dry, flavorless centers because you choose the cake, the frosting, and the chocolate coating.
You can involve kids in rolling and decorating, which turns dessert into an activity. You also customize them for school parties, office potlucks, or a horror movie night on the couch.
My kids said these Halloween cake pops taste better than bakery ones and begged me to make a double batch next time. ★★★★★
Ingredients You Need
Cake and frosting
- 1 standard box chocolate cake mix
- Any brand works; I often use Betty Crocker or Duncan Hines.
- You can use vanilla, red velvet, or funfetti if you prefer a lighter center.
- Ingredients listed on the cake mix box
- Usually eggs, oil, and water.
- 1 to 1 ¼ cups canned frosting
- Vanilla, cream cheese, or chocolate frosting all work.
- Use store brand to save money; the cake pops will still taste rich.
Coating and decorations
- 16 to 20 ounces candy melts or almond bark
- Use orange, black, white, or green for Halloween colors.
- I like Wilton or Ghirardelli melting wafers because they melt smoothly.
- 1 to 2 tablespoons refined coconut oil or vegetable shortening
- This thins the coating so it covers easily.
- Halloween sprinkles
- Use eyeball sprinkles, black jimmies, orange nonpareils, or sugar crystals.
- Edible candy eyes
- These turn cake pops into mummies, monsters, or ghosts.
- Black decorating gel or food-safe marker
- Draw faces on ghosts or pumpkins.
Equipment
- 9×13 inch baking pan
- Large mixing bowl
- Forks or your hands for crumbling cake
- Sturdy spoon or spatula
- 1 tablespoon cookie scoop or small ice cream scoop
- Baking sheets lined with parchment paper
- 6 inch lollipop sticks
- Styrofoam block, cardboard box with holes, or a colander to hold pops upright
- Microwave safe bowls
- Small cups or narrow bowls for dipping
Tips & Mistakes
- Chill the cake balls at least 30 minutes so they hold shape and do not slide off the sticks.
- Use only enough frosting to bind the crumbs; too much frosting turns the centers gummy and heavy.
- Roll cake balls tightly so they look smooth after coating.
- Dip the stick tip in melted coating before inserting; this glue step keeps the cake from falling off.
- Keep the coating warm and fluid; thick coating pulls cake off the stick.
- Work with a few cake pops at a time and keep the rest in the fridge so they stay firm.
- Do not rush the chilling or the coating will crack as the centers warm up.
- Tap the stick gently on the bowl edge and rotate the pop so extra coating drips off without leaving streaks.
- Add sprinkles while the coating still feels wet; if it sets, the decorations slide off.
- If the coating clumps, stir in a teaspoon of coconut oil at a time until it flows smoothly again.
How to Make Halloween Cake Pops Recipe
Bake the cake
- Preheat your oven to the temperature on the cake mix box. Grease a 9×13 inch pan or line it with parchment.
- Mix the cake batter according to package directions. Bake until a toothpick in the center comes out clean and the top springs back.
- Cool the cake completely in the pan. Warm cake melts frosting and turns the mixture mushy, so give it time.
Crumble and mix
- Once cool, cut the cake into large chunks and place them in a big mixing bowl.
- Use clean hands or a fork to crumble the cake into fine, even crumbs with no big pieces.
- Start with ¾ cup frosting and mix it into the crumbs. Add more frosting a spoonful at a time until the mixture holds together when you squeeze it but still feels slightly crumbly, not sticky.
Shape the cake balls
- Line a baking sheet with parchment. Use a 1 tablespoon scoop to portion the mixture so all cake pops match in size.
- Roll each portion between your palms until it looks smooth and round. Place each ball on the lined sheet.
- Chill the tray in the fridge for 30 to 45 minutes, or in the freezer for 15 to 20 minutes, until firm but not rock hard.
Attach the sticks
- Melt a small amount of candy melts in a microwave safe bowl in 20 to 30 second bursts, stirring between each burst until smooth.
- Dip the tip of each lollipop stick about ½ inch into the melted coating.
- Insert the dipped end of the stick halfway into a chilled cake ball. Set the pops upright on the tray and chill again for 10 to 15 minutes so the coating on the stick sets.
Melt the coating
- Place the remaining candy melts in a microwave safe bowl or tall narrow cup.
- Microwave in short bursts, stirring often, until smooth and fluid.
- Stir in 1 teaspoon coconut oil or shortening at a time until the coating flows like warm yogurt. You want it thin enough to coat without clumping.
Dip and decorate
- Hold a cake pop by the stick and dip it straight down into the melted coating until it covers the cake ball.
- Lift it out and gently tap the stick on the bowl edge while rotating the pop so extra coating drips off and the surface looks smooth.
- While the coating still feels wet, add sprinkles, candy eyes, or sanding sugar.
- For mummies, coat in white, let it set, then drizzle thin lines of white coating across and add candy eyes.
- For pumpkins, use orange coating, then draw faces with black gel once the coating sets.
- Stick each finished pop into a Styrofoam block or a box with holes so it stands upright. Let the coating set completely at room temperature.
Final chill
- Once the coating feels firm and dry, move the cake pops to the fridge for 15 to 20 minutes.
- Serve them chilled or at cool room temperature. The centers stay moist, and the coating keeps everything neat for party platters.
Variations I've Tried
I swap chocolate cake for red velvet and use cream cheese frosting for a vampire theme with red drizzle on top. I also use funfetti cake with vanilla frosting and coat them in white chocolate, then add pastel Halloween sprinkles for younger kids who do not love spooky faces. Oreo cake pops taste amazing too; I mix crushed chocolate sandwich cookies into vanilla cake and coat them in dark chocolate with bright green drizzle. If you like peanut butter, use chocolate cake with peanut butter frosting and coat them in milk chocolate, then top with crushed peanuts or chocolate chips.
How to Serve Halloween Cake Pops Recipe
Serve Halloween cake pops on a platter stuck into a foam block covered with tissue paper so they stand upright like a spooky forest. Add plastic spiders, candy corn, and mini pumpkins around the base for a fun display. Pack them in treat bags with a twist tie for school parties or trunk or treat events. Pair them with hot chocolate, apple cider, or milk for a kid friendly dessert table.
How to store
- Store cake pops in an airtight container at room temperature for up to 2 days if your kitchen stays cool and dry.
- Keep them in the fridge for 5 to 7 days; place parchment between layers so they do not stick.
- Freeze undecorated cake balls for up to 2 months in a freezer bag; thaw in the fridge, then coat and decorate.
- Freeze finished cake pops for up to 1 month; wrap each one in plastic, place in a container, thaw in the fridge, then bring to room temperature before serving.
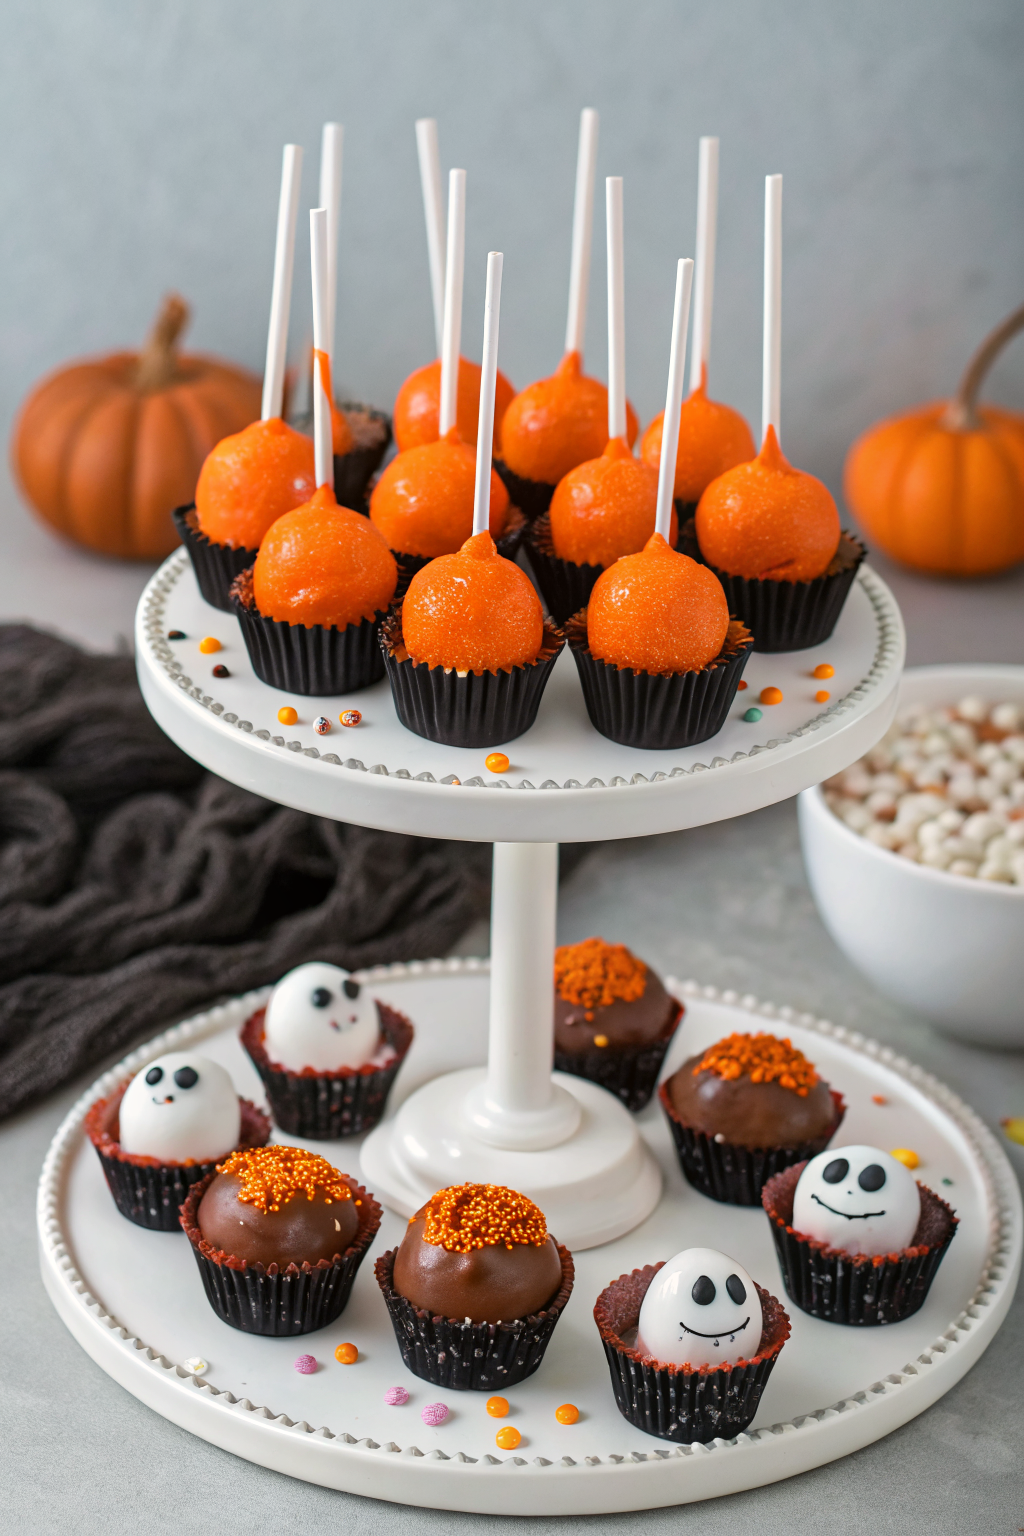
Halloween Cake Pops Recipe
Ingredients
Method
- Preheat the oven to the temperature listed on the cake mix box. Grease a 9x13 inch pan or line it with parchment paper.
- Prepare the cake batter according to the package directions using the eggs, oil, and water listed on the box.
- Pour the batter into the prepared pan and bake until a toothpick inserted in the center comes out clean and the top springs back. Cool the cake completely in the pan before proceeding.
- Once the cake is completely cool, cut it into large chunks and place them in a large mixing bowl.
- Use clean hands or a fork to crumble the cake into fine, even crumbs with no large pieces remaining.
- Add 3/4 cup frosting to the cake crumbs and mix until combined. Add more frosting a spoonful at a time until the mixture holds together when squeezed but still feels slightly crumbly, not sticky.
- Line a baking sheet with parchment paper. Use a 1 tablespoon cookie scoop or small ice cream scoop to portion the cake mixture into even mounds.
- Roll each portion between your palms until smooth and round, then place the cake balls on the lined baking sheet.
- Chill the tray in the refrigerator for 30 to 45 minutes, or in the freezer for 15 to 20 minutes, until the cake balls are firm but not rock hard.
- Melt a small amount of candy melts in a microwave-safe bowl in 20 to 30 second bursts, stirring between each burst, until smooth.
- Dip the tip of each lollipop stick about 1/2 inch into the melted coating.
- Insert the dipped end of the stick halfway into a chilled cake ball. Return the pops to the tray and chill for another 10 to 15 minutes so the coating around the stick sets and holds.
- Place the remaining candy melts in a microwave-safe bowl or tall, narrow cup.
- Microwave in short bursts, stirring frequently, until melted and smooth.
- Stir in 1 teaspoon of coconut oil or shortening at a time until the coating flows smoothly and has a consistency similar to warm yogurt, thin enough to coat the cake pops without clumping.
- Hold a cake pop by the stick and dip it straight down into the melted coating until the cake ball is fully covered.
- Lift the pop out and gently tap the stick on the edge of the bowl while rotating the pop to allow excess coating to drip off and the surface to become smooth.
- While the coating is still wet, decorate with Halloween sprinkles, candy eyes, or sanding sugar as desired.
- For mummy pops, coat in white, let the coating set, then drizzle thin lines of white coating across the pop and add candy eyes.
- For pumpkin pops, use orange coating and allow it to set, then draw faces with black decorating gel or a food-safe marker.
- Place each finished pop upright in a Styrofoam block or box with holes so it can stand while the coating sets completely at room temperature.
- Once the coating is firm and dry, transfer the cake pops to the refrigerator for 15 to 20 minutes to finish setting.
- Serve the cake pops chilled or at cool room temperature. Arrange them upright on a platter or in a foam block for a festive Halloween display.
Notes
Approximate per 1 cake pop (about 1/36 of recipe, using chocolate cake mix, 1 cup frosting, and 18 oz candy melts): 150 calories; fat 8 g; saturated fat 4 g; carbohydrates 19 g; fiber 1 g; sugars 14 g; protein 1 g; sodium 140 mg. Values will vary based on cake mix, frosting, candy coating brand, decorations, and portion size.