How to Make Sourdough Starter tastes tangy, complex, and a little bit buttery, with a smell that reminds me of walking past an old-school bakery at 6 a.m. How to Make Sourdough Starter works for curious beginners and bread nerds alike, and you only need about 5 to 7 days of low-effort babysitting. I still feel weirdly proud every time my starter bubbles up like a science fair project that actually worked.
Why Make Sourdough Starter Is Worth It
You turn flour and water into a living, bubbly starter that gives bread real flavor instead of that one-note packet-yeast taste. You control the flavor, the schedule, and the ingredients, which helps if you care about organic flours or avoiding additives.
You also save money, because one healthy jar of starter can power years of loaves, pancakes, waffles, and pizza. The process teaches you to read dough with your eyes and nose, not just a timer, which makes every bread recipe feel less mysterious.
This Sourdough Starter method gave me a strong, bubbly starter in under a week and the best bread of my life. ★★★★★
Ingredients You Need
Core ingredients
- Flour, 2 to 3 cups total over several days
- Use unbleached all-purpose flour or bread flour for a reliable starter.
- Mix in whole wheat or rye flour for the first couple of days to speed up activity.
- I like King Arthur or Bob’s Red Mill, but any good unbleached flour works.
- Avoid bleached flour, because it often slows or weakens fermentation.
- Water, about 2 to 3 cups total
- Use room temperature water.
- If your tap water smells strongly of chlorine, use filtered or rest tap water in a jar overnight so chlorine can dissipate.
- Aim for water that feels cool but not cold to the touch.
Optional helpers
- A small pinch of whole grain flour on day 1
- Whole wheat or rye adds natural yeasts and bacteria that kickstart fermentation.
- A teaspoon of pineapple juice or apple cider on day 1
- Some bakers add a tiny bit of acid to keep early bad bacteria in check.
- I usually skip this, but it can help in very warm kitchens.
Equipment list
- Kitchen scale
- You can use cups, but a scale keeps the starter consistent and easier to troubleshoot.
- Medium glass jar or clear container, 16 to 32 ounces
- A clear jar lets you see bubbles and rise.
- Leave plenty of headroom so the starter does not overflow.
- Loose lid, small plate, or clean cloth with rubber band
- You want to cover the jar but still let it breathe.
- Spoon or small spatula
- Stir the mixture well and scrape down the sides.
- Rubber band or piece of tape
- Mark the starter level so you can see how much it rises.
Quick Tips & substitutions
- Use unbleached flour for a stronger starter; mix in 25 to 50 percent whole wheat or rye for faster bubbling.
- If your tap water smells like a swimming pool, use filtered water or let tap water sit out overnight.
- Keep the jar in a warm spot, around 70 to 78°F; a slightly warm oven with the light on or a high shelf often works.
- If the starter smells like nail polish remover, feed it more often and keep it a bit cooler.
- If nothing happens by day 3, switch to half white flour and half whole wheat or rye for a couple of feedings.
- Use equal weights of flour and water for a classic, easy-to-use starter; that means 50 grams flour and 50 grams water, not 1 cup and 1 cup.
- If you do not own a scale, aim for a thick pancake batter texture and adjust with a spoonful of flour or water as needed.
- Mark the jar with a rubber band at the starting level so you can see when it doubles.
- If you see a dark liquid on top, called hooch, stir it in or pour it off, then feed the starter; it just feels hungry.
- If you miss a feeding, do not panic; feed twice a day for a couple of days and the starter usually bounces back.
How to Make Sourdough Starter
Day 1: Mix the first starter
- Combine flour and water
- Add 50 grams whole wheat or rye flour and 50 grams water to your jar.
- Stir until no dry bits remain and the mixture looks like thick batter.
- Scrape down the sides and level the top.
- Mark the level with a rubber band or tape.
- Cover and rest
- Cover the jar loosely with a lid, small plate, or cloth.
- Set the jar in a warm, draft free spot, away from direct sun.
- Leave it alone for 24 hours.
- Do not feed again on day 1, even if you see a few bubbles.
Day 2: Check and feed
- Check for early signs of life
- Look for a few bubbles, a slightly tangy or wheaty smell, or a bit of rise.
- If nothing seems different, you still move ahead with a feeding.
- Early activity can come from bacteria that fade later, so you do not judge success yet.
- Discard and feed
- Stir the starter, then remove about half and throw it away or save it for pancakes later.
- Add 50 grams unbleached all-purpose or bread flour and 50 grams water to the jar.
- Stir very well to add air and hydrate all the flour.
- Cover again and leave for another 24 hours.
Day 3: Increase feedings if needed
- Evaluate activity
- By now you often see more bubbles and a slightly sour, yogurty smell.
- The starter may rise a bit, then fall.
- If it smells rotten or moldy, start over with fresh flour and water, because that starter will not improve.
- Feed once or twice
- Discard down to about 50 grams starter.
- Add 50 grams flour and 50 grams water, stir, and cover.
- If your kitchen feels warm and the starter rises and falls within 12 hours, start feeding twice a day, about 12 hours apart.
- If it still feels sluggish, keep feeding once a day and use half whole wheat or rye flour in each feeding.
Day 4: Build strength and consistency
- Watch the rise pattern
- You want the starter to double in volume within 4 to 8 hours after a feeding.
- It should smell pleasantly tangy, not harsh or rotten.
- The surface should look bubbly and a bit airy inside when you peek through the glass.
- Keep regular feedings
- Continue the pattern: keep 50 grams starter, feed with 50 grams flour and 50 grams water, once or twice a day.
- Stir thoroughly every time so you mix in oxygen and hydrate new flour.
- Keep the jar in a consistent warm spot so the starter does not swing between hot and cold.
- If it rises and collapses very fast, feed a bit more often or move it to a slightly cooler area.
Day 5 to 7: Test for baking strength
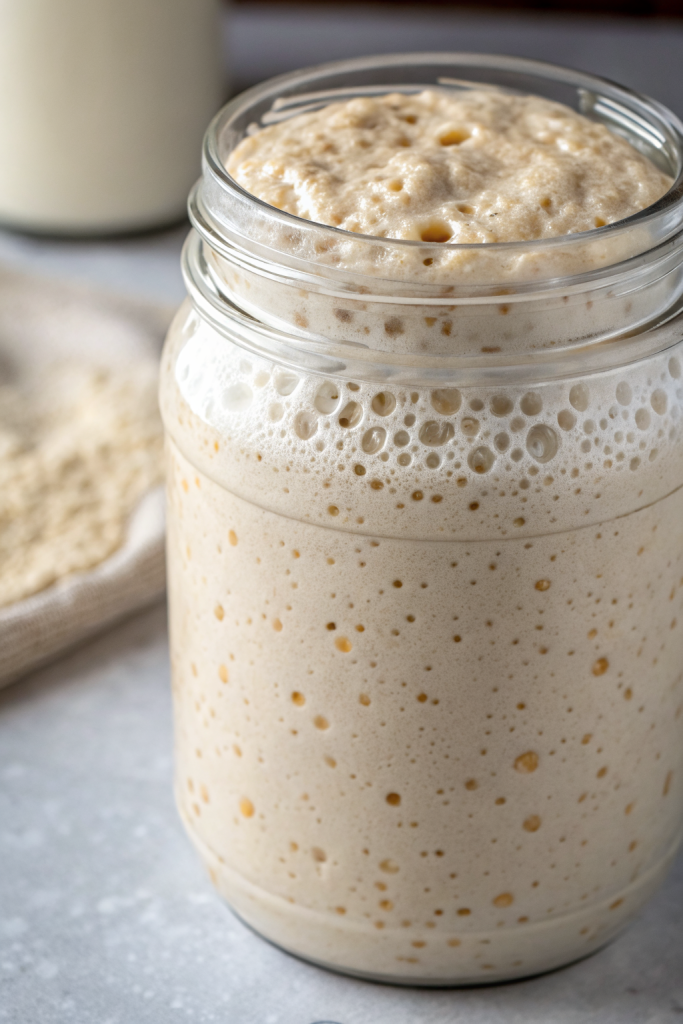
- Check for peak activity
- When the starter doubles in 4 to 6 hours after feeding and smells like mild yogurt with a hint of fruit, it usually feels ready to bake.
- The surface should show lots of small and medium bubbles.
- The texture should feel airy and stretchy, not runny or stiff.
- Float test (optional)
- Take a small spoonful of starter at its peak, right after it doubles.
- Drop it gently into a glass of room temperature water.
- If it floats, it holds enough gas and structure to leaven bread.
- If it sinks, keep feeding for another day or two and test again.
- Name and maintain your starter
- Give your starter a name, because you will talk about it more than you expect.
- Keep feeding it daily at room temperature if you bake often.
- If you bake once a week or less, store it in the fridge and feed it at least once a week.
- Always keep some starter after baking so you can continue the cycle.
Recipe Variations
- Gluten free starter
- Use brown rice flour, sorghum flour, or a gluten free all purpose blend instead of wheat flour.
- Keep the same equal weight flour and water ratio.
- Vegan starter
- The basic starter already counts as vegan, since it uses only flour and water.
- Low carb style
- True sourdough starter needs starch, but you can use whole grain flours and bake smaller loaves to reduce overall carbs per serving.
- Rye-forward starter
- Feed with 50 to 100 percent rye flour for a more intense flavor and faster fermentation.
- Mild flavor starter
- Use mostly white bread flour, feed regularly, and store in the fridge between bakes to keep the flavor gentle.
Ways to Serve
- Use the active starter to bake classic sourdough bread with a chewy crust and open crumb.
- Stir discard into pancakes, waffles, or crepes for a tangy twist.
- Mix discard into pizza dough for extra flavor and a crisp, airy crust.
- Add a spoonful of starter to muffin or quick bread batter for subtle tang and tenderness.
- Stir discard into crackers, flatbreads, or savory biscuits.
Storage Success
Keep the starter at room temperature if you bake several times a week and feed it once or twice a day. If you bake less often, store the jar in the fridge, loosely covered, and feed it at least once a week. When you want to bake, pull it out, feed it a couple of times at room temperature, and wait until it doubles reliably again. If you ever neglect it for a long stretch, scrape off any dark liquid, take a clean spoonful from the middle, feed it with fresh flour and water, and nurse it back with a few regular feedings.

How to Make Sourdough Starter
Ingredients
Method
- Day 1: In a clean glass jar or container, mix whole wheat flour, all-purpose flour, and lukewarm water until no dry spots remain. The mixture should be thick like pancake batter. Scrape down the sides, cover loosely with a lid or cloth, and let sit at room temperature (70–75°F) for 24 hours.
- Day 2: Check the mixture. You may see a few small bubbles, or no visible change yet. Discard about half of the mixture (roughly 1/2 cup). Add 1/2 cup unbleached all-purpose flour and 1/2 cup lukewarm water. Stir until smooth, cover loosely, and let rest another 24 hours at room temperature.
- Day 3: By now, you should begin to see more bubbles and a mild tangy aroma. Again, discard about half of the starter. Feed with 1/2 cup unbleached all-purpose flour and 1/2 cup lukewarm water, stirring to combine. Cover and rest 24 hours.
- Day 4: The starter should be noticeably more active, with bubbles throughout and some rise after feeding. Discard half of the starter. Feed with 1/2 cup unbleached all-purpose flour and 1/2 cup lukewarm water. If it is very sluggish, start feeding every 12 hours instead of every 24 hours.
- Day 5 and beyond: Continue a pattern of discarding about half the starter and feeding with equal parts flour and water by volume (or equal weights by scale). Keep the starter at a comfortable room temperature and adjust feeding to every 12 hours as activity increases.
- Check for readiness: The starter is ready to bake with when it at least doubles in volume within 4–8 hours of feeding, has a pleasantly tangy smell, and shows a network of bubbles throughout. A small spoonful should float in a bowl of cool water, indicating good aeration.
- Ongoing maintenance at room temperature: If baking often, continue daily or twice-daily feedings. Always discard part of the starter before feeding to keep the total volume manageable and the yeast population strong.
- Refrigerator storage: If baking less frequently, let the starter become active after a feeding, then refrigerate covered. Once a week, remove from the fridge, discard about half, feed with fresh flour and water, let it become bubbly at room temperature, then return it to the refrigerator. Before baking, give it 1–2 room-temperature feedings until it is active and doubling reliably.
Notes
Sourdough starter is essentially a mixture of flour and water, so its nutrition profile is similar to diluted flour.
Approximate per 2-tablespoon (30 g) active starter: 60 calories; fat 0.2 g; saturated fat 0 g; carbohydrates 13 g; fiber 0.5 g; sugars 0 g; protein 2 g; sodium 1–2 mg. Values vary based on flour type, hydration level, and feeding schedule.
Because starter is used as a leavening component rather than eaten in large quantities, the nutritional impact per slice of finished sourdough bread is modest. Using whole-grain flours will increase fiber, vitamins (notably B vitamins), and minerals such as iron and magnesium.