

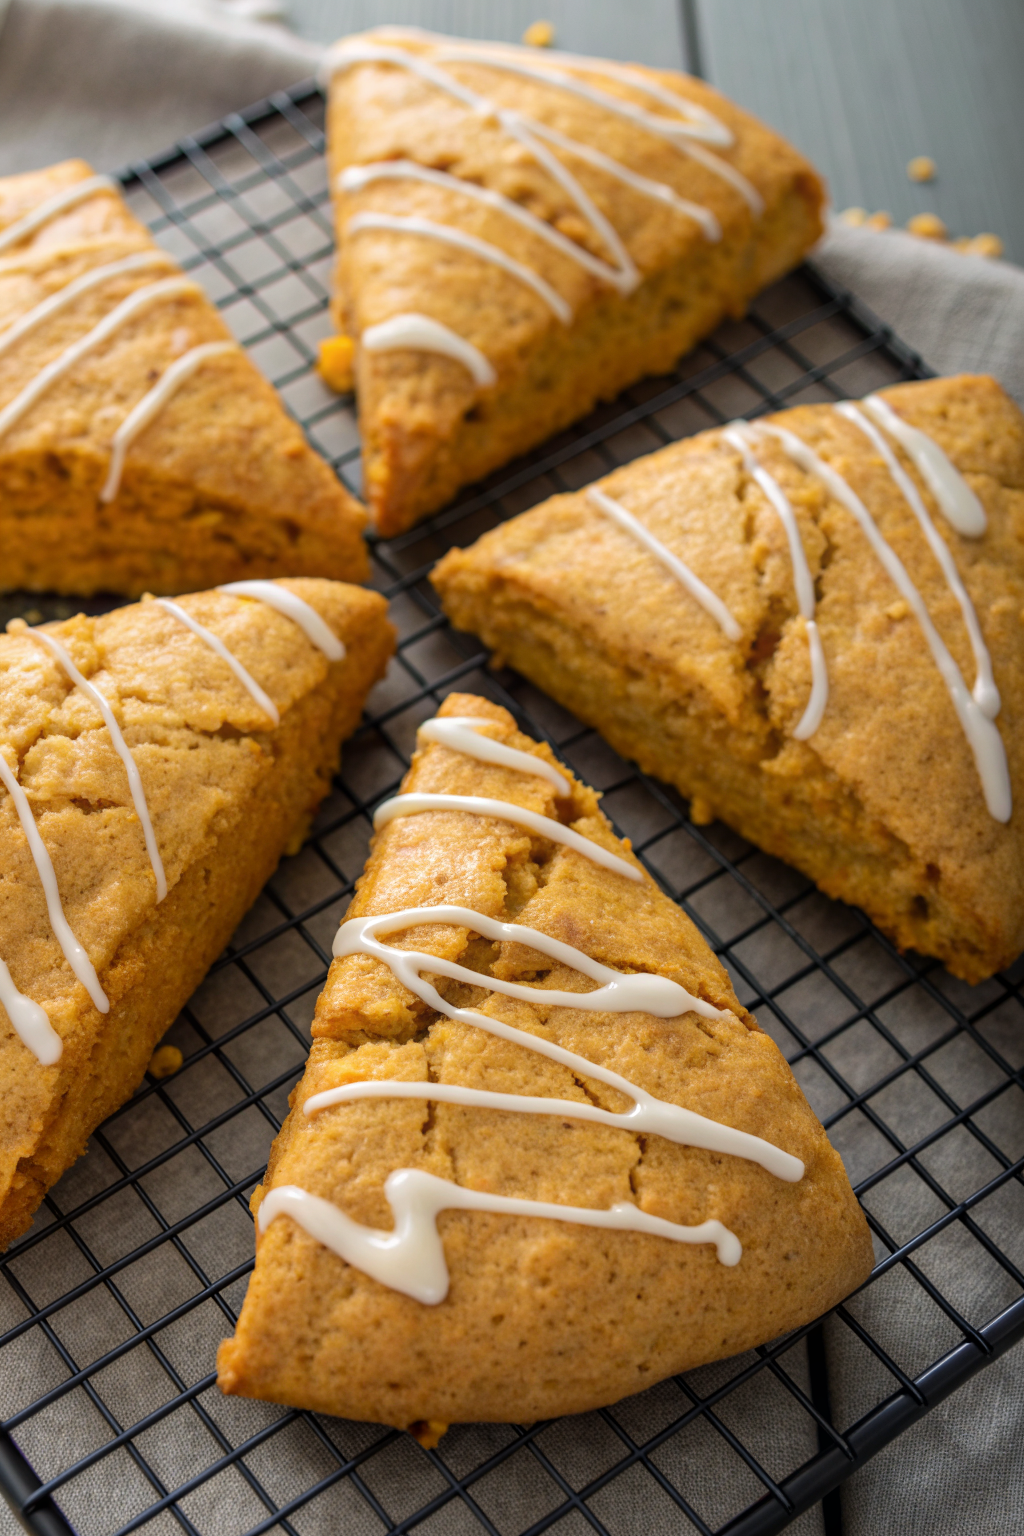
Tasty Mini Pumpkin Scones Recipe tastes like a cozy pumpkin spice latte in buttery, crumbly bite-size form, with crisp edges and tender centers. It suits busy bakers who want a fall bakery treat on the table in about 35 minutes, start to finish. I tested these on my neighbors during a football Sunday, and not a single crumb survived.
Why Make This Tasty Mini Pumpkin Scones Recipe at Home
You control the spices, sweetness, and glaze thickness, so the flavor hits exactly how you like it. Store-bought pumpkin scones often taste dry or overly sweet, while these mini ones stay moist from pumpkin puree and real butter.
Mini size also means perfect snack portions for kids, brunch trays, and coffee breaks. You mix everything in one bowl, pat out the dough, cut, and bake, so cleanup stays easy.
These mini pumpkin scones taste like a cozy coffee shop treat in my own kitchen, and they disappear faster than I can brew a second cup of coffee ★★★★★
Ingredients You Need
Dry ingredients
- 2 cups all-purpose flour
- 1 tablespoon baking powder
- 1 teaspoon ground cinnamon
- 1 teaspoon pumpkin pie spice
- 1/4 teaspoon ground nutmeg
- 1/4 teaspoon ground ginger
- 1/2 teaspoon fine sea salt
- 1/3 cup light brown sugar, packed
Use any good unbleached all-purpose flour; King Arthur and Gold Medal both work great. If you lack pumpkin pie spice, use extra cinnamon plus a pinch more nutmeg and ginger.
Cold ingredients
- 6 tablespoons unsalted butter, very cold, cut into small cubes
- 1/2 cup cold heavy cream, plus extra for brushing
- 1 large egg, cold
I prefer unsalted butter so I control the salt level. If you only have salted butter, reduce the added salt to a pinch.
Pumpkin and flavor boosters
- 1/2 cup pumpkin puree (not pumpkin pie filling)
- 2 teaspoons vanilla extract
- Optional: 1 teaspoon finely grated orange zest for a bright note
Use canned pure pumpkin puree like Libby’s for consistent texture. If you use homemade pumpkin puree, pat it dry with paper towels so the dough does not turn sticky.
Simple vanilla glaze
- 1 cup powdered sugar, sifted
- 2 to 3 tablespoons milk or half-and-half
- 1 teaspoon vanilla extract
- Pinch of salt
- Optional: 1/4 teaspoon pumpkin pie spice for a spiced glaze
If you want a thicker glaze that sets firm, use less milk. If you want a thin drizzle, add a splash more.
Pantry shortcuts and substitutions
- Swap heavy cream with half-and-half in a pinch, but chill it very well.
- Use coconut milk from a carton for a dairy-light version, though the texture turns slightly softer.
- Replace brown sugar with white sugar plus 1 teaspoon molasses if you need a quick substitute.
- Use gluten free all-purpose baking blend that includes xanthan gum, and add 1 extra tablespoon of cream if the dough feels dry.
Equipment list
- Large mixing bowl
- Medium bowl for glaze
- Pastry cutter, fork, or box grater for the butter
- Rubber spatula or wooden spoon
- Measuring cups and spoons
- Parchment paper or silicone baking mat
- Baking sheet
- Bench scraper or sharp knife
- Cooling rack
Tips & Mistakes
- Chill the butter until very firm, and work quickly so it stays cold; warm butter turns the scones dense.
- Grate the butter on a box grater if you dislike cutting it; this coats the flour evenly and keeps the texture tender.
- Do not overmix the dough; stop as soon as it comes together or the mini pumpkin scones turn tough.
- Lightly flour your hands and work surface; too much flour dries the dough and steals that soft crumb.
- Pat the dough instead of rolling it; rolling compresses the layers and reduces flakiness.
- Cut small triangles with a sharp knife and slice straight down; sawing motions seal the edges and block rise.
- Space the scones apart on the baking sheet; crowding them prevents browning and keeps the sides pale.
- Brush the tops with cream, not egg wash; cream gives a tender crust and gentle color without a hard shell.
- Let the scones cool slightly before glazing; hot scones melt the glaze into a puddle.
- Taste the first batch and adjust spices next time; some people love extra cinnamon while others prefer a milder pumpkin spice flavor.
How to Make Tasty Mini Pumpkin Scones Recipe
Step 1: Preheat and prep
Preheat the oven to 400°F and line a baking sheet with parchment paper or a silicone mat. This temperature gives the mini pumpkin scones a quick lift and golden edges. Set the lined pan aside.
Step 2: Mix the dry ingredients
Add flour, baking powder, cinnamon, pumpkin pie spice, nutmeg, ginger, salt, and brown sugar to a large bowl. Whisk until everything looks evenly combined and no sugar clumps remain. This step spreads the spices through the flour so each bite tastes balanced.
Step 3: Cut in the cold butter
Add the cold butter cubes to the flour mixture. Use a pastry cutter, fork, or your fingers to cut the butter into the flour until you see pea-size pieces. Keep some slightly larger bits; they create those flaky, tender pockets in the finished mini pumpkin scones.
Step 4: Whisk the wet ingredients
In a separate bowl or large measuring cup, whisk pumpkin puree, heavy cream, egg, vanilla, and orange zest if you use it. Stir until the mixture looks smooth and uniform. Cold ingredients help the dough stay firm and easy to handle.
Step 5: Bring the dough together
Pour the pumpkin mixture into the flour and butter mixture. Use a spatula to fold everything together gently until a shaggy dough forms and no big dry patches remain. If the dough feels too dry and crumbly, add 1 tablespoon of cream at a time until it holds together but still feels slightly sticky.
Step 6: Shape the dough
Turn the dough out onto a lightly floured surface. Gently pat it into a rectangle about 6 inches by 8 inches and about 3/4 inch thick. Keep a light touch so the dough stays airy.
Step 7: Cut into mini scones
Use a sharp knife or bench scraper to cut the rectangle into 4 long strips, then cut each strip into small triangles. Aim for about 16 to 20 mini pumpkin scones, depending on how tiny you want them. Transfer each piece to the prepared baking sheet, leaving some space between them.
Step 8: Chill briefly and brush
Place the baking sheet in the fridge for 10 minutes while the oven finishes heating. This quick chill firms the butter again and helps the scones puff nicely. After chilling, brush the tops lightly with a bit of heavy cream.
Step 9: Bake
Slide the tray into the oven and bake for 12 to 15 minutes, until the tops look set and lightly golden and the edges feel firm. Smaller scones bake faster, so check at 11 minutes. If a toothpick in the center comes out clean or with just a few moist crumbs, they stand done.
Step 10: Cool before glazing
Move the mini pumpkin scones to a cooling rack and let them cool for at least 10 to 15 minutes. Warm scones hold glaze better than hot ones. Use this time to mix the glaze.
Step 11: Mix the vanilla glaze
In a medium bowl, whisk powdered sugar, vanilla, salt, and 2 tablespoons of milk or half-and-half. Add more liquid a teaspoon at a time until the glaze reaches a thick but pourable consistency. If you want a spiced glaze, whisk in pumpkin pie spice.
Step 12: Glaze the mini pumpkin scones
Drizzle the glaze over the cooled mini pumpkin scones with a spoon or piping bag. You can glaze just the tops or zigzag across the whole surface. Let the glaze set for about 10 minutes, then serve.
Variations I've Tried
I swap the vanilla glaze with a maple glaze by using maple syrup instead of some of the milk and adding a drop of maple extract. That version tastes amazing with coffee or hot tea. I also fold in 1/3 cup mini chocolate chips for a dessert-style pumpkin scone that kids inhale.
Sometimes I add chopped toasted pecans or walnuts to the dough for crunch and a nutty flavor. A cranberry version also works well; I stir in 1/3 cup dried cranberries and skip the pumpkin pie spice in the glaze. When I want a lighter option, I use half whole wheat flour and add 1 extra tablespoon of cream to keep the texture soft.
How to Serve Tasty Mini Pumpkin Scones Recipe
Serve these mini pumpkin scones warm or at room temperature with a mug of coffee, chai, or hot cocoa. Pair them with scrambled eggs and fresh fruit for a cozy fall breakfast spread. They also sit perfectly on a brunch board with yogurt, berries, and a little honey.
Kids love them as an after-school snack with a glass of cold milk. If you host a fall gathering, arrange them on a tiered stand and drizzle extra glaze right before serving for a bakery-style look.
How to store
- Keep leftover mini pumpkin scones in an airtight container at room temperature for up to 2 days.
- Store them in the fridge for up to 5 days; warm them briefly before serving to refresh the texture.
- Freeze unglazed scones in a single layer, then move them to a freezer bag and store for up to 2 months.
- Reheat from room temperature in a 300°F oven for 5 to 8 minutes, or from frozen for 10 to 12 minutes, then glaze once warm.
Tasty Mini Pumpkin Scones
Ingredients
Method
- Preheat the oven to 400°F and line a baking sheet with parchment paper or a silicone baking mat.
- In a large bowl, whisk together the flour, baking powder, cinnamon, pumpkin pie spice, nutmeg, ginger, salt, and brown sugar until evenly combined and no sugar clumps remain.
- Add the cold butter cubes to the dry ingredients. Cut the butter into the flour using a pastry cutter, fork, or your fingers until you see pea-size pieces, leaving some slightly larger bits for flakiness.
- In a separate bowl or large measuring cup, whisk together the pumpkin puree, heavy cream, egg, vanilla, and orange zest (if using) until smooth and uniform.
- Pour the pumpkin mixture into the flour and butter mixture. Gently fold with a spatula until a shaggy dough forms and no large dry patches remain. If the dough seems too dry and crumbly, add heavy cream 1 tablespoon at a time just until it holds together but remains slightly sticky.
- Turn the dough out onto a lightly floured surface. Gently pat it into a rectangle about 6 x 8 inches and about 3/4 inch thick, handling the dough lightly to keep it airy.
- Use a sharp knife or bench scraper to cut the rectangle into 4 long strips, then cut each strip into small triangles to make about 16 to 20 mini scones. Transfer the pieces to the prepared baking sheet, leaving space between them.
- Place the baking sheet in the refrigerator for 10 minutes to firm the butter. Remove, then lightly brush the tops of the scones with a little heavy cream.
- Bake for 12 to 15 minutes, until the tops are set and lightly golden and the edges feel firm. Smaller scones may be done closer to 11–12 minutes. A toothpick inserted in the center should come out clean or with a few moist crumbs.
- Transfer the scones to a cooling rack and let them cool for 10 to 15 minutes before glazing.
- While the scones cool, prepare the glaze. In a medium bowl, whisk together the powdered sugar, vanilla, salt, and 2 tablespoons of milk or half-and-half. Add more liquid a teaspoon at a time until the glaze is thick but pourable. For a spiced glaze, whisk in pumpkin pie spice.
- Drizzle the glaze over the cooled mini pumpkin scones with a spoon or piping bag. Let the glaze set for about 10 minutes before serving.
Notes
Approximate per 1 mini scone (1 of 16, including glaze): 170 calories; fat 8 g; saturated fat 5 g; carbohydrates 23 g; fiber 1 g; sugars 11 g; protein 3 g; sodium 140 mg. Values are estimates and will vary based on brands, exact size of scones, and any substitutions.