
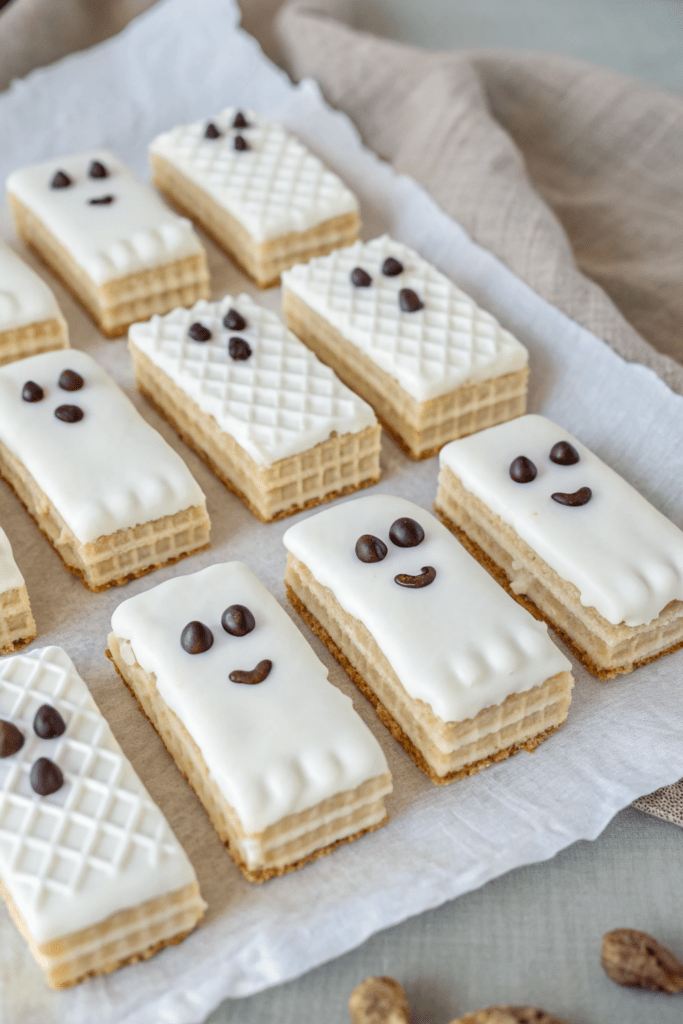
Chocolate Dipped Ghost Wafer Cookies Recipe tastes like a crunchy vanilla cookie hugged by rich, snappy chocolate with a sweet marshmallowy face on top. It works perfectly for busy Halloween bakers who want a cute dessert in under 30 minutes from start to finish. I tested these with my kids and my neighbors, and not a single ghost survived the night.
Why Chocolate Dipped Ghost Wafer Cookies Recipe Is Worth It
You get maximum Halloween cuteness with almost zero stress. The base uses store bought vanilla wafer cookies, so you spend your time decorating instead of measuring flour.
The chocolate sets quickly, the ghosts hold their shape, and the whole tray looks like you spent hours on it. Kids can help with dipping and dotting the faces, so it doubles as an easy holiday activity.
“These Chocolate Dipped Ghost Wafer Cookies disappeared faster than any other Halloween treat I served, and everyone asked for the recipe. ★★★★★”
Ingredients You Need
For the Chocolate Dipped Ghost Wafer Cookies Recipe
- 1 package vanilla wafer cookies
- Use classic rectangular vanilla wafers, not round ones. Any brand works, but choose a sturdy cookie that does not crumble easily.
- 1 1/2 cups white chocolate chips or white candy melts
- Candy melts give a smoother, brighter white color and set more firmly. White chocolate chips taste richer but can melt a bit softer.
- 1 tablespoon refined coconut oil or vegetable shortening
- This thins the chocolate so it coats the wafers smoothly. Skip it if you use a very fluid melting wafer.
- 1/2 cup semisweet or dark chocolate chips
- Use these for the ghost eyes and mouths. Mini chips or a chopped bar also work.
- 1 teaspoon neutral oil for the dark chocolate
- This helps the dark chocolate pipe smoothly. Any mild oil like canola or sunflower works.
- Optional: 1/4 teaspoon vanilla extract for the white chocolate
- Stir this in after melting to boost flavor. Avoid adding liquid if your white chocolate seizes easily.
Pantry shortcuts and swaps
- Use pre flavored vanilla wafers like honey or cinnamon if you want a twist.
- Use pre made white coating bark if you struggle with melting chocolate.
- Use mini chocolate chips pressed in directly for eyes if you do not want to pipe faces.
Equipment list
- Microwave safe bowls or a double boiler
- Silicone spatula
- Parchment paper or a silicone baking mat
- Baking sheet or large cutting board
- Small piping bag or zip top bag with a tiny corner snipped
- Toothpick or skewer for fixing tiny face details
- Cooling rack (optional, but helpful for airflow)
Quick Tips & substitutions
- Dry the wafers completely and keep them at room temperature so the chocolate sticks well.
- Use candy melts if you want a bright, opaque white ghost color with less fuss.
- Melt chocolate in short bursts of 15 to 20 seconds and stir often to avoid scorching.
- If the white coating looks too thick, stir in 1 teaspoon of oil at a time until it flows like warm honey.
- Keep a couple of extra wafers nearby so you can test the dipping thickness before you commit to the whole batch.
- Use mini chocolate chips pressed into the soft white coating for eyes and mouths if you do not want to pipe.
- Swap vanilla wafers with gluten free vanilla cookies for a gluten free version.
- Use dairy free white chips and dark chocolate for a vegan friendly batch.
- Chill the dipped cookies in the fridge for 10 minutes if your kitchen runs warm and the coating refuses to set.
How to Make Chocolate Dipped Ghost Wafer Cookies Recipe
Step 1: Prep your workspace
Line a baking sheet with parchment paper or a silicone mat.
Set the vanilla wafer cookies in a single layer so you can grab them easily.
Keep your chocolate chips, oil, and any decorations within reach so you work quickly once the chocolate melts.
Step 2: Melt the white chocolate
Place the white chocolate chips or candy melts in a microwave safe bowl.
Add the coconut oil or shortening.
Microwave in 15 to 20 second bursts, stirring well after each burst, until the mixture turns smooth and glossy.
Stir in vanilla extract if you use it, and mix until fully combined.
Step 3: Adjust the coating consistency
Lift the spatula and let the white chocolate drip back into the bowl.
Aim for a slow, steady ribbon that coats the spatula without clumping.
If it looks too thick, add another teaspoon of oil and stir again.
If it looks too thin, add a small handful of chips and stir until they melt and thicken the mixture.
Step 4: Dip the wafer cookies
Hold a vanilla wafer at one end between your fingers or with tongs.
Dip it into the white chocolate, leaving a small undipped section at the bottom for a “tail” handle.
Lift it out and let the excess drip back into the bowl, then gently tap your wrist so the coating smooths out.
Lay the dipped cookie on the lined baking sheet and repeat with the rest.
Step 5: Shape the ghost look
While the coating still feels soft, nudge the top edge of each dipped cookie with a spoon or spatula to form a rounded ghost head.
Use the spoon to drag a tiny bit of coating down the sides to form wavy “sheet” edges.
Do not stress about perfection, because slightly lopsided ghosts look extra spooky and fun.
Work in batches of 6 to 8 cookies so the coating does not set before you shape them.
Step 6: Chill briefly
Place the baking sheet in the fridge for about 5 to 10 minutes.
Let the white coating firm up enough so you can pipe faces without smudging.
Avoid chilling too long, because very cold cookies can cause condensation when they come back to room temperature.
Condensation can make the chocolate sticky, so keep the chill time short.
Step 7: Melt the dark chocolate for faces
Add the dark or semisweet chocolate chips to a small microwave safe bowl.
Stir in the teaspoon of oil.
Microwave in 10 to 15 second bursts, stirring each time, until smooth and fluid.
Let it cool for 1 to 2 minutes so it thickens slightly and does not run everywhere.
Step 8: Pipe the ghost faces
Transfer the melted dark chocolate to a small piping bag or a zip top bag.
Snip a tiny corner so you get a fine line.
Pipe two small dots for eyes and a larger oval or “O” shape for a mouth on each ghost.
Use a toothpick to fix any uneven edges or to add eyebrows and tiny frowns for personality.
Step 9: Let the cookies set
Leave the decorated cookies at room temperature until the chocolate hardens.
If your kitchen runs warm, slide the tray back into the fridge for another 5 to 10 minutes.
Check one cookie by gently touching the surface to see if it feels firm and dry.
Once set, peel each ghost cookie off the parchment and transfer to a serving plate.
Step 10: Clean edges and serve
Trim any long chocolate drips from the bottom with a small knife if you want a neater look.
Arrange the ghosts in rows or circles on a platter.
Add candy corn or sprinkles around them to fill gaps and make the tray look full.
Serve the Chocolate Dipped Ghost Wafer Cookies Recipe at room temperature so the chocolate tastes smooth and the wafers stay crisp.
Recipe Variations
-
Gluten free
- Use gluten free vanilla wafer cookies and check that both white and dark chocolate chips list gluten free on the package.
-
Vegan
- Use dairy free vanilla cookies, vegan white chips, and dairy free dark chocolate.
-
Low carb
- Use sugar free vanilla style cookies and sugar free white and dark chocolate sweetened with erythritol or similar.
-
Extra crunchy
- Sprinkle finely crushed crispy rice cereal or crushed cornflakes on the wet white coating before it sets.
-
Colorful ghosts
- Tint part of the white coating with gel food coloring for pastel ghosts and leave some plain white for contrast.
-
Spiced ghosts
- Stir a pinch of cinnamon or pumpkin pie spice into the white coating for a warm fall flavor.
Ways to Serve
- Arrange the ghosts on a black platter with plastic spiders for a spooky dessert table centerpiece.
- Pack a few cookies in clear treat bags with ribbon for classroom or office Halloween gifts.
- Serve them with hot cocoa, milk, or apple cider for a cozy movie night snack.
- Add them to a Halloween dessert board with caramel apples, popcorn, and fruit.
- Use them as cupcake toppers by standing one ghost in the frosting on each cupcake.
Storage Success
Store the Chocolate Dipped Ghost Wafer Cookies Recipe in an airtight container at room temperature for up to 4 days. Keep layers separated with parchment so the faces do not smudge. If your kitchen runs very warm, store them in the fridge and let them sit at room temperature for 10 minutes before serving. Avoid humid spots near the stove or dishwasher so the wafers stay crisp and the chocolate keeps a nice snap.
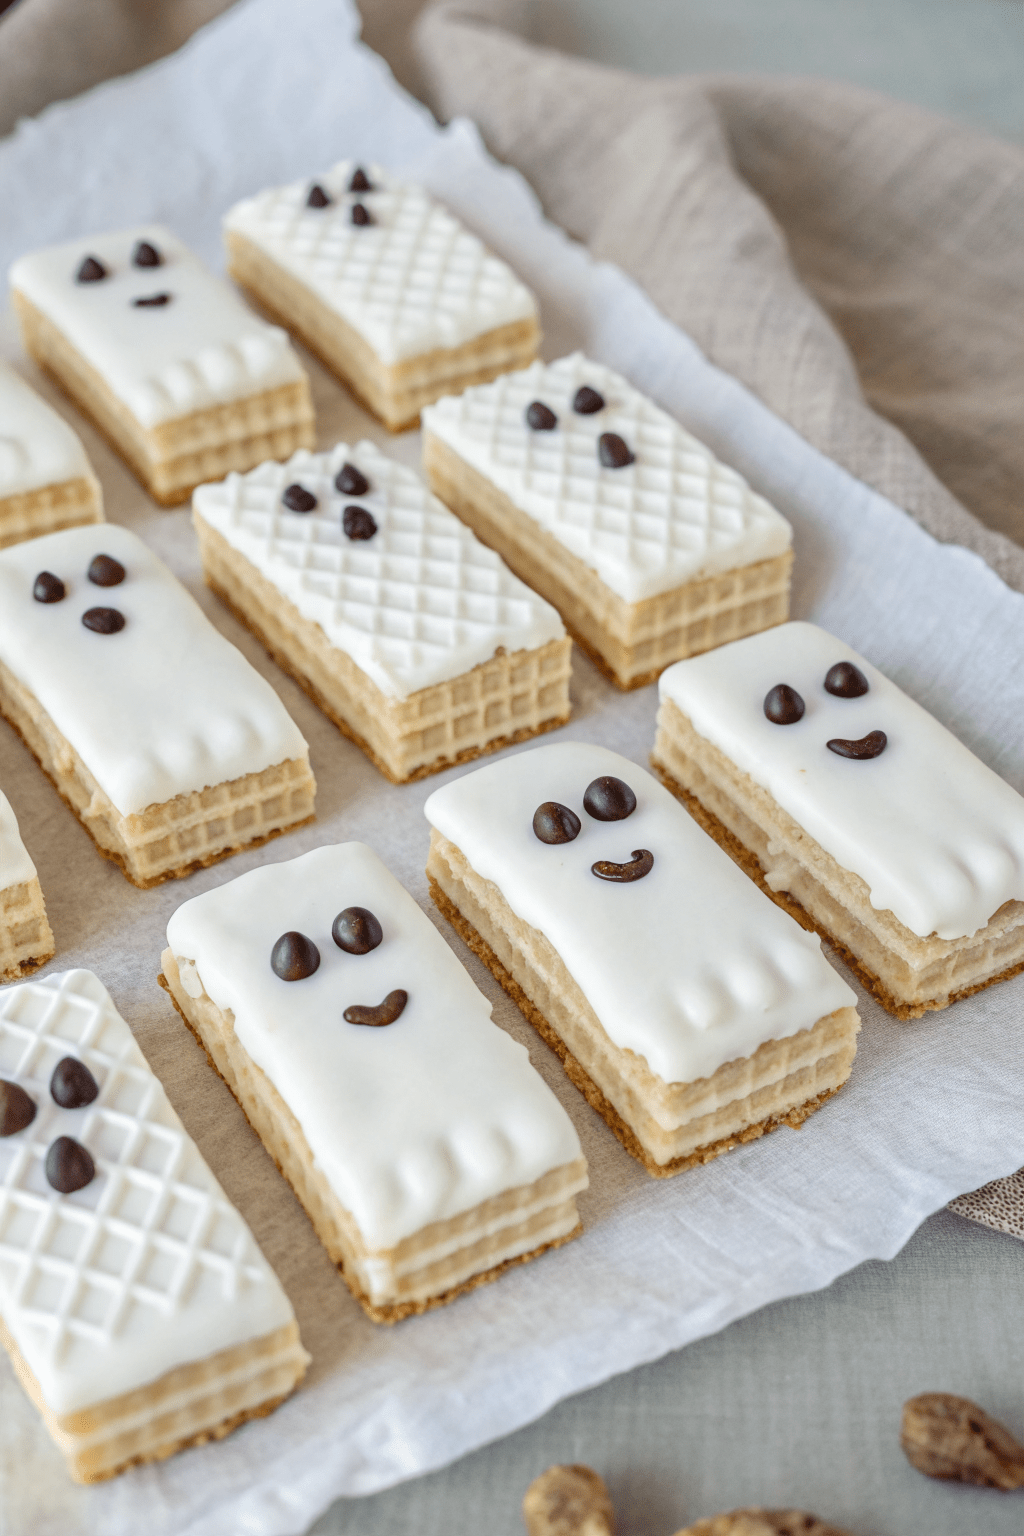
Chocolate Dipped Ghost Wafer Cookies Recipe
Ingredients
Method
- Line a baking sheet with parchment paper or a silicone mat and arrange the vanilla wafer cookies in a single layer so they are easy to grab.
- Place the white chocolate chips or candy melts in a microwave-safe bowl. Add the coconut oil or shortening if using. Microwave in 15–20 second bursts, stirring after each burst, until smooth and glossy. Stir in the vanilla extract, if using.
- Check the coating consistency by lifting some with a spatula and letting it drip back into the bowl. It should fall in a slow, steady ribbon. If too thick, stir in a teaspoon of oil at a time. If too thin, add a small handful of white chips and stir until melted and slightly thickened.
- Hold each vanilla wafer by one end and dip it into the white chocolate, leaving a small undipped section at the bottom as a handle or “tail.” Let excess drip back into the bowl, gently tapping your wrist to smooth the coating. Lay the dipped cookies on the prepared baking sheet.
- While the coating is still soft, use a spoon or spatula to nudge the top of each cookie into a rounded ghost head shape. Drag a bit of coating down the sides to create wavy, sheet-like edges. Work in small batches so the coating does not set before you shape the ghosts.
- Chill the tray in the refrigerator for 5–10 minutes, just until the white coating is firm enough to decorate without smudging.
- Place the dark or semisweet chocolate chips in a small microwave-safe bowl. Add the neutral oil and microwave in 10–15 second bursts, stirring between each, until smooth. Let cool 1–2 minutes so it thickens slightly and does not run.
- Transfer the melted dark chocolate to a small piping bag or a zip-top bag and snip a tiny corner. Pipe two small dots for eyes and a slightly larger oval or “O” for the mouth on each ghost. Use a toothpick if needed to adjust shapes or add extra expressions.
- Let the cookies sit at room temperature until both chocolates are fully set, or chill for a few more minutes if your kitchen is warm. Gently peel the cookies from the parchment, trim any long drips from the bottoms if desired, and arrange on a serving platter.
Notes
Approximate per cookie (24 cookies total): 120 calories; fat 6 g; saturated fat 4 g; carbohydrates 16 g; fiber 0 g; sugars 11 g; protein 1 g; sodium 60 mg. Values will vary based on brands, exact cookie size, and portion count.