
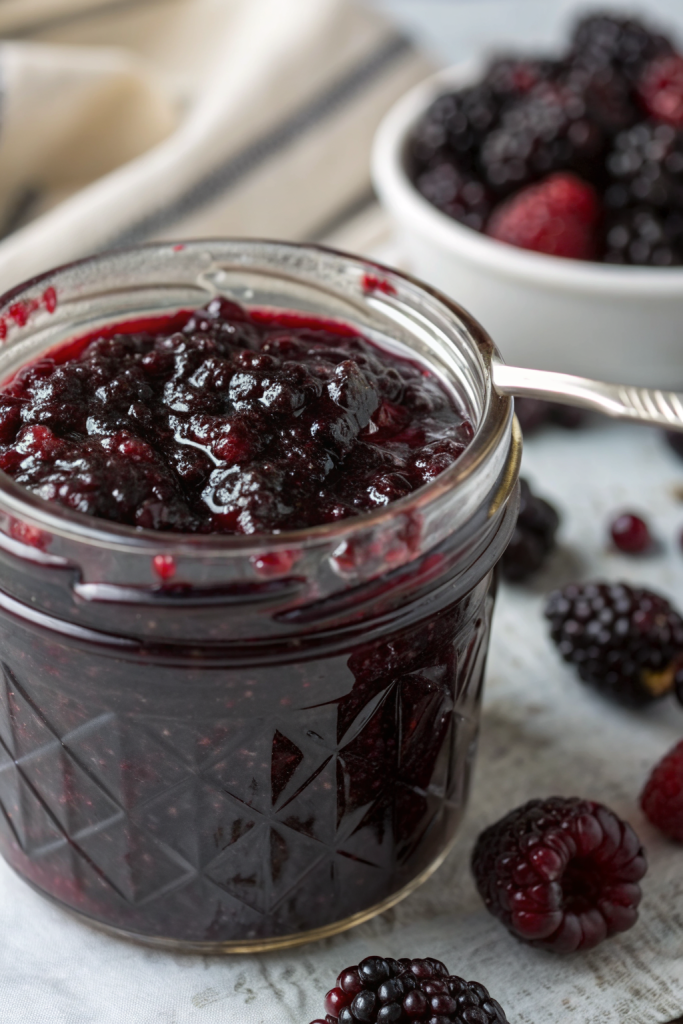
Bear Jam Recipe tastes like bright summer berries with a cozy honey finish, and it works perfectly for breakfast people, snack grazers, and anyone who loves spreading something special on toast in under 1 hour total. This small batch recipe suits beginners and seasoned canners, and you can cook it with or without canning equipment. I first made it on a camping trip with my kids, and they still call it “bear breakfast fuel.”
Why Bear Jam Recipe Is Worth It
This jam packs big berry flavor with a fun twist from honey and a hint of citrus. You control the sweetness, the texture, and the fruit mix, so every batch feels a little custom. It costs less than fancy store jars, and you know exactly what goes into it.
You can spoon it over everything from yogurt to pancakes, and it also works as a quick dessert sauce. The recipe uses simple equipment and pantry ingredients, so you can pull it together on a weeknight without stress.
“This Bear Jam Recipe tastes like a spoonful of summer on toast, and my kids lick the jar clean every time ★★★★★”
Ingredients You Need
Fruit base
- 3 cups mixed berries, fresh or frozen
- I like a mix of blueberries, raspberries, and blackberries.
- Frozen berries work great and save money; choose unsweetened bags.
- 1 cup chopped strawberries, hulled
- 1 small apple, peeled and grated, about 1 cup
- Use a tart apple like Granny Smith for natural pectin and brightness.
Sweeteners
- 1 cup granulated sugar
- You can use organic cane sugar if you prefer.
- 1 cup honey
- A mild clover or wildflower honey keeps the flavor balanced.
- 1 tablespoon lemon juice, fresh
- Bottled lemon juice works in a pinch and keeps the acidity consistent.
Flavor boosters
- 1 teaspoon lemon zest
- 1 teaspoon vanilla extract
- 1 pinch fine sea salt
- Salt sharpens the fruit flavor and keeps the jam from tasting flat.
Thickening options
- 2 tablespoons low sugar pectin powder
- Look for brands labeled “low sugar” or “no sugar needed.”
- Or skip pectin and cook longer for a softer, rustic jam.
Optional add ins
- 1 to 2 tablespoons finely chopped nuts for texture
- 1 teaspoon ground cinnamon for a cozy fall version
Equipment list
- Large heavy bottomed pot or Dutch oven
- Wooden spoon or heat safe spatula
- Potato masher or large fork
- Measuring cups and spoons
- Microplane or small grater for zest and apple
- Clean glass jars with lids, 4 to 6 half pint jars
- Funnel and ladle for easy filling
- Optional: water bath canner or large deep pot with rack and tongs
Quick Tips & substitutions
- Use frozen berries straight from the freezer and add 5 extra minutes of simmer time.
- Swap honey with maple syrup, then reduce the sugar by 2 tablespoons to keep the set similar.
- Choose low sugar pectin if you want to cut the sugar by up to half.
- Skip pectin and simmer longer for a looser, spoonable jam that works as a sauce.
- Stir often and keep the heat at medium to prevent scorching on the bottom.
- Taste near the end and adjust with a teaspoon of lemon juice at a time if it tastes too sweet.
- Use a wide pot so the mixture reduces faster and thickens more evenly.
- Replace strawberries with extra blueberries if you want a darker color and deeper flavor.
- Use coconut sugar for part of the sweetener, but expect a slightly softer set and darker color.
- If foam builds on top, skim it with a spoon so the jam looks clear and glossy.
How to Make Bear Jam Recipe
Step 1: Prep the fruit
Rinse fresh berries and pat them dry. Hull and chop the strawberries into small pieces so they break down quickly. Peel and grate the apple on the large holes of a box grater, then squeeze out a little moisture if it feels very juicy.
Add all the fruit to your heavy pot. Sprinkle the lemon zest and pinch of salt over the fruit. Stir to combine and let the mixture sit for 5 to 10 minutes so the fruit starts to release juice.
Step 2: Add sweeteners and pectin
Pour the sugar and honey over the fruit. Stir until the berries look coated and glossy. If you use pectin, whisk it with 2 tablespoons of sugar in a small bowl so it does not clump.
Sprinkle the pectin mixture over the fruit and stir again. Add the lemon juice and vanilla extract. Set the pot on the stove over medium heat.
Step 3: Bring to a simmer and mash
Stir the pot often as the mixture warms. When the fruit starts to bubble gently, use a potato masher to crush the berries to your preferred texture. Leave some chunks if you like a rustic jam, or mash more for a smoother spread.
Keep the heat at medium and stir every minute or so. The mixture should bubble steadily but not spit aggressively. Adjust the heat slightly if it starts to stick.
Step 4: Cook to the right thickness
Let the jam simmer for 15 to 25 minutes, depending on your pot and fruit. Stir often and scrape the bottom and corners of the pot. The jam will thicken as water evaporates and pectin activates.
To test the set, place a small plate in the freezer for 5 minutes. Spoon a little hot jam on the cold plate and wait 30 seconds. Push the edge with your finger; if it wrinkles and holds a soft line, the jam reached a good set.
If it still runs like syrup, cook for another 3 to 5 minutes and test again. Taste a tiny bit carefully and adjust with a little more lemon juice or sugar if needed. When you like the thickness and flavor, turn off the heat.
Step 5: Prepare jars
While the jam cooks, wash your jars, lids, and rings in hot soapy water. Rinse well and set them on a clean towel. If you plan to store the jam in the fridge only, you can skip full canning and just use clean, hot jars.
If you want shelf stable jars, place the clean jars in a large pot of simmering water to heat them. Keep the lids in hot, not boiling, water. Hot jam meets hot jars so the glass stays safe.
Step 6: Fill the jars
Place a clean towel on your counter. Set the warm jars on the towel. Use a funnel and ladle to fill each jar with hot Bear Jam Recipe, leaving about 1 quarter inch of headspace at the top.
Wipe the rims with a damp clean cloth so no jam sticks there. Place lids on the jars and screw on the rings until fingertip tight. If you only plan fridge storage, let the jars cool, then chill them.
Step 7: Optional water bath canning
If you want shelf stable jam, lower the filled jars into a boiling water bath canner or deep pot with a rack. Make sure the water covers the jars by at least 1 inch. Bring the water back to a gentle boil and process for 10 minutes for half pint jars.
Use tongs to lift the jars out and set them on a towel. Let them cool without touching the lids. After they cool, check that each lid feels firm and slightly concave.
Label the jars with the date and name of the jam. Store sealed jars in a cool, dark place. Keep any jar that did not seal in the fridge and use it first.
Recipe Variations
-
Gluten free
- The base recipe already stays gluten free, just check labels on pectin and vanilla.
-
Vegan
- Replace honey with extra sugar or maple syrup.
- Use organic sugar if you want fully vegan sweetener.
-
Low sugar
- Use low sugar pectin and cut the sugar to 1/2 cup.
- Add a bit more lemon juice and zest to keep the flavor bright.
-
Berry blend twists
- Use only blueberries for a deep purple Bear Jam Recipe.
- Swap in cherries for part of the berries and remove the pits first.
-
Spiced version
- Add cinnamon, nutmeg, or cardamom near the end of cooking.
- Stir in a tiny pinch of ground cloves for a cozy winter batch.
-
Chunky fruit version
- Hold back 1/2 cup of berries, then stir them in during the last 5 minutes.
Ways to Serve
- Spoon over warm toast, biscuits, or English muffins.
- Swirl into plain yogurt or cottage cheese for a quick breakfast.
- Spread inside peanut butter sandwiches or sunflower seed butter sandwiches.
- Use as a topping for pancakes, waffles, or French toast.
- Stir into oatmeal or overnight oats for berry sweetness.
- Serve with cheese and crackers as a fun snack board centerpiece.
- Warm slightly and drizzle over vanilla ice cream or fruit salad.
Storage Success
Let the jars cool completely at room temperature, then move any unprocessed jars to the fridge. Store opened jars in the fridge and use them within 3 to 4 weeks for best flavor and texture. Keep properly processed, sealed jars in a cool, dark pantry for up to 12 months. Label every jar with the date so you can rotate your Bear Jam Recipe stash and enjoy the oldest jars first.