
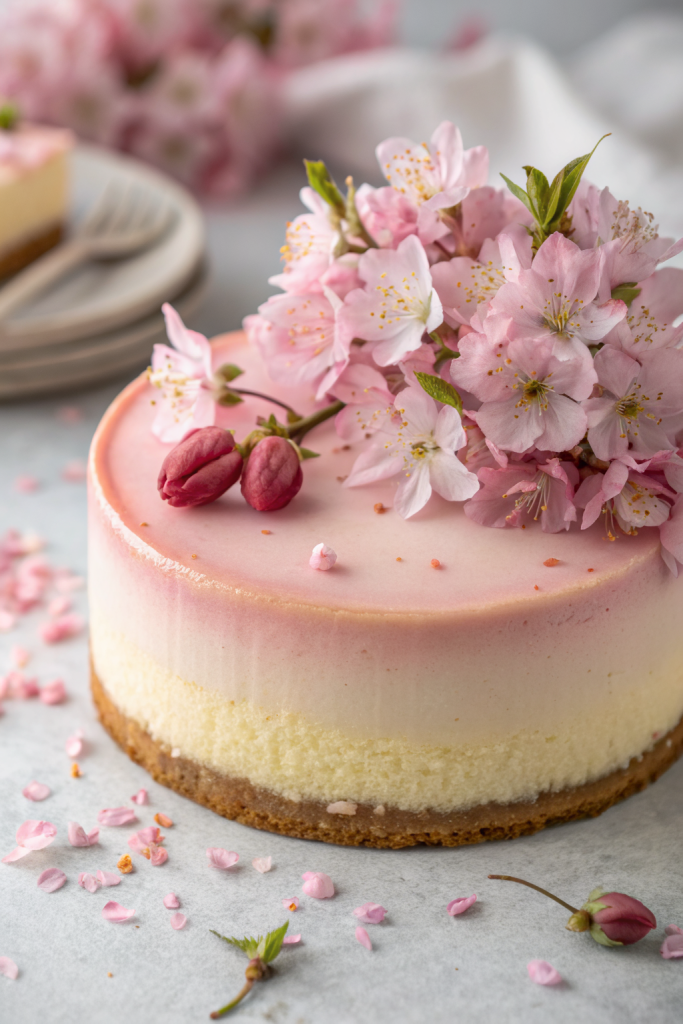
Cherry Blossom Japanese Sakura Cheesecake Recipe tastes like a cloud of vanilla cheesecake kissed with floral cherry blossom and a hint of tart cherry, soft and jiggly like Japanese cotton cheesecake. It suits spring gatherings, afternoon tea, or anyone who wants a showstopper dessert in about 2 hours total time, including baking and cooling. I tested this version after a trip to Tokyo, and my suitcase smelled like sakura extract for a week, so you know I took it seriously.
Why Choose This Cherry Blossom Japanese Sakura Cheesecake Recipe
This Japanese sakura cheesecake bakes up ultra light, with a souffle-style texture that still feels rich and creamy. The cherry blossom flavor stays gentle and elegant, not soapy or overpowering, which often happens with floral desserts.
You use simple techniques and basic tools, so home bakers at any level can pull it off. The recipe also includes easy substitutions, so you can still bake it even if your local store does not stock sakura everything.
“Soft, floral, and not too sweet, this Cherry Blossom Japanese Sakura Cheesecake Recipe tastes like spring on a plate and disappears in minutes at parties. ★★★★★”
Ingredients You’ll Need
Core cheesecake ingredients
- 7 oz (200 g) cream cheese, full fat, room temperature
- I like Philadelphia or a good store brand; avoid low fat because it turns grainy.
- 3 tbsp (40 g) unsalted butter, melted and slightly cooled
- 3 large eggs, room temperature, separated
- 1/3 cup (70 g) granulated sugar, divided
- 1/4 cup (60 ml) whole milk, room temperature
- 1/4 cup (30 g) cake flour, sifted
- Substitute: all-purpose flour plus 1 tsp cornstarch if you do not have cake flour.
- 2 tbsp (15 g) cornstarch, sifted
- 1/4 tsp fine sea salt
Sakura and cherry flavor
- 1 to 1 1/2 tsp sakura extract or sakura flavoring
- Start with 1 tsp; some brands taste stronger than others.
- 1 tbsp sakura syrup or maraschino cherry syrup
- This adds color and a gentle cherry note.
- 1 to 2 tsp pickled sakura blossoms, rinsed and patted dry, optional but beautiful
- You can find these online or in Japanese markets.
- 2 to 3 drops pink gel food coloring, optional
- Gel color works better than liquid because it does not thin the batter.
Crust (optional but tasty)
You can bake this cheesecake without a crust in classic Japanese style. If you love a base, use this:
- 3/4 cup (75 g) graham cracker crumbs or digestive biscuit crumbs
- 3 tbsp (40 g) unsalted butter, melted
- 1 tbsp sugar
- Pinch of salt
Sakura jelly topping (optional but very pretty)
- 1/2 cup (120 ml) water
- 2 tbsp sakura syrup or cherry syrup
- 1 tsp gelatin powder
- 1 tbsp sugar
- Extra pickled sakura blossoms or edible flowers for garnish
Pantry shortcuts and substitutions
- Use bottled cherry juice instead of sakura syrup if you cannot find it, then keep the sakura extract for floral notes.
- Use vanilla extract plus cherry extract if sakura extract stays unavailable; the flavor changes but still tastes lovely and fruity.
- Use Greek yogurt (full fat) for up to one third of the cream cheese if you want a tangier cheesecake.
- Use superfine sugar if you have it; it dissolves faster in the meringue and gives a smoother texture.
Equipment list
- 7 or 8 inch round springform pan or deep cake pan
- Parchment paper
- Large roasting pan or deep baking tray for water bath
- Mixing bowls: 1 large, 1 medium, 1 small
- Electric hand mixer or stand mixer with whisk attachment
- Fine mesh sieve
- Rubber spatula
- Small saucepan
- Kitchen scale if possible, for accuracy
- Toothpick or skewer to check doneness
Tips & Tricks
- Bring cream cheese, eggs, and milk to room temperature so the batter mixes smooth and fluffy.
- Line the bottom and sides of the pan with parchment to prevent sticking and to help the cheesecake rise evenly.
- Wrap the outside of the springform pan tightly with foil so water does not sneak into the water bath.
- Sift the flour and cornstarch to avoid lumps and to keep the texture light.
- Add sugar to the egg whites in two or three additions so the meringue whips glossy and stable.
- Fold the meringue into the batter gently from bottom to top so you keep the air bubbles that give the cheesecake its cloud-like texture.
- Tap the filled pan lightly on the counter to pop big air bubbles that can cause cracks.
- Bake low and slow and avoid opening the oven door so the cheesecake rises evenly and does not collapse.
- Cool the cheesecake gradually in the oven with the door slightly open to prevent sudden temperature shock.
- Use a thin knife around the edge while still slightly warm so the sides release cleanly and stay smooth.
How to Make Cherry Blossom Japanese Sakura Cheesecake Recipe
Step 1: Prepare the pan and oven
Preheat your oven to 320°F (160°C). Line the bottom of a 7 or 8 inch springform pan with parchment and line the sides as well, letting the parchment rise about 1 inch above the rim. Wrap the outside of the pan with two layers of heavy foil so water from the bath stays out.
Set a large roasting pan on the middle rack of the oven. Boil a kettle of water so you have hot water ready for the water bath. This water bath keeps the cheesecake moist and helps it bake without cracks.
Step 2: Make the optional crust
Stir graham cracker crumbs, sugar, and salt together in a bowl. Pour in melted butter and mix until the crumbs feel like wet sand. Press the mixture firmly into the bottom of the lined pan in an even layer.
Bake the crust for 8 minutes at 320°F (160°C), then remove the pan and let it cool while you make the batter. If you skip the crust, you can move straight to the cheesecake base.
Step 3: Mix the cream cheese base
Place the room temperature cream cheese in a large bowl. Beat it with a mixer on medium speed until it turns smooth and creamy with no lumps. Add the melted butter and beat again until fully combined.
Pour in the milk and mix until the mixture looks silky. Add sakura extract, sakura syrup, and a pinch of salt, then mix again. Taste a small bit and adjust the sakura extract drop by drop so the flavor tastes floral but not perfume-like.
Step 4: Add the dry ingredients and egg yolks
Sift cake flour and cornstarch together into a separate bowl. Sift this mixture over the cream cheese base in two additions, folding gently with a spatula after each addition. Stir only until the batter looks smooth so you do not overwork the gluten.
Add the egg yolks one at a time, mixing well after each yolk. The batter should look glossy and slightly thick. Add a drop or two of pink gel food coloring if you want a soft blush color, then stir until the color looks even.
Step 5: Whip the meringue
Place the egg whites in a clean, dry bowl. Beat on medium speed until they look foamy. Sprinkle in one third of the sugar and keep beating.
Add the second third of sugar when the whites look opaque and slightly thicker. Beat until soft peaks form, then add the final third of sugar. Continue to beat until the meringue forms medium peaks that hold their shape but still look slightly soft at the tip.
Step 6: Fold the meringue into the batter
Scoop one third of the meringue into the cream cheese batter. Fold gently with a spatula to lighten the mixture. Do not stir aggressively; sweep from the bottom up and rotate the bowl.
Add the second third of meringue and fold again until only a few streaks remain. Add the final third and fold just until the batter looks uniform and airy. You want a light, mousse-like texture.
Step 7: Assemble and add sakura blossoms
Pour the batter into the prepared pan over the crust or directly into the lined pan if you skipped the crust. Tap the pan lightly on the counter two or three times to release large air bubbles. If you use pickled sakura blossoms, arrange them gently on top of the batter or press a few along the sides between parchment and batter.
Place the pan inside the preheated roasting pan. Carefully pour hot water into the roasting pan until it reaches about halfway up the sides of the cheesecake pan.
Step 8: Bake the cheesecake
Bake at 320°F (160°C) for 20 minutes. Lower the oven temperature to 285°F (140°C) without opening the door and bake another 30 to 35 minutes. The cheesecake should rise, look slightly jiggly in the center, and feel set around the edges.
Turn off the oven and crack the door open slightly with a wooden spoon. Let the cheesecake sit in the oven for 15 to 20 minutes so it cools gradually. Remove the pan from the water bath and place it on a rack to cool to room temperature.
Step 9: Chill and release from the pan
Once the cheesecake reaches room temperature, cover the top lightly with plastic wrap. Chill in the refrigerator for at least 3 hours, or overnight if you plan ahead. Chilling helps the texture set and the sakura flavor mellow.
When you feel ready to serve, run a thin knife around the edge between the parchment and the pan. Release the springform ring and peel away the parchment from the sides. Slide the cheesecake onto a serving plate.
Step 10: Make the sakura jelly topping (optional)
Sprinkle gelatin over 2 tbsp of cold water in a small bowl and let it sit for 5 minutes so it blooms. Heat 1/2 cup water, sakura syrup, and sugar in a small saucepan until hot but not boiling, then remove from heat. Stir in the bloomed gelatin until it dissolves completely.
Let the mixture cool until it reaches room temperature and thickens slightly. Arrange a few rinsed sakura blossoms on top of the chilled cheesecake. Pour the cooled jelly gently over the surface, then chill again for 30 to 45 minutes until the jelly sets.
What to Serve with it?
This Cherry Blossom Japanese Sakura Cheesecake Recipe pairs beautifully with hot green tea, matcha latte, or a simple jasmine tea. Fresh berries like strawberries, raspberries, or cherries add a bright, juicy contrast to the soft floral flavor. You can also serve thin slices with a small scoop of vanilla or cherry blossom ice cream for a cafe-style dessert. If you host a spring brunch, slice the cheesecake small and serve it alongside fruit salad and mini sandwiches for a balanced spread.
Storage Options
- Store leftover cheesecake covered in the refrigerator for up to 4 days; keep it in an airtight container so it does not absorb fridge odors.
- Chill slices on a flat plate first, then transfer them to containers so they keep their shape and stay neat.
- Freeze individual slices on a parchment-lined tray until firm, then wrap each slice tightly and store in a freezer bag for up to 1 month.
- Thaw frozen slices in the refrigerator overnight, then let them sit at room temperature for 15 to 20 minutes before serving so the texture turns creamy again.