
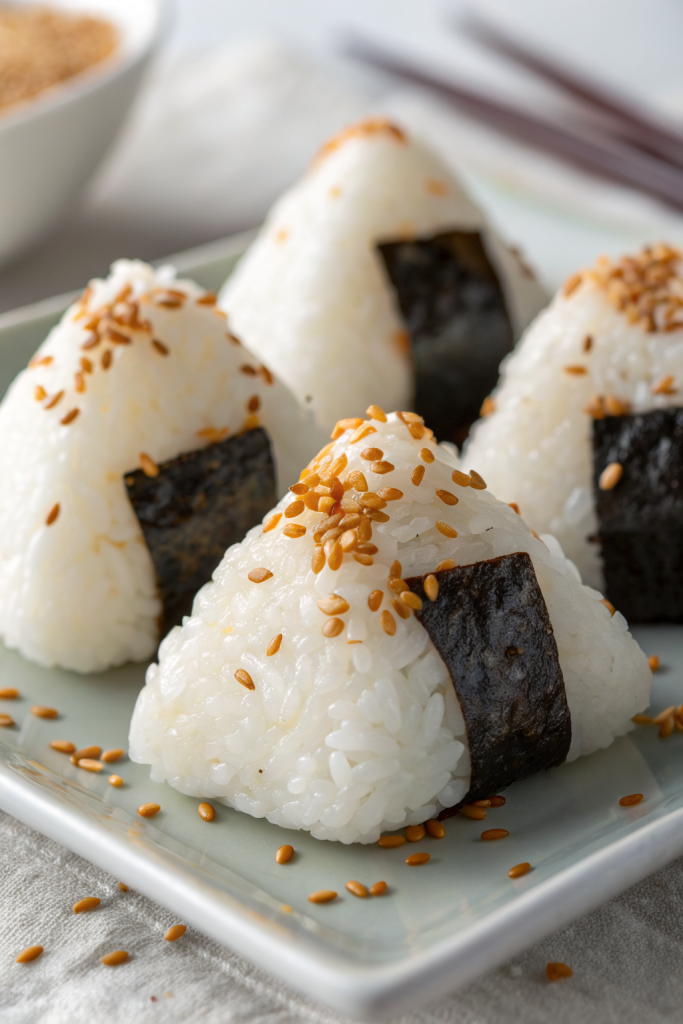
How to Make Tuna Mayo Onigiri Recipe tastes like a cozy sushi roll that you can hold in one hand, with creamy tuna, savory mayo, and perfectly seasoned rice. It works great for busy folks who want a quick lunch, snack, or kid-friendly meal in about 35 minutes total. I started packing these in my own work lunches years ago, and they still beat any sad desk salad.
Why Make This How to Make Tuna Mayo Onigiri Recipe at Home
Homemade tuna mayo onigiri tastes fresher, costs less, and lets you control the seasoning and quality of ingredients. You can adjust the mayo, salt, and spice level so every rice ball hits your exact comfort-food zone.
You also shape them to fit your life: small ones for kids, bigger ones for serious hunger, or mini bites for parties. Once you learn the basic method, you can fill them with almost anything in your pantry.
“This How to Make Tuna Mayo Onigiri Recipe tastes like my favorite convenience store snack but fresher, creamier, and way more satisfying to pack for lunch. ★★★★★”
Ingredients You Need
Rice and Seasoning
- 2 cups uncooked Japanese short-grain rice
- Use sushi rice or Calrose rice. Long-grain rice will not hold shape as well.
- 2 1/4 cups water for cooking rice
- 2 tablespoons rice vinegar
- 1 tablespoon sugar
- 1 teaspoon fine sea salt
Tuna Mayo Filling
- 1 can tuna in water, 5 to 6 ounces, drained well
- Use solid or chunk light tuna. Albacore works too but tastes stronger.
- 2 1/2 to 3 tablespoons Japanese mayonnaise
- Kewpie mayo gives the most classic flavor, but any good mayo works.
- 1 teaspoon soy sauce
- 1 teaspoon rice vinegar
- 1 to 2 teaspoons finely chopped green onion or chives
- 1 to 2 teaspoons finely chopped onion or shallot (optional, for extra bite)
- 1/2 teaspoon sugar
- Freshly ground black pepper, to taste
- 1/2 teaspoon toasted sesame oil (optional, for a nutty note)
- 1 teaspoon toasted sesame seeds (optional, white or black)
Nori and Seasoning Options
- 3 to 4 full sheets nori (roasted seaweed), cut into strips or rectangles
- Use good quality sushi nori so it stays crisp longer.
- Extra salt for your hands when shaping
- Extra toasted sesame seeds for coating (optional)
- Furikake rice seasoning (optional, nice shortcut for extra flavor)
Equipment
- Rice cooker or medium saucepan with lid
- Fine mesh strainer
- Medium mixing bowl for tuna filling
- Small bowl of water and a small bowl of salt for shaping
- Clean kitchen towel or plastic wrap
- Sharp knife and cutting board
- Kitchen scissors to cut nori
Tips & Mistakes
- Rinse the rice until the water runs almost clear so the grains cook fluffy and not gummy.
- Let the rice cool until warm, not hot, or it will burn your hands and soften the nori too fast.
- Season the rice gently and fold, do not mash, so the grains stay intact.
- Drain the tuna very well or the filling will taste watery and leak into the rice.
- Taste the tuna mayo and adjust salt, soy sauce, and mayo before you start shaping.
- Keep a small bowl of water and salt nearby so the rice does not stick to your hands and still picks up seasoning.
- Do not overfill the center or the onigiri will crack and fall apart.
- Press the rice firmly but not aggressively so it holds shape without turning into a dense brick.
- Add the nori just before eating if you want it crisp, or wrap earlier if you like it soft and chewy.
- Pack onigiri tightly in containers so they do not roll around and break during transport.
How to Make How to Make Tuna Mayo Onigiri Recipe
Step 1: Cook and Season the Rice
-
Rinse the rice in a bowl with cold water and swirl with your hand.
-
Drain and repeat until the water looks mostly clear, about 3 to 4 rinses.
-
Add the rinsed rice and 2 1/4 cups water to a rice cooker or saucepan.
-
Cook according to your rice cooker instructions, or bring to a boil on the stove, then cover and simmer on low until the water absorbs, about 15 minutes.
-
While the rice cooks, mix rice vinegar, sugar, and salt in a small bowl until the sugar dissolves.
-
When the rice finishes cooking, let it sit covered for 10 minutes so the steam distributes evenly.
-
Transfer the hot rice to a wide bowl or shallow dish.
-
Drizzle the vinegar mixture over the rice and gently fold with a rice paddle or spatula until the grains look glossy and evenly seasoned.
-
Spread the rice out slightly in the bowl so it cools faster.
-
Let it cool until warm to the touch, not hot and not fully cold.
-
Cover with a clean towel while you prepare the filling so the rice does not dry out.
Step 2: Mix the Tuna Mayo Filling
-
Add drained tuna to a medium bowl and break it into small flakes with a fork.
-
Stir in Japanese mayonnaise, soy sauce, rice vinegar, sugar, and black pepper.
-
Add green onion, chopped onion or shallot if using, sesame oil, and sesame seeds.
-
Mix until the tuna looks creamy and holds together but does not turn soupy.
-
Taste the filling and adjust with a pinch of salt, more soy sauce, or more mayo as you like.
-
If the mixture looks too wet, add a teaspoon of panko breadcrumbs or a bit more tuna to thicken it.
-
Chill the filling in the fridge for 5 to 10 minutes while you set up for shaping.
Step 3: Prep Your Shaping Station
-
Cut nori sheets into strips or rectangles that cover the bottom or sides of each onigiri.
-
Set out a small bowl of clean water and a small bowl with a tablespoon of salt.
-
Place your warm rice nearby with a rice paddle.
-
Keep the tuna filling and a spoon within reach.
-
If you prefer less mess, place a square of plastic wrap on the counter and use it to help shape each onigiri.
-
Keep a clean plate or tray ready to hold the finished rice balls.
Step 4: Shape the Onigiri
-
Wet your hands lightly with water, then tap your fingertips into the salt and rub your hands together.
-
Scoop about 1/3 to 1/2 cup of warm rice into your palm and flatten it into a thick disc.
-
Place 1 to 2 teaspoons of tuna mayo in the center of the rice.
-
Fold the rice around the filling and pinch the edges together so the tuna hides inside.
-
Gently press the rice ball into a triangle shape between your palms.
-
Rotate and press the corners lightly so the triangle looks even and compact.
-
If any filling peeks out, patch it with a bit more rice and press again.
-
Set the shaped onigiri on your plate or tray and repeat with the remaining rice and filling.
Step 5: Wrap with Nori and Season
-
When you finish shaping, take one onigiri and press a strip or rectangle of nori onto the bottom or around the sides.
-
Press gently so the warm rice sticks to the nori.
-
Sprinkle a few sesame seeds or a pinch of furikake on top if you like extra flavor.
-
Repeat with all onigiri.
-
If you plan to eat them later and want crisp nori, pack the nori strips separately and wrap them right before eating.
-
Taste one onigiri and adjust salt or furikake on the next batch if needed.
Variations I've Tried
- Spicy tuna mayo onigiri: Add sriracha, chili crisp, or a pinch of gochugaru to the tuna mayo for a gentle kick.
- Corn and tuna mayo: Stir in a couple of tablespoons of canned or frozen corn for sweetness and extra texture.
- Avocado tuna mayo: Fold in small avocado cubes right before shaping for a richer, creamier filling.
- Tuna mayo with cucumber: Add finely diced cucumber for crunch and freshness, perfect for hot weather.
- Cheesy tuna mayo: Mix in a tablespoon of finely shredded cheddar or mozzarella and shape quickly so the cheese stays soft.
How to Serve How to Make Tuna Mayo Onigiri Recipe
Serve tuna mayo onigiri at room temperature with a side of miso soup, sliced cucumbers, or a simple green salad. Pack them in lunch boxes with carrot sticks, edamame, and some fresh fruit for a balanced meal. Kids love them as an after-school snack, especially when you shape them a bit smaller. You can also set them out on a platter with other fillings like salmon or plain salted rice for a fun mix-and-match meal.
How to store
- Room temperature: Keep onigiri at cool room temperature for up to 4 hours if your kitchen does not feel hot.
- Fridge: Wrap each onigiri tightly in plastic wrap, then place in an airtight container and chill for up to 2 days.
- Freezer: Wrap each one in plastic wrap, then in a freezer bag, squeeze out extra air, and freeze for up to 1 month.
- Reheating: Thaw frozen onigiri in the fridge overnight, then warm gently in the microwave for 20 to 30 seconds, covered with a damp paper towel, and add fresh nori right before eating.
How to Make Tuna Mayo Onigiri Recipe
Ingredients
Method
- Rinse the rice in a bowl with cold water, swishing with your hand, then drain. Repeat until the water runs mostly clear, about 3 to 4 rinses.
- Add the rinsed rice and 2 1/4 cups water to a rice cooker or medium saucepan with a lid.
- Cook according to your rice cooker instructions, or bring to a boil on the stove, then cover and simmer on low until the water is absorbed, about 15 minutes.
- While the rice cooks, mix the rice vinegar, sugar, and salt in a small bowl until the sugar dissolves.
- When the rice is done, let it sit covered for 10 minutes so the steam distributes evenly.
- Transfer the hot rice to a wide bowl or shallow dish. Drizzle the vinegar mixture over the rice and gently fold with a rice paddle or spatula until the grains look glossy and evenly seasoned.
- Spread the rice out slightly so it cools faster, then let it cool until warm to the touch. Cover with a clean towel while you prepare the filling so it does not dry out.
- Add the well-drained tuna to a medium bowl and break it into small flakes with a fork.
- Stir in the Japanese mayonnaise, soy sauce, rice vinegar, sugar, and black pepper until combined.
- Add the green onion, onion or shallot if using, sesame oil, and sesame seeds. Mix until creamy and cohesive but not soupy.
- Taste and adjust the seasoning with a pinch of salt, more soy sauce, or more mayo if desired. Chill for 5 to 10 minutes while you set up for shaping.
- Cut the nori sheets into strips or rectangles sized to cover the bottom or sides of each onigiri.
- Set out a small bowl of clean water and a small bowl with about a tablespoon of salt.
- Place the warm seasoned rice nearby with a rice paddle and keep the tuna filling and a spoon within reach.
- If you prefer, place a square of plastic wrap on the counter to help with shaping and keep your hands cleaner.
- Lightly wet your hands with water, then tap your fingertips into the salt and rub your hands together to coat them lightly.
- Scoop about 1/3 to 1/2 cup of warm rice into your palm and flatten it into a thick disc.
- Place 1 to 2 teaspoons of tuna mayo filling in the center of the rice.
- Fold the rice around the filling and pinch the edges together so the tuna is completely enclosed.
- Gently press the rice ball into a triangle shape between your palms, rotating and pressing the corners lightly so it becomes even and compact. Patch any exposed filling with a bit more rice.
- Set the finished onigiri on a plate or tray and repeat with the remaining rice and filling.
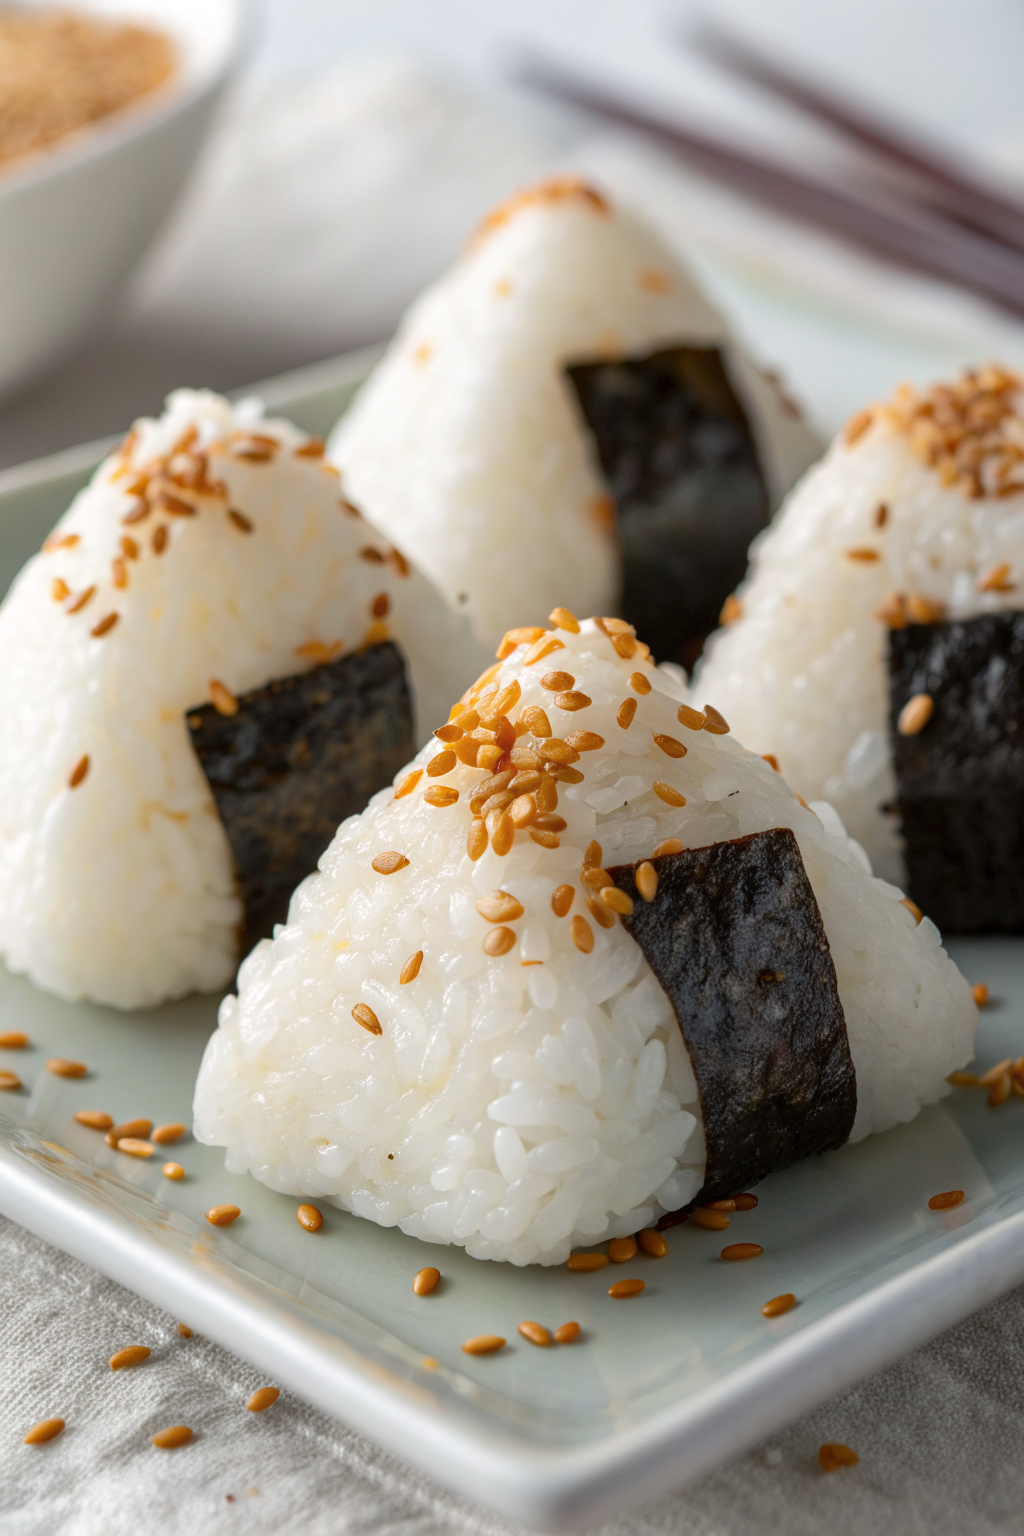
- When all the onigiri are shaped, press a strip or rectangle of nori onto the bottom or around the sides of each one so the warm rice helps it adhere.
- Sprinkle sesame seeds or a pinch of furikake on top if you like extra flavor.
- Serve at room temperature, or pack for lunch, adding the nori just before eating if you prefer it crisp.
Notes
Approximate per onigiri (1 of 8): 230 calories; fat 7 g; saturated fat 1.5 g; carbohydrates 32 g; fiber 1 g; sugars 3 g; protein 9 g; sodium 360 mg. Values will vary based on brands, exact tuna amount, and portion size.