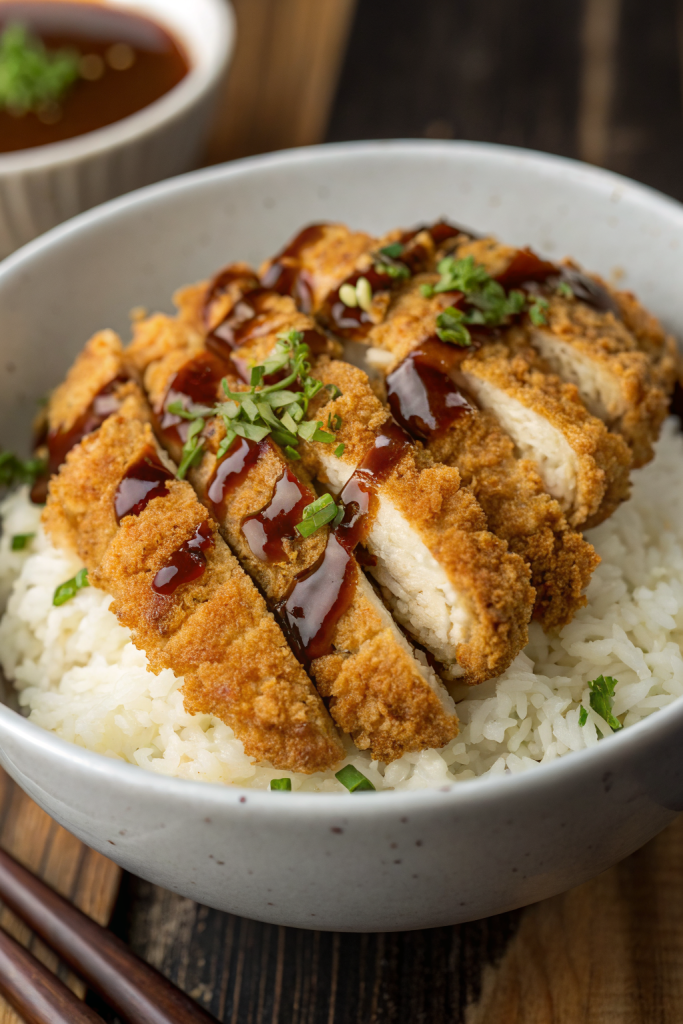
Crispy Japanese Katsu Bowls Recipe hits that perfect combo of crunchy, juicy, saucy, and cozy, all in one bowl. It works great for busy weeknights, meal prep, or an at-home “takeout” night in about 40–45 minutes. I first made this on a Tuesday when my energy felt low and my craving for something crispy felt very high, and it absolutely saved the evening.
Why Make This Crispy Japanese Katsu Bowls Recipe at Home
You control everything at home: how thick the cutlets feel, how crunchy the panko crust gets, and how saucy the bowl turns out. You also adjust the seasoning, pick your favorite protein, and keep the oil fresh, which makes the katsu taste lighter and cleaner.
You also save money compared to takeout and still get that restaurant-style crunch. Plus, you build the bowls exactly how you like them, with extra cabbage, extra sauce, or a soft egg on top if that makes you happy.
“This Crispy Japanese Katsu Bowls Recipe tastes like my favorite Japanese spot moved into my kitchen and started cooking just for me. ★★★★★”
Ingredients You Need
You can use chicken, pork-free options, or tofu for this Crispy Japanese Katsu Bowls Recipe. I usually reach for chicken thighs because they stay juicy, but chicken breast or firm tofu also work well.
Protein
- 1 to 1.5 pounds boneless, skinless chicken thighs
- Use thighs for maximum juiciness.
- Or: 1 to 1.5 pounds boneless, skinless chicken breasts, sliced into cutlets
- Or: 1 block extra-firm tofu, pressed and sliced into slabs
Seasoning for the cutlets
- 1 teaspoon kosher salt
- 1/2 teaspoon black pepper
- 1 teaspoon garlic powder
- 1 teaspoon onion powder
- Optional: 1/2 teaspoon smoked paprika for a deeper flavor
Breading station
- 1 cup all-purpose flour
- You can use a 1:1 gluten free blend if needed.
- 2 large eggs
- 2 tablespoons milk or unsweetened plant milk
- 2 cups panko breadcrumbs
- Japanese panko gives the best crunch; I like Kikkoman or any “Japanese style” panko.
- Optional: 2 tablespoons grated Parmesan for extra savory flavor
- Neutral oil for shallow frying
- Use canola, vegetable, avocado, or peanut oil. Avoid olive oil because it browns too fast.
Rice and bowl base
- 2 cups uncooked short-grain or sushi rice, rinsed
- Jasmine rice works in a pinch, but short-grain gives that classic bite.
- 2 1/4 cups water or follow your rice cooker directions
- 2 cups finely shredded green cabbage
- 1 medium carrot, julienned or shredded
- 2 green onions, thinly sliced
- Optional: sliced cucumber or steamed broccoli for extra veggies
Simple katsu sauce
You can use bottled tonkatsu sauce as a shortcut. I often keep Bulldog brand in the pantry and reach for it on busy nights.
If you want to mix a quick version at home:
- 1/4 cup ketchup
- 2 tablespoons Worcestershire sauce
- 1 tablespoon soy sauce
- 1 tablespoon oyster sauce or vegan oyster-style sauce
- 1 teaspoon sugar or honey
- 1 teaspoon rice vinegar
- 1/2 teaspoon Dijon or Japanese mustard
Whisk everything until smooth and taste. Add a pinch more sugar if you want it sweeter or a splash more vinegar if you like extra tang.
Simple mayo drizzle (optional but tasty)
- 1/4 cup Japanese mayo (Kewpie) or regular mayo
- 1 teaspoon soy sauce
- 1 teaspoon rice vinegar
- 1 teaspoon sriracha or other chili sauce
Equipment
- Cutting board and sharp knife
- 3 shallow bowls or plates for breading
- Large skillet or frying pan
- Tongs
- Wire rack or paper towel lined plate
- Rice cooker or pot with lid
- Small bowl and whisk for sauces
Tips & Mistakes
- Slice chicken into even thickness so it cooks at the same speed and stays juicy.
- Pat the protein dry before seasoning so the flour sticks better.
- Season every layer: the meat, the flour, and the panko, so the crust tastes flavorful, not bland.
- Press the panko firmly onto the cutlets so it clings and forms a thick, crunchy coating.
- Do not crowd the pan; fry in batches so the oil stays hot and the crust stays crisp.
- Keep the oil around 340 to 350°F; too cool and the katsu turns greasy, too hot and the crust burns before the inside cooks.
- Drain katsu on a wire rack instead of stacking on paper towels so the bottom does not steam and soften.
- Slice the cutlets after they rest for a few minutes so the juices stay inside.
- Rinse the rice well until the water runs mostly clear so it cooks fluffy, not gummy.
- Taste the sauce and adjust sweetness and tang to match your favorite restaurant version.
How to Make Crispy Japanese Katsu Bowls Recipe
Step 1: Cook the rice
Rinse the rice under cold water, swishing with your hand, until the water looks mostly clear. Add the rice and water to a rice cooker or pot. Cook according to your rice cooker instructions or bring to a boil, cover, reduce heat to low, and simmer about 15 minutes, then rest 10 minutes off heat.
Fluff the rice with a fork or paddle. Keep it covered so it stays warm while you cook the katsu.
Step 2: Prep the veggies and sauces
Finely shred the cabbage and rinse it in cold water. Drain well and pat dry so it stays crisp. Slice the carrot and green onions.
Whisk together the katsu sauce ingredients in a small bowl. Taste and adjust salt, sweetness, or tang. Mix the mayo drizzle in another small bowl and set it aside.
Step 3: Prep and season the protein
Trim any excess fat from the chicken thighs or breasts. If you use chicken breast, slice it horizontally into thinner cutlets so it cooks quickly and evenly. If you use tofu, press it for at least 15 to 20 minutes, then slice into 1/2 inch slabs.
Pat the protein dry with paper towels. Season both sides with salt, pepper, garlic powder, onion powder, and any optional spices.
Step 4: Set up the breading station
Place flour in one shallow bowl. Beat the eggs and milk together in a second bowl. Mix panko with a pinch of salt and any optional Parmesan in a third bowl.
Work with one piece of protein at a time. Coat it lightly in flour and shake off the excess. Dip it into the egg mixture, then press it into the panko, coating both sides and pressing firmly so the crumbs cling.
Step 5: Fry the katsu
Pour enough oil into a large skillet to cover the bottom by about 1/4 to 1/2 inch. Heat over medium to medium-high heat until a breadcrumb sizzles gently when it hits the oil. You can also test with a wooden chopstick; tiny bubbles should form around it.
Lay the breaded cutlets into the hot oil, a few at a time, without overlapping. Cook each side about 3 to 4 minutes, until the crust looks golden brown and the chicken cooks through. Adjust the heat as needed so the crust browns evenly.
Transfer cooked katsu to a wire rack or paper towel lined plate. Let it rest a few minutes while you finish the rest. Slice one piece to check that the center looks fully cooked and juicy.
Step 6: Slice the katsu
After the cutlets rest for 3 to 5 minutes, slice them into strips across the grain. Use a sharp knife so you keep the crust intact. Keep the sliced katsu on the rack so the bottom stays crisp.
Step 7: Build the bowls
Scoop a bed of hot rice into each bowl. Add a handful of shredded cabbage and some carrot and green onion on top of the rice. Arrange sliced katsu over the veggies.
Drizzle katsu sauce generously over the cutlets. Add a light drizzle of the mayo sauce if you use it. Finish with extra green onion or a sprinkle of toasted sesame seeds.
Variations I’ve Tried
Chicken katsu with thighs stays my favorite because it tastes juicy and forgiving, even if you cook it a minute too long. Chicken breast katsu tastes lighter and leaner, and it works great when I slice the cutlets thin. Tofu katsu turns out surprisingly satisfying, especially with extra seasoning in the flour and a longer press to remove moisture.
You can also make a baked version by spraying the breaded cutlets with oil and baking at 425°F on a wire rack over a sheet pan until golden and cooked through. Air fryer katsu works well too; I cook it at 375°F, flip halfway, and spray lightly with oil for extra crunch. You can also swap the rice for brown rice or cauliflower rice if you want a different base.
How to Serve Crispy Japanese Katsu Bowls Recipe
Serve these bowls hot, with the katsu still crisp and the rice steamy. I like to add extra shredded cabbage on the side and a drizzle of katsu sauce over the veggies so they soak up the flavor. A soft boiled egg or jammy egg on top turns it into a very satisfying meal.
Pair the bowl with miso soup, a simple cucumber salad, or steamed edamame for a full dinner. A cold glass of iced green tea or sparkling water with lemon balances the richness nicely.
How to store
- Store leftover sliced katsu in an airtight container in the fridge for up to 3 days.
- Keep the rice and veggies in separate containers so the cabbage stays crisp and the rice does not pick up moisture from the cutlets.
- Freeze cooked katsu cutlets in a single layer on a sheet pan, then transfer to a freezer bag and keep up to 2 months.
- Reheat katsu in a 375°F oven or air fryer until hot and crisp; avoid the microwave for the cutlets because it softens the crust.
- Reheat rice in the microwave with a splash of water and a cover so it steams back to life.

Crispy Japanese Katsu Bowls
Ingredients
Method
- Season both sides of the pounded chicken or pork cutlets with salt and pepper.
- Place flour, beaten eggs, and panko breadcrumbs into three shallow dishes. Dredge each cutlet in flour, shaking off excess, dip in egg, then coat thoroughly with panko, pressing to adhere.
- Heat the oil in a large skillet over medium to medium-high heat. When hot, add cutlets in a single layer without crowding.
- Fry 3–4 minutes per side, or until golden brown and cooked through (internal temperature 165°F / 74°C for chicken). Transfer to a wire rack or paper towel–lined plate to drain. Slice into strips.
- In a small bowl, whisk together tonkatsu sauce, ketchup, soy sauce, and mirin until smooth. Set aside.
- Divide warm cooked rice among 4 serving bowls. Top each with shredded cabbage, carrot matchsticks, and cucumber slices.
- Arrange sliced katsu over the rice and vegetables. Drizzle with katsu sauce and sprinkle with green onions and toasted sesame seeds, if using.
- Serve immediately while the katsu is still hot and crispy.
Notes
Approximate per serving (1 bowl): 720 calories; fat 30 g; saturated fat 6 g; carbohydrates 80 g; fiber 4 g; sugars 10 g; protein 32 g; sodium 1180 mg. Values will vary based on exact ingredients, brands, frying oil absorption, and portion size.