
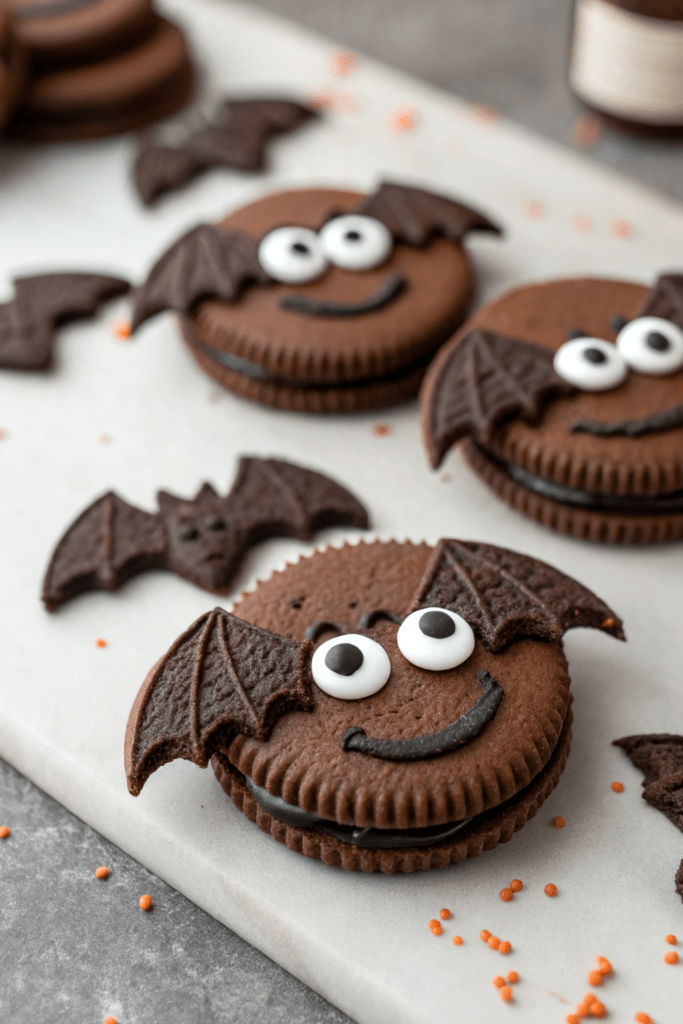
Cute Bat Oreos Recipe tastes like crunchy chocolate cookies hugged in creamy frosting with a sweet candy crunch, and it works perfectly for Halloween parties or kid-friendly baking nights in under 30 minutes. This recipe fits busy parents, teachers, and anyone who wants a no-bake Halloween dessert that still looks impressive. I tested these with my nieces last October, and they judged them “too cute to eat, but we ate them anyway.”
Why Make This Cute Bat Oreos Recipe at Home
You skip complicated baking and still serve a Halloween dessert that looks like you spent hours on it. The Cute Bat Oreos Recipe uses store-bought cookies and a few pantry shortcuts, so you keep your sanity and still win the snack table.
Kids can help with almost every step, which turns this into a fun activity instead of just dessert prep. You also control ingredients like chocolate type and candy decorations, which helps if you deal with allergies or picky eaters.
“These Cute Bat Oreos disappeared from the party table in minutes and every kid asked for the recipe ★★★★★”
Ingredients You Need
-
Oreos or chocolate sandwich cookies
Use classic Oreos or a store brand that stays crisp. Double Stuf works great because the extra filling helps the wings stick better. -
Mini Oreos or mini chocolate sandwich cookies
These make easy bat wings when you split them. You can also use chocolate wafer cookies broken into half circles. -
Chocolate candy melts or chocolate chips
Use black, dark, or milk chocolate candy melts for smooth dipping. If you use chocolate chips, add 1 teaspoon coconut oil or vegetable shortening per cup to help them melt smoothly. -
Candy eyes
These give the bats personality with almost no effort. If you cannot find candy eyes, use mini chocolate chips or white chocolate chips with a dot of melted chocolate. -
Small round candies for noses (optional)
Use mini M&M’s, mini Skittles, or small sugar pearls. Orange or red looks especially cute for Halloween. -
Vegetable shortening or coconut oil (optional)
Add a small amount to chocolate chips to thin the coating. Candy melts usually do not need it.
Equipment
- Microwave safe bowl or small saucepan
- Spoon or fork for dipping
- Parchment paper or silicone baking mat
- Baking sheet or large plate
- Small piping bag, squeeze bottle, or zip-top bag for chocolate detail
- Toothpicks for tiny fixes and eye placement
Tips & Mistakes
- Use fresh, crisp Oreos so the wings stay firm and do not crumble while you work.
- Chill the cookies for 10 minutes before dipping so the filling does not slide around.
- Melt chocolate in short bursts and stir often so it stays smooth and does not scorch.
- If the chocolate looks thick and gloopy, stir in a tiny bit of coconut oil until it flows easily.
- Work in small batches so the chocolate coating stays wet while you attach eyes and wings.
- Press wings gently into the filling or wet chocolate so they stay secure instead of falling off later.
- Let the decorated bats set completely on parchment before stacking so they do not stick together.
- Keep kids on “eye duty” and you handle the hot chocolate to avoid burns and sticky chaos.
- Do not refrigerate too long or moisture can bead on the chocolate and dull the finish.
- If the wings break, turn the pieces into “crumbs on the ground” and call it spooky snack dust.
How to Make Cute Bat Oreos Recipe
Step 1: Prep the cookies
Line a baking sheet with parchment paper or a silicone mat.
Set out the full-size Oreos, mini Oreos, candy eyes, and nose candies so everything sits within reach.
Twist several mini Oreos apart and gently cut or break each cookie half into two wings shaped like half moons.
Step 2: Melt the chocolate
Place chocolate candy melts or chips in a microwave safe bowl.
Microwave in 20 to 30 second bursts, stirring well between each burst until the chocolate turns smooth and glossy.
If the chocolate feels too thick, stir in 1 teaspoon coconut oil or shortening at a time until it coats a spoon easily.
Step 3: Dip the Oreo bodies
Drop one Oreo into the melted chocolate and spoon chocolate over the top to coat it fully.
Lift the cookie out with a fork, tap the fork gently on the bowl edge to shake off extra chocolate, then slide the cookie onto the parchment.
Repeat with more Oreos, leaving space between each one so you can add wings and faces.
Step 4: Attach the wings
While the chocolate still looks wet, press two mini cookie wings into the sides of each dipped Oreo.
Angle the wings slightly upward so the bats look like they fly instead of droop.
If a wing will not stick, dab a little extra melted chocolate on the edge and press it in again.
Step 5: Add eyes and noses
Place two candy eyes near the top center of each Oreo while the chocolate still feels soft.
Press a tiny candy or sugar pearl under the eyes for a nose if you like that look.
Use a toothpick dipped in chocolate to fix any sliding eyes or to draw small eyebrows or fangs.
Step 6: Let the bats set
Leave the Cute Bat Oreos at room temperature until the chocolate firms up completely.
If your kitchen feels warm, move the tray to the fridge for 10 to 15 minutes to speed things up.
Once the coating hardens, gently peel each bat off the parchment and transfer them to a serving plate.
Step 7: Clean edges and decorate the platter
Trim any big chocolate drips from the edges with a small knife if they bother you.
Scatter Halloween sprinkles, candy corn, or plastic spiders around the plate for extra fun.
Serve the Cute Bat Oreos Recipe at room temperature so the chocolate tastes smooth and the cookies stay crisp.
Variations I've Tried
I swapped classic Oreos for golden Oreos and used purple candy melts for a “vampire bat” version that kids loved.
I also used peanut butter sandwich cookies with dark chocolate coating for a salty sweet twist that adults grabbed first.
One year I skipped dipping and just used melted chocolate as glue for wings and eyes, which worked well when I ran low on candy melts.
You can also use gluten free sandwich cookies and allergy friendly chocolate to fit more guests.
How to Serve Cute Bat Oreos Recipe
Serve the Cute Bat Oreos Recipe on a big platter with extra candy eyes scattered around for a fun, slightly spooky vibe. Pair them with hot chocolate, apple cider, or cold milk for a cozy Halloween treat. They work great in lunch boxes, classroom party trays, or as a sweet reward after pumpkin carving. If you host a dessert table, mix them with simple snacks like popcorn, pretzels, and fruit so everyone finds something they like.
How to store
- Room temperature: Store Cute Bat Oreos in an airtight container at room temperature for 3 to 4 days. Keep them away from direct sunlight or heat so the chocolate does not soften.
- Fridge: Chill in a sealed container up to 1 week, but place a paper towel inside the lid to catch moisture and protect the chocolate surface.
- Freezer: Freeze in a single layer on a tray, then move to a freezer bag or container for up to 1 month. Thaw at room temperature in the closed container so condensation forms on the container, not on the bats.
- Best way to refresh: Do not reheat, since heat melts the chocolate. Instead, let chilled or frozen bats sit at room temperature until the cookies taste crisp and the chocolate softens slightly.
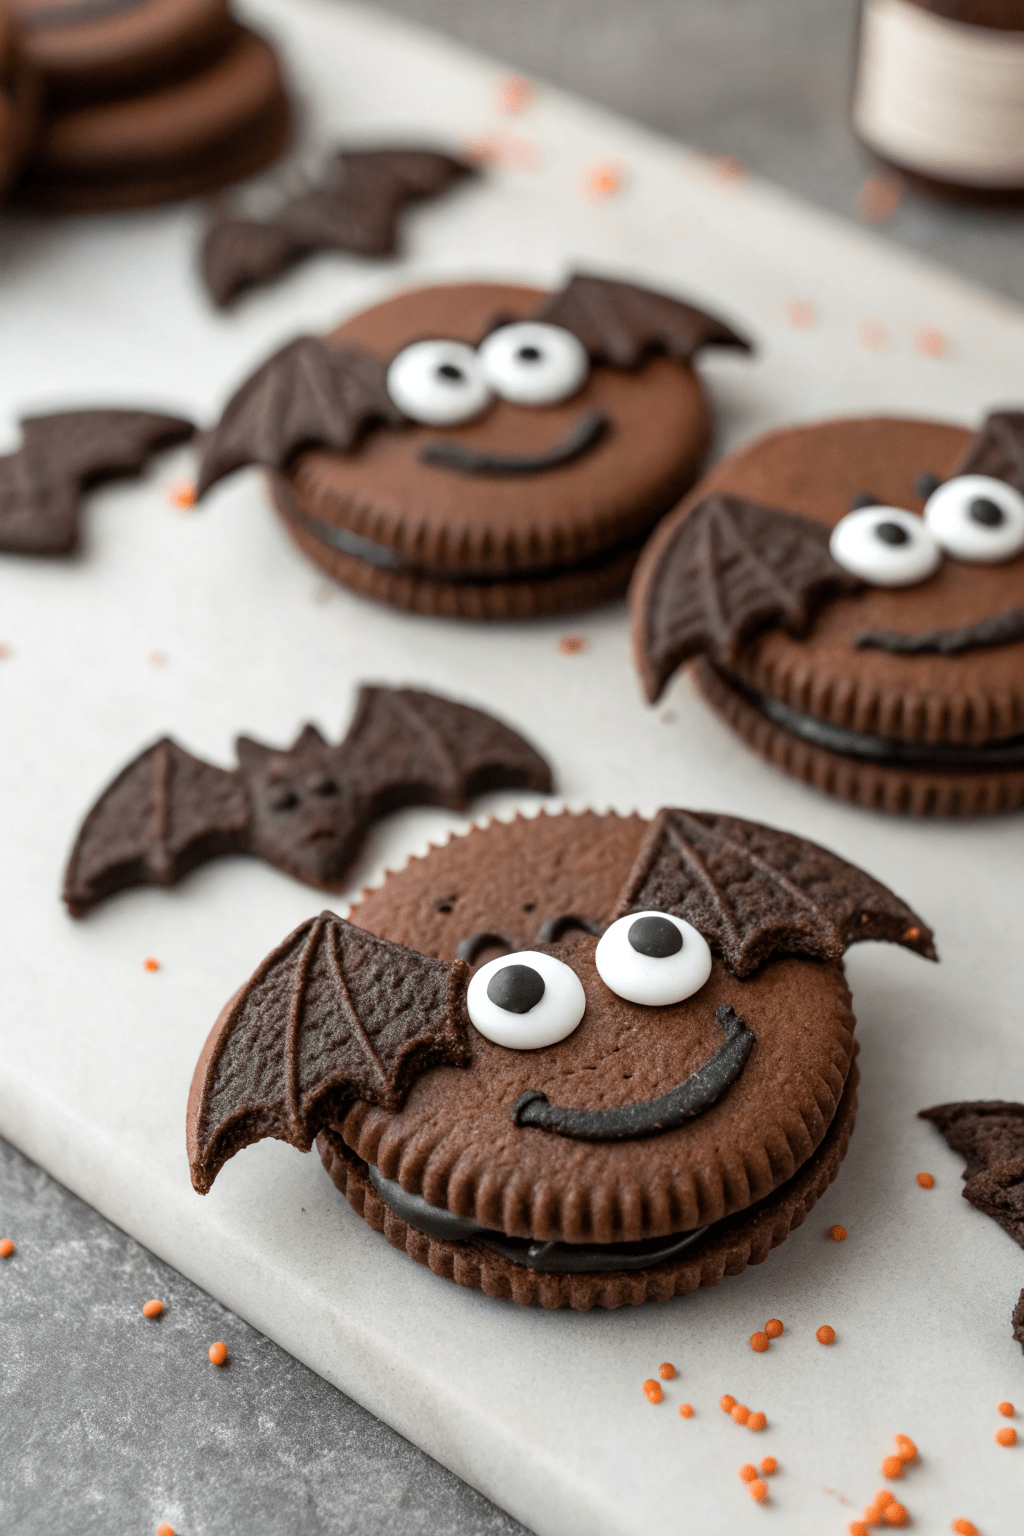
Cute Bat Oreos Recipe
Ingredients
Method
- Line a baking sheet with parchment paper or a silicone baking mat. Set out the full-size Oreos, mini Oreos, candy eyes, and small round candies so everything is within reach.
- Twist the mini Oreos apart and gently cut or break each cookie half into two curved pieces to form bat wings.
- Place the chocolate candy melts or chocolate chips into a microwave-safe bowl. Microwave in 20–30 second bursts, stirring well between each burst, until the chocolate is smooth and glossy. If the chocolate seems too thick, stir in coconut oil or vegetable shortening a little at a time until it flows easily.
- Drop one full-size Oreo into the melted chocolate and spoon chocolate over the top until completely coated. Lift it out with a fork, tap the fork gently on the bowl to remove excess chocolate, then slide the coated cookie onto the prepared baking sheet. Repeat with remaining Oreos, leaving space between each one.
- While the chocolate is still wet, gently press two mini cookie wing pieces into the sides of each dipped Oreo, angling them slightly upward so they look like flying bat wings. Add a dab of extra melted chocolate if needed to help them stick.
- Place two candy eyes near the top center of each Oreo while the chocolate is still soft. Press a small round candy under the eyes to make a nose if using. Use a toothpick dipped in melted chocolate to nudge any sliding eyes into place or to add small details like eyebrows or fangs.
- Let the decorated bat Oreos sit at room temperature until the chocolate is completely set. If your kitchen is warm, place the tray in the refrigerator for 10–15 minutes to speed up setting.
- Once firm, carefully peel the bat Oreos off the parchment paper. Trim any large chocolate drips from the edges with a small knife if desired, then arrange on a serving platter and serve at room temperature so the cookies stay crisp and the chocolate coating tastes smooth.
Notes
Approximate per 1 bat Oreo (about 1 regular Oreo, 1 mini Oreo, chocolate coating, and decorations): 160 calories; fat 8 g; saturated fat 4.5 g; carbohydrates 22 g; fiber 1 g; sugars 15 g; protein 2 g; sodium 95 mg. Values are estimates and will vary based on cookie brands, type of chocolate, decorations used, and exact portion size.