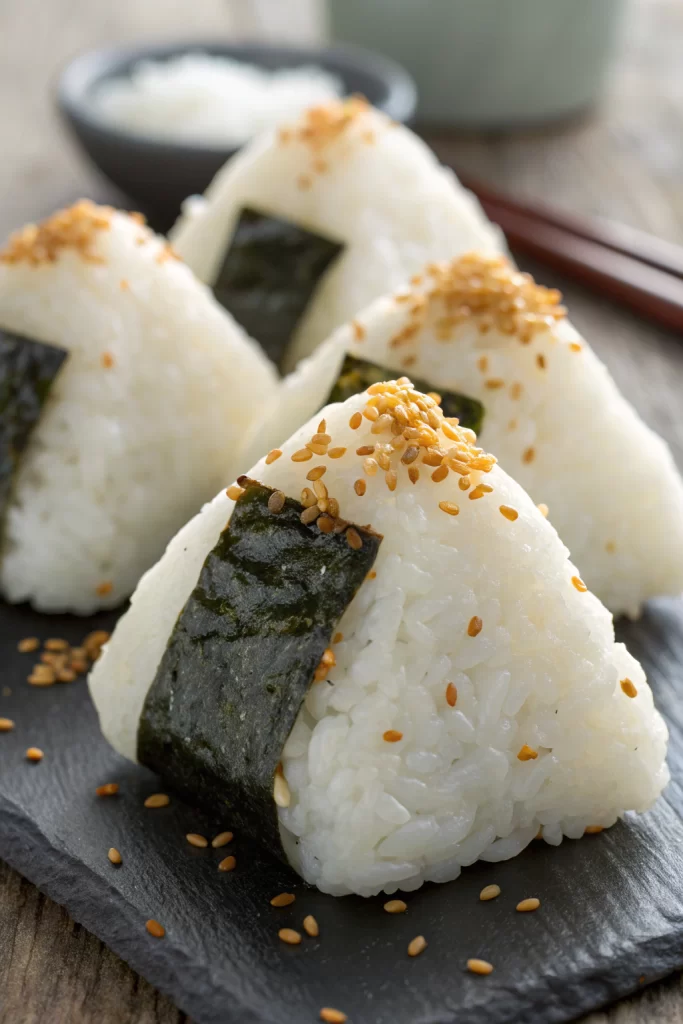
How to Make Tuna Mayo Onigiri Recipe tastes like a cozy sushi roll that you can eat with one hand, with creamy savory tuna tucked inside warm, lightly salted rice. It works perfectly for busy folks who want a quick lunch, snack, or meal prep option in under 35 minutes. I started packing these in my own lunch years ago, and my kids now treat them like edible currency at school.
Why Tuna Mayo Onigiri Recipe Is Worth It
You get all the flavor of a sushi bar classic with pantry ingredients you probably already own. Canned tuna, mayo, rice, and a few seasonings turn into a portable rice ball that tastes rich, comforting, and a little bit fancy.
You can prep a batch ahead for lunches, picnics, or road trips, and they still taste great. The recipe stays flexible, so you can tweak the filling, spice level, and shape without any special skills or tools.
“These tuna mayo onigiri taste like a sushi shop snack that jumped into my lunchbox, and I never felt happier about rice in triangle form. ★★★★★”
Ingredients You Need
Rice and seasoning
- 2 cups uncooked Japanese short grain rice
- Use sushi rice or any labeled “short grain” for best stickiness.
- Avoid long grain rice, since it does not hold shape well.
- 2 1/4 cups water, for cooking the rice
- 1 teaspoon fine sea salt, divided
- 1 to 2 tablespoons rice vinegar, optional, for a lightly seasoned rice flavor
Tuna mayo filling
- 1 can tuna in water or oil, 5 to 6 ounces, well drained
- Tuna in oil tastes richer; tuna in water tastes lighter.
- 2 1/2 to 3 tablespoons Japanese mayonnaise (like Kewpie)
- Use regular mayo if needed, then add a tiny pinch of sugar for similar flavor.
- 1 teaspoon soy sauce
- Use low sodium soy sauce if you watch salt.
- 1 teaspoon rice vinegar or lemon juice
- 1 to 2 teaspoons finely chopped green onion, optional
- 1/2 teaspoon sugar, optional, to round out flavor
- Freshly ground black pepper, to taste
Nori and extras
- 3 to 4 full sheets nori, cut into strips or rectangles
- Use roasted nori for best flavor and texture.
- Toasted sesame seeds, optional, for coating or sprinkling
- Furikake seasoning, optional, to mix into rice or sprinkle on top
Equipment
- Rice cooker or medium saucepan with lid
- Medium mixing bowl
- Small bowl of water with a pinch of salt, for shaping
- Clean kitchen gloves or clean hands
- Spoon or small cookie scoop
- Kitchen scissors, to cut nori
- Plastic wrap, optional, to help shape and wrap onigiri
Quick Tips & substitutions
- Rinse the rice 3 to 4 times until the water runs mostly clear to get fluffy, sticky grains.
- Let the cooked rice rest covered for 10 minutes so it firms up and shapes more easily.
- Use Japanese mayo if possible, since it gives a richer, slightly tangy flavor.
- Swap tuna with canned salmon or shredded cooked chicken if you prefer.
- Add a small squeeze of sriracha or chili crisp to the tuna mixture for a spicy version.
- Wet your hands with lightly salted water before shaping to prevent sticking and to season the rice.
- Shape the onigiri while the rice stays warm, not hot and not cold, for best texture.
- Add furikake directly into the rice for extra flavor without extra effort.
- Wrap nori right before eating if you want it crisp, or wrap earlier if you like it soft and chewy.
- Use plastic wrap to shape if you feel nervous about sticky rice on your hands.
How to Make Tuna Mayo Onigiri Recipe
Step 1: Cook the rice
Rinse the short grain rice in a bowl of cold water, swish, then drain. Repeat until the water looks mostly clear. Add the rinsed rice and 2 1/4 cups water to a rice cooker or saucepan.
Cook the rice according to your rice cooker instructions, or bring it to a boil on the stove, then cover and reduce heat to low. Simmer for about 15 minutes, then turn off the heat and keep the lid on for another 10 minutes. Fluff the rice gently with a rice paddle or spatula.
Step 2: Season and cool the rice
Transfer the hot rice to a wide bowl. Sprinkle about 1/2 teaspoon salt over the rice and gently fold it in. If you like seasoned rice, drizzle in 1 to 2 tablespoons rice vinegar and mix gently.
Let the rice cool until it feels warm but comfortable to touch. Warm rice sticks together nicely and shapes into tidy triangles or balls. If the rice cools too much, it turns harder to shape, so work while it stays slightly warm.
Step 3: Mix the tuna mayo filling
Add drained tuna to a medium bowl and break it into small flakes with a fork. Stir in Japanese mayo, soy sauce, rice vinegar or lemon juice, and sugar if you use it. Mix until the tuna looks creamy and evenly coated.
Add green onion and black pepper and stir again. Taste and adjust with a little more soy sauce, mayo, or acid until the filling tastes balanced and savory. The mixture should feel creamy but not runny, so add a bit more tuna or mayo to adjust texture.
Step 4: Prep your shaping station
Fill a small bowl with water and stir in the remaining 1/2 teaspoon salt. Set it near your rice bowl. Cut nori sheets into strips or rectangles that fit around the bottom of each onigiri.
Set out a plate or tray for finished rice balls. If you use plastic wrap, tear off several small squares and place them nearby. Keep a small spoon or scoop handy for the tuna filling.
Step 5: Shape the rice and add filling
Wet your hands lightly with the salted water, then take about 1/3 to 1/2 cup warm rice and form a loose ball. Press a shallow well in the center with your thumb. Add about 1 to 1 1/2 tablespoons tuna mayo into the well.
Fold the rice around the filling and gently press it closed so the tuna sits fully inside. Shape the rice into a triangle by cupping your hands and pressing the sides and top with light pressure. Rotate as you shape so the triangle looks even and compact, but avoid crushing the grains.
Step 6: Add nori and finish
Wrap a strip or rectangle of nori around the bottom or back of the onigiri. Press it lightly so it sticks to the warm rice. If you like, roll the sides in toasted sesame seeds or sprinkle furikake on top.
Place the finished tuna mayo onigiri on your tray. Repeat with the remaining rice and filling, wetting your hands with salted water as needed. You can also use plastic wrap to help shape each onigiri, then unwrap and add nori.
Step 7: Chill or pack for later
Let the onigiri cool to room temperature before you pack them in a lunch box. If you plan to eat them within a few hours, keep them at a cool room temperature. If you plan to eat them later, store them in the fridge and add the nori right before serving.
Recipe Variations
- Spicy tuna mayo onigiri
- Stir in sriracha, gochujang, or chili crisp to the tuna mixture.
- Gluten free version
- Use gluten free tamari instead of regular soy sauce and check your furikake label.
- Vegan version
- Use mashed chickpeas or mashed tofu with vegan mayo, soy sauce, and a touch of nori flakes for a sea flavor.
- Low carb twist
- Use half cauliflower rice and half short grain rice to keep some stickiness while cutting carbs.
- Extra crunchy filling
- Add finely diced cucumber, celery, or pickles to the tuna mixture.
- Cheesy tuna onigiri
- Tuck a small cube of mozzarella or mild cheese inside with the tuna for a melty center.
Ways to Serve
- Pack in a bento box with sliced cucumbers, carrot sticks, and edamame.
- Serve as a quick lunch with miso soup and a simple green salad.
- Offer as an after school snack with fruit and yogurt.
- Bring to picnics or road trips as a tidy, hand held meal.
- Set out on a snack board with other rice balls, cut veggies, and dipping sauces like soy sauce or spicy mayo.
Storage Success
Store leftover tuna mayo onigiri in an airtight container in the fridge for up to 2 days. Wrap each rice ball in plastic wrap, then place them together in a container so they stay moist and hold shape. Keep nori strips separate and add them just before eating so they stay crisp. To refresh chilled onigiri, let them sit at room temperature for 20 to 30 minutes, or warm them very lightly in the microwave for a few seconds until the rice softens but does not turn hot.

Tuna Mayo Onigiri Recipe
Ingredients
Method
- Rinse the rice under cold water, gently rubbing the grains, until the water runs mostly clear. Drain well.
- Combine the rinsed rice and water in a rice cooker or pot. Cook according to the rice cooker instructions or bring to a boil, then cover and simmer on low heat for about 15 minutes, until the water is absorbed.
- Turn off the heat and let the rice rest, covered, for 10 minutes. Fluff gently with a rice paddle and season with 1/2 teaspoon salt. Let cool until warm but not hot to the touch.
- In a small bowl, combine drained tuna, Japanese mayonnaise, soy sauce, rice vinegar (if using), green onion (if using), and black pepper.
- Mix until the tuna is evenly coated and the mixture is creamy but not runny. Adjust seasoning to taste.
- Prepare a small bowl of water and a pinch of salt. Wet your hands lightly, then rub them with a little salt to prevent sticking and season the rice surface.
- Scoop about 1/3 cup of warm rice into your hand and make a shallow indentation in the center.
- Place about 1 tablespoon of tuna mayo filling into the indentation, then cover with another 2–3 tablespoons of rice.
- Gently press and shape the rice into a triangle or round, firmly enough to hold together but without crushing the grains.
- Wrap a strip or half-sheet of nori around the bottom or sides of the onigiri, shiny side out.
- Repeat with the remaining rice and filling to make about 6 onigiri.
- Serve immediately, or wrap each onigiri in plastic wrap and keep at room temperature for a few hours, or refrigerated for up to 1 day.
Notes
Approximate per 1 onigiri (1 of 6): 240 calories; fat 8 g; saturated fat 1.5 g; carbohydrates 31 g; fiber 1 g; sugars 1 g; protein 9 g; sodium 430 mg. Values will vary based on brands, exact quantities, and portion size.