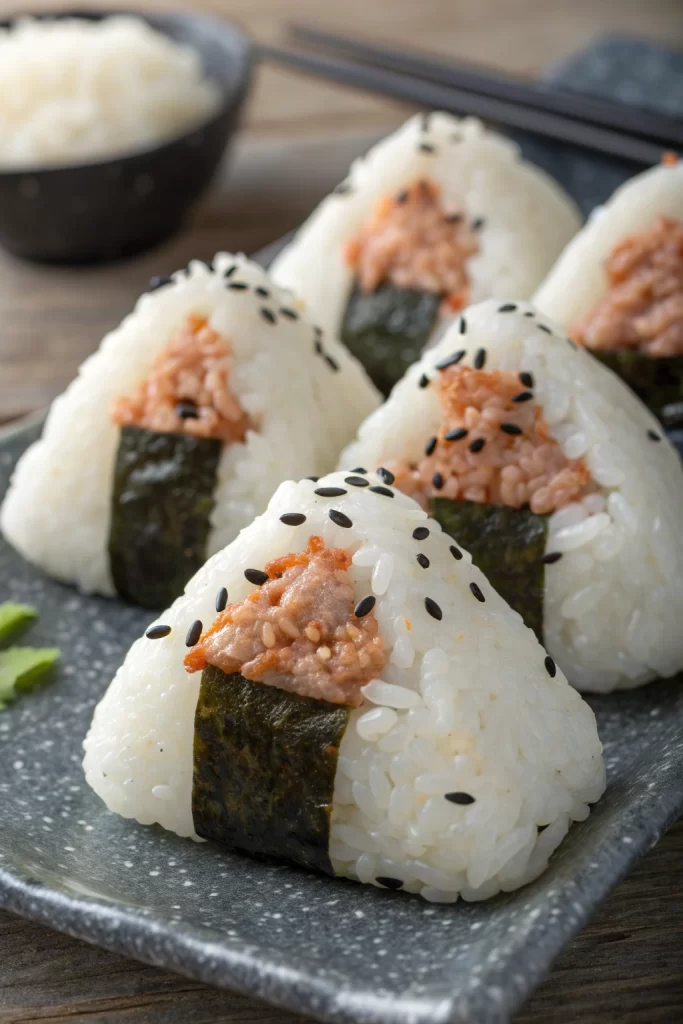
Spicy Tuna Onigiri Recipe tastes like a sushi roll’s fun cousin: creamy, spicy, salty, and perfectly handheld. It works great for busy folks who want a fast lunch or snack, since you can finish the whole recipe in about 30 minutes. I make these onigiri for road trips with my kids, and they vanish faster than I can pack them.
Why Spicy Tuna Onigiri Recipe Is Worth It
This Spicy Tuna Onigiri Recipe gives you all the flavor of a sushi bar without the price tag or the special skills. The spicy tuna filling tastes rich and creamy, with a little kick that pairs perfectly with warm, seasoned rice. You can pack it for lunch, meal prep it for the week, or serve it as a fun snack for friends.
You also control the spice level, the mayo, and the fillings, so picky eaters and heat lovers both stay happy. Canned tuna, pantry sauces, and basic short grain rice turn into something that feels special and comforting. Once you shape a few, the process starts to feel relaxing and almost meditative.
“This Spicy Tuna Onigiri Recipe tastes like takeout sushi in a cute rice triangle, but it costs less and packs easier for lunch boxes.” ★★★★★
Ingredients You Need
For the rice:
- 2 cups uncooked Japanese short grain rice
- Look for labels like “sushi rice” or “Calrose.” Long grain rice will not stick well enough.
- 2 1/4 cups water
- 3 tablespoons rice vinegar
- 1 1/2 tablespoons sugar
- 1 teaspoon fine sea salt
For the spicy tuna filling:
- 2 cans tuna in water, drained very well
- Use solid or chunk light tuna for a softer texture, or albacore for a meatier bite.
- 3 to 4 tablespoons Japanese mayonnaise
- Kewpie tastes best, but regular mayo works if that is what you have.
- 1 to 2 tablespoons sriracha or other chili sauce
- Adjust to taste; start smaller if you pack these for kids.
- 1 teaspoon soy sauce
- Use tamari or coconut aminos for a gluten free option.
- 1 teaspoon sesame oil
- 1 green onion, thinly sliced
- 1 teaspoon toasted sesame seeds
- Optional: 1 to 2 teaspoons finely chopped pickled ginger for extra zing
For shaping and wrapping:
- 4 to 6 full sheets nori, cut into strips or rectangles
- I like roasted, seasoned nori for extra flavor, but plain works too.
- Bowl of cold water for dipping your hands
- Small bowl of salt for your hands
- Extra toasted sesame seeds for the outside, optional
Pantry shortcuts and notes:
- Use microwaveable sticky rice packs if you feel short on time, but season them with vinegar, sugar, and salt.
- Use canned tuna pouches if you want less draining and cleanup.
- Use pre-cut onigiri nori sleeves if you find them at an Asian market; they fit perfectly and keep the seaweed crisp.
Equipment list:
- Fine mesh strainer for rinsing rice
- Rice cooker or medium saucepan with lid
- Small saucepan or microwave safe bowl for rice seasoning
- Mixing bowls
- Rice paddle or silicone spatula
- Onigiri mold, optional, or just clean hands
- Sharp knife and cutting board
Quick Tips & substitutions
- Rinse the rice until the water runs almost clear to get the best sticky yet fluffy texture.
- Season the rice while it still feels warm so it absorbs the vinegar mixture evenly.
- Keep a bowl of cold water nearby and dip your hands often so the rice does not cling too much.
- Sprinkle a tiny bit of salt on your damp hands before shaping to season the outside of the onigiri.
- Drain the tuna very well so the filling stays thick and not watery.
- Use Greek yogurt for part of the mayo if you want a lighter filling, but keep at least half mayo for flavor.
- Swap sriracha with gochujang or chili crisp if you want a different kind of heat.
- Use canned salmon or canned chicken if you do not like tuna.
- Use tamari or coconut aminos instead of soy sauce if you avoid gluten.
- Use vegan mayo and mashed chickpeas or mashed tofu to make a plant based version.
How to Make Spicy Tuna Onigiri Recipe
Step 1: Cook and season the rice
- Rinse the short grain rice in a fine mesh strainer under cold water. Swirl it with your hand, drain, and repeat until the water looks mostly clear.
- Add the rinsed rice and water to a rice cooker or saucepan. Cook according to your rice cooker instructions, or bring to a boil on the stove, then cover, lower the heat, and simmer for about 15 minutes.
- Turn off the heat and let the rice sit covered for another 10 minutes so the steam finishes the cooking.
- While the rice cooks, mix rice vinegar, sugar, and salt in a small saucepan or microwave safe bowl. Warm it just enough so the sugar and salt dissolve, then cool it slightly.
- Transfer the hot rice to a wide bowl. Gently fold the vinegar mixture into the rice with a rice paddle, using a cutting and lifting motion so the grains stay intact.
- Let the seasoned rice cool until it feels warm but not hot, since very hot rice can burn your hands and wilt the nori too quickly.
Step 2: Mix the spicy tuna filling
- Add drained tuna to a mixing bowl and break it up with a fork.
- Stir in Japanese mayonnaise, sriracha, soy sauce, and sesame oil until the mixture looks creamy and evenly combined.
- Add sliced green onion, sesame seeds, and optional chopped pickled ginger. Mix again and taste, then adjust salt, soy sauce, or spice level as you like.
- The filling should feel thick and scoopable, not runny. If it looks too loose, add a bit more tuna or a spoon of panko crumbs to tighten it up. If it feels too dry, add a little more mayo.
Step 3: Prep your shaping station
- Set out the bowl of warm seasoned rice, the spicy tuna filling, a bowl of cold water, and a small dish of salt.
- Cut the nori sheets into strips or rectangles that fit around the base or one side of each onigiri.
- If you use an onigiri mold, lightly wet it and keep it nearby. If you shape by hand, clear a small work area and keep a plate ready for finished pieces.
Step 4: Shape the onigiri by hand
- Dip your hands in cold water, shake off the excess, then tap your fingertips into the salt. Rub your hands together so a light layer of salt coats them.
- Scoop about 1/3 to 1/2 cup of warm rice into your palm and gently flatten it into a thick disc.
- Add about 1 to 2 tablespoons of spicy tuna filling into the center of the rice disc.
- Add a little more rice on top to cover the filling. Gently press the rice around the filling so it closes fully and no filling peeks out.
- Shape the rice into a triangle by cupping your hands. Use one hand to form the base and the other hand to shape the two sides, turning the onigiri as you go until it looks like a neat triangle.
- Press firmly enough so the rice holds together, but not so hard that you crush the grains into a dense block.
- Wrap a strip or rectangle of nori around the bottom or one side of the triangle. Press it lightly so it sticks to the rice.
- Place the finished onigiri on a plate and repeat with the remaining rice and filling. If the rice starts to stick too much, dip your hands in water again and add a tiny bit more salt.
Step 5: Use an onigiri mold instead (optional)
- Wet the inside of the mold lightly so the rice does not cling.
- Add a layer of rice to the mold, then press a small indent in the center with the back of a spoon.
- Spoon some spicy tuna filling into the indent, then cover with more rice.
- Place the lid on the mold and press down gently but firmly to compact the rice.
- Remove the lid, flip the mold over, and press the release tab or push gently so the onigiri slides out.
- Wrap with nori and set aside, then repeat with the remaining ingredients.
Step 6: Taste and adjust
- Try one onigiri while the rice still feels slightly warm.
- If you want more spice, drizzle a tiny bit of sriracha on top or mix more into the remaining filling.
- Sprinkle extra sesame seeds or chopped green onion on top if you want more texture and color.
Recipe Variations
- Gluten free: Use tamari or coconut aminos instead of soy sauce, and check your sriracha label for gluten free certification.
- Vegan: Swap tuna with mashed chickpeas or crumbled firm tofu, and use vegan mayo plus tamari.
- Low carb: Use cauliflower rice that you steam and mix with a little mayo to help it stick, then shape gently.
- Extra spicy: Add chopped fresh chili, chili oil, or a bit of wasabi to the tuna mixture.
- Kid friendly: Cut the sriracha in half or leave it out, then serve extra chili sauce on the side for adults.
- Crunchy: Stir in finely diced cucumber, celery, or tempura bits into the tuna filling.
- Cheesy: Tuck a small cube of mozzarella or mild cheese inside with the tuna for a melty center.
Ways to Serve
- Pack in a bento box with sliced cucumbers, carrot sticks, and edamame.
- Serve as a snack plate with miso soup and a small salad of shredded cabbage and sesame dressing.
- Offer at game night or movie night as a fun finger food with soy sauce and extra sriracha on the side.
- Add to a picnic spread with fruit, seaweed salad, and roasted chickpeas.
- Serve as a quick breakfast with green tea and some sliced avocado.
Storage Success
Let the Spicy Tuna Onigiri Recipe cool to room temperature before you store it, so condensation does not make the rice soggy. Wrap each onigiri tightly in plastic wrap, then place them in an airtight container in the fridge for up to 2 days. Keep the nori separate if you want it to stay crisp, and wrap it right before you eat. Eat chilled or let the onigiri sit at room temperature for 20 to 30 minutes so the rice softens and tastes closer to fresh.

Spicy Tuna Onigiri Recipe
Ingredients
Method
- Rinse the rice in cold water until the water runs mostly clear. Drain well.
- Add the rinsed rice and 2 1/2 cups water to a rice cooker or pot. Cook according to rice cooker instructions or bring to a boil, then cover, reduce heat, and simmer until the water is absorbed and the rice is tender, about 15–18 minutes. Let sit covered for 10 minutes.
- Transfer the hot rice to a wide bowl. Sprinkle with 1/2 teaspoon salt and rice vinegar if using, gently folding with a rice paddle or spatula to season without smashing the grains. Let cool until warm but still pliable.
- While the rice cools, make the filling: In a small bowl, combine drained tuna, mayonnaise, sriracha, soy sauce, sesame oil, green onion, and sesame seeds. Mix until well combined and creamy. Adjust spiciness to taste.
- Prepare a small bowl of water and a pinch of salt. Wet your hands lightly with water, then rub a little salt onto your palms to prevent sticking and lightly season the rice.
- Scoop about 1/3 to 1/2 cup of warm rice into your hand and gently flatten it into a thick disk. Place about 1 tablespoon of the spicy tuna mixture in the center.
- Fold the rice around the filling, adding a little more rice if needed, and shape into a firm triangle or ball, pressing gently but securely so the filling is enclosed.
- Wrap a strip or rectangle of nori around the bottom or side of each onigiri, shiny side out, pressing lightly so it adheres to the rice.
- Repeat with remaining rice and filling. Serve immediately for crisp nori, or wrap tightly and refrigerate for up to 1 day, allowing to come to room temperature before eating.
Notes
Approximate per 1 onigiri (1 of 8): 190 calories; fat 7 g; saturated fat 1 g; carbohydrates 26 g; fiber 1 g; sugars 1 g; protein 7 g; sodium 310 mg. Values are estimates and will vary based on specific ingredients, brands, and portion sizes.